ROKAE Industrial Robot Setup Instructions
This section introduces the process of setting up master-control of a ROKAE industrial robot.
Check Hardware and Software Versions
The robot in use is a ROKAE industrial robot.
The series of the controller is XBC3, and the version is 3.6 or above.
The Mech-Mind Software Suite version is 1.5.0 or above.
Hint
The XBC5 series controller in version 3.6 has not been tested.
Start the Robot and Teach Pendant
Turn the controller’s power switch on, as shown below. If the controller is started successfully, a welcome interface will appear on the teach pendant.
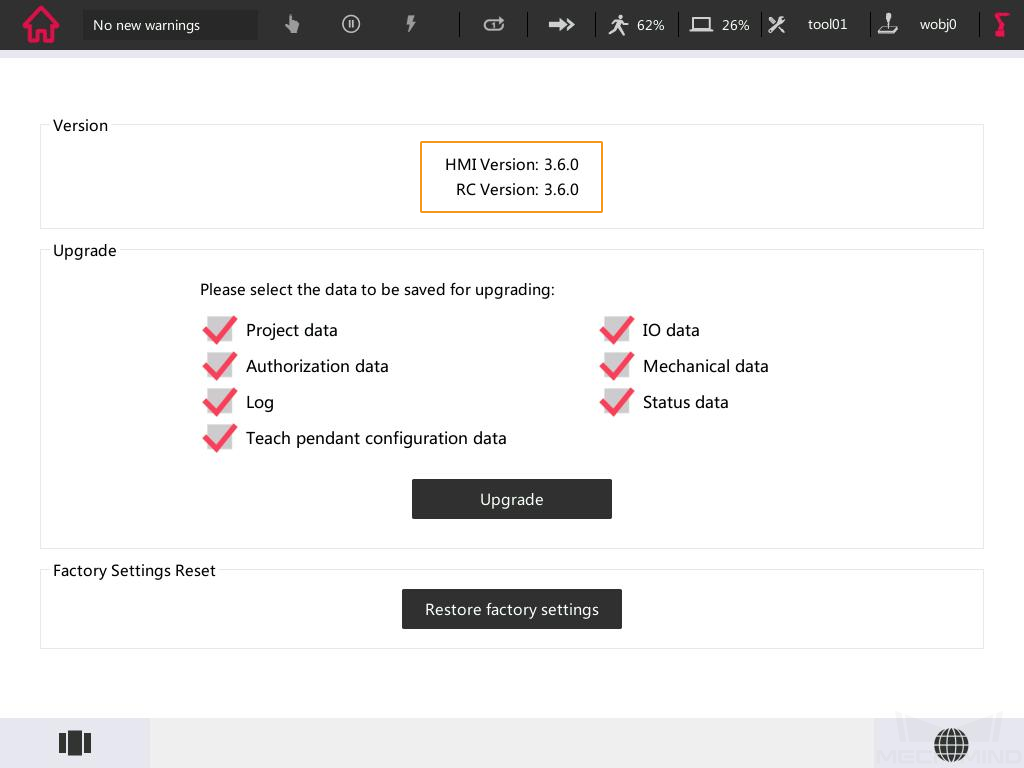
Check the Controller Version
On the teach pendant, press the icon in the upper left corner, and then press Help to check the version.

Switch the User Type to Admin
An operator user does not have the right to manage files or operate. Therefore, please switch to the admin user.
On the teach pendant, press the icon in the upper left corner, and then press Settings.
Press , and select admin.
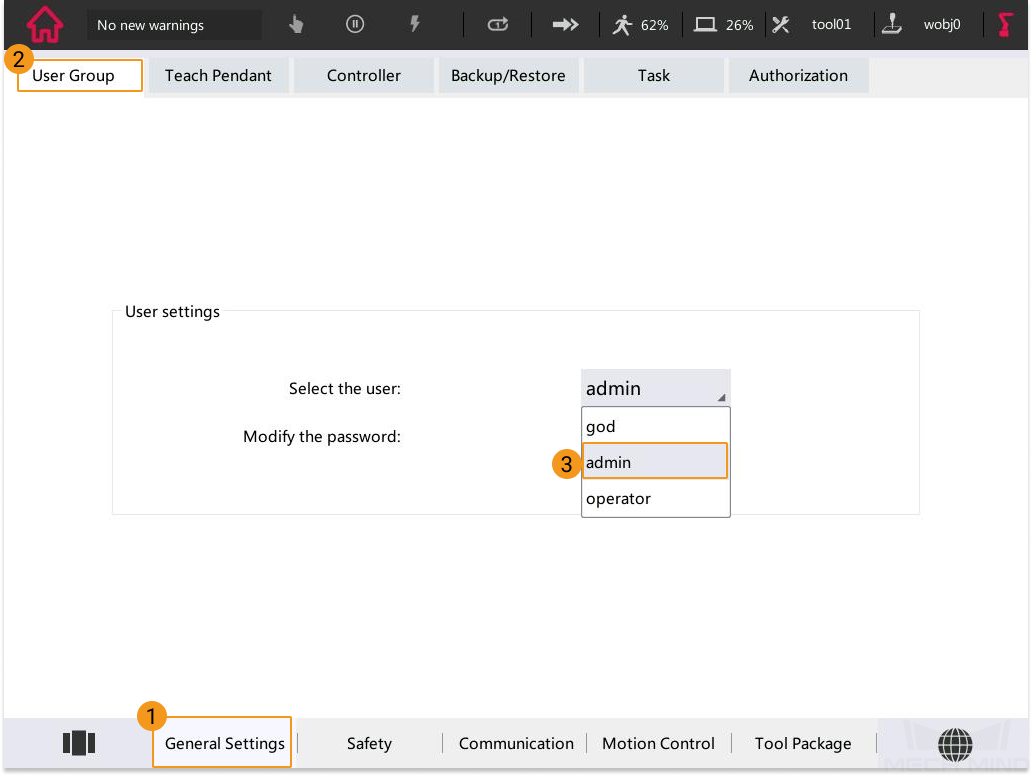
Enter the password 123456 in the pop-up window.
Set up the Network Connection
Hardware Connection
Use the Ethernet cable to connect the network ports of the IPC and the robot controller.

Configure External Communication
On the teach pendant, press the icon in the upper left corner, and then press Settings.
Press , configure Socket communication as shown in the figure below, and then click Connect.
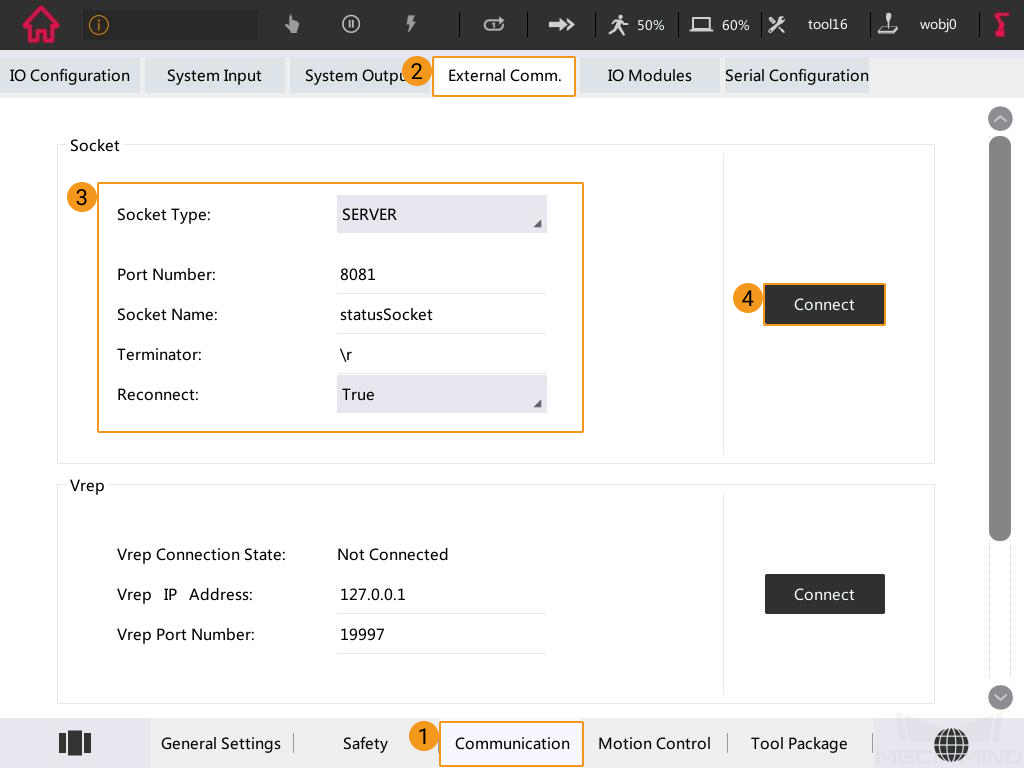
Restart the controller.
IP Address Configuration
The default IP address of the ROKAE robot to communicate with the vision system is 192.168.2.160, which cannot be modified currently. However, you can modify the IP address of the IPC (192.168.2.222 is used in this example) to ensure that their IP addresses are in the same subnet. Please refer to Set IP Address of the IPC for detailed instructions.
After modifying the IP address on the IPC, open the Command Prompt window of the IPC, enter “ping 192.168.2.160”, and test whether the connection between the IPC and the robot is successful.
Prepare the Files
On the IPC, open the
Mech-Center/Robot_Server/Robot_FullControl/rokaefolder in the installation directory of Mech-Mind Software Suite.Attention
There are three subfolders in the rokae folder.
singleTask5 contains commonly-used projects which support robot motion control and DO receiving. In this section, singleTask5 is used as an example.
splineCurve is an upgraded version of singleTask5. It is specifically developed for gluing applications. When running the program, please select either singleTask5 or splineCurve.
getDIServer is an integral service program to receive robot DI. If you want to use singleTask5 and getDIServer at the same time, the multitasking function should be enabled on the robot end. For detailed instructions, please refer to Enable Multitasking.
Plug the USB flash drive into the USB port of the IPC. Copy the rokae folder to the USB flash drive and then remove the USB flash drive safely.
Load the Files to the Robot
Attention
It is recommended to back up robot system files before loading Master-Control program files to avoid system corruption that may be caused by the loading operation. In case any issue occurs, you can use the backup files to restore the robot system. Please refer to Backup and Restore Robot Files for detailed instructions.
Plug the USB flash drive with the program files into the USB port on the robot controller.
On the teach pendant, press the icon in the upper left corner, and then press Project.
Press Project Manager.
Press More and select Show U disk.

Select the singleTask5 folder in the flash drive, press More, and select Copy U disk folder to root directory.
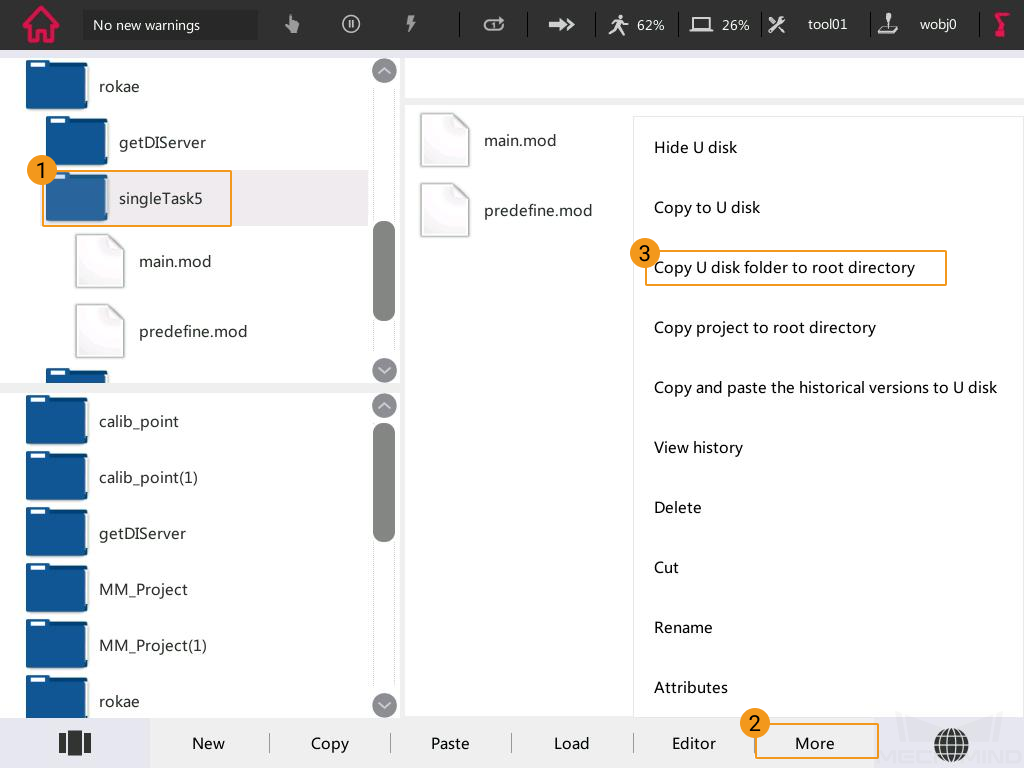
Once pasted successfully, the singleTask5 folder can be found in the file browser at the bottom left.
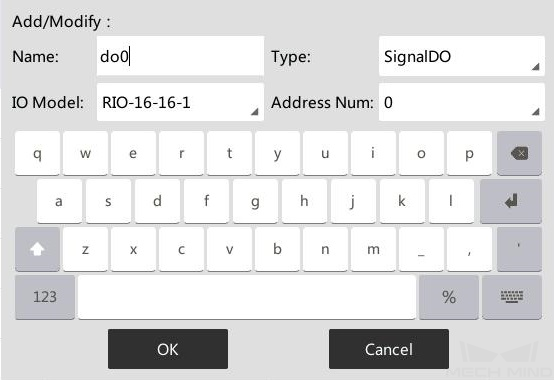
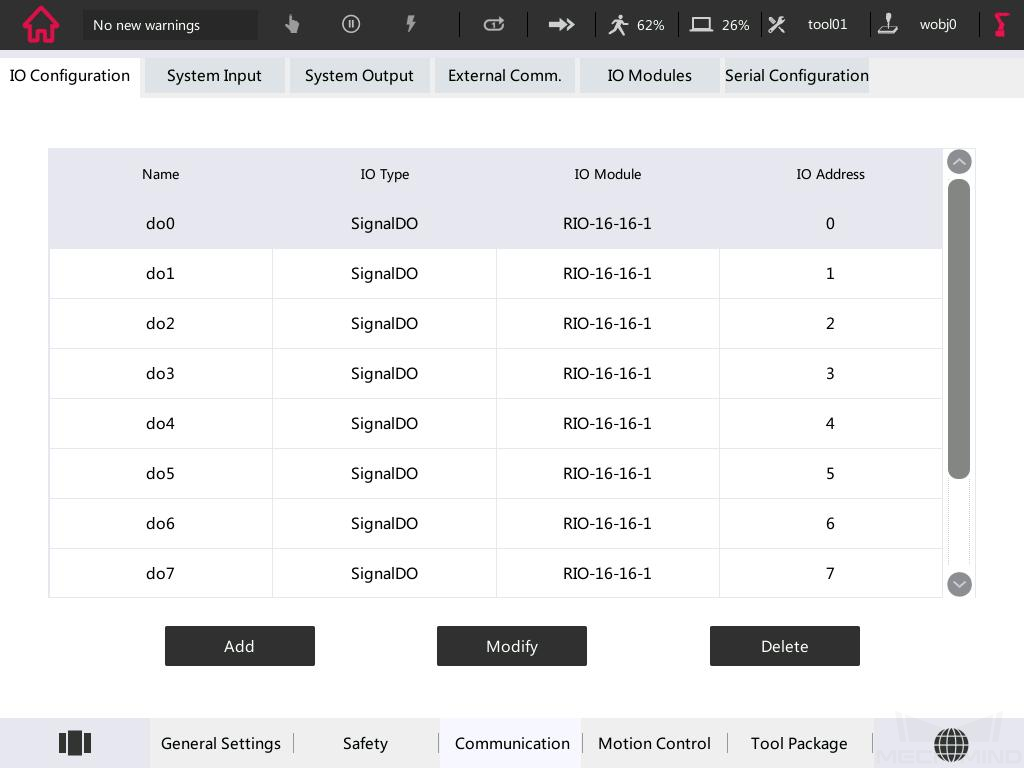
Configure Robot I/O
On the teach pendant, press the icon in the upper left corner, and then press Settings.
Press in turn.
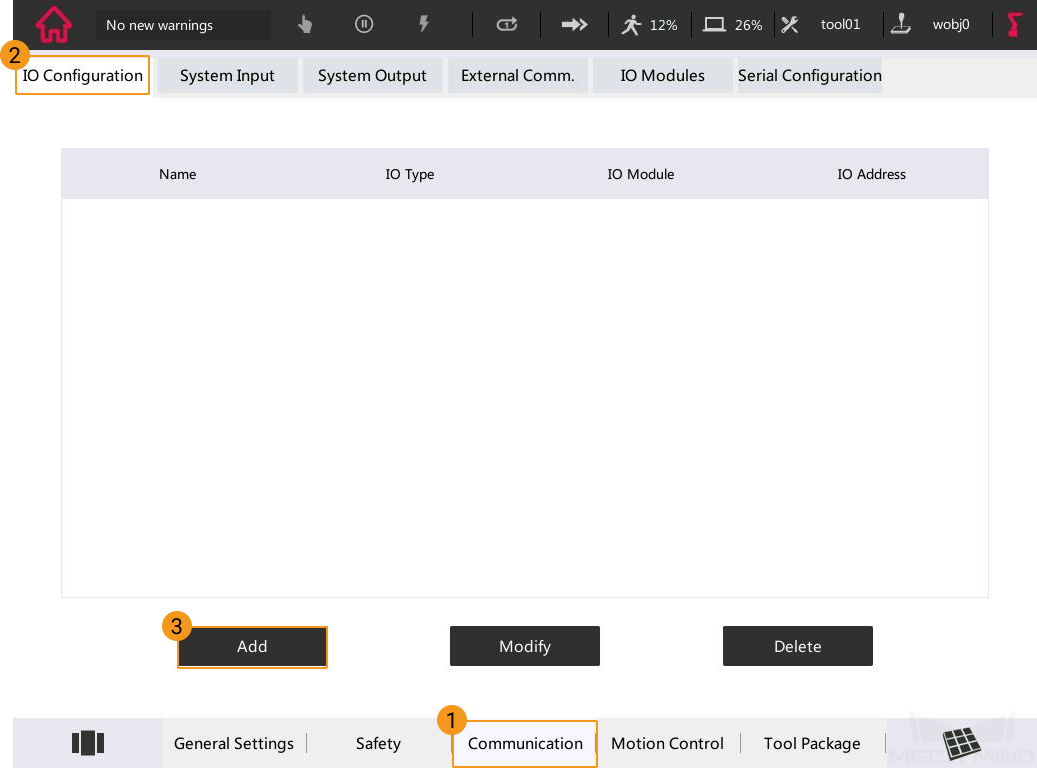
Add do0, and the specific options are shown below.
Similarly, add do0 to do7. The final result is shown in the figure below.
Test Robot Connection
Before running the Master-Control program, please ensure you have configured robot in Mech-Viz and configured settings in Mech-Center. The Host IP address in Robot Server should be set to 192.168.2.160. For detailed instructions, please refer to Test Robot Connection.
In the main interface of Mech-Center, click Connect Robot on the toolbar. The loading and running process should be completed in 120 seconds, or else you should click Connect Robot on the toolbar again.
Select the local singleTask5 folder, and press Load.

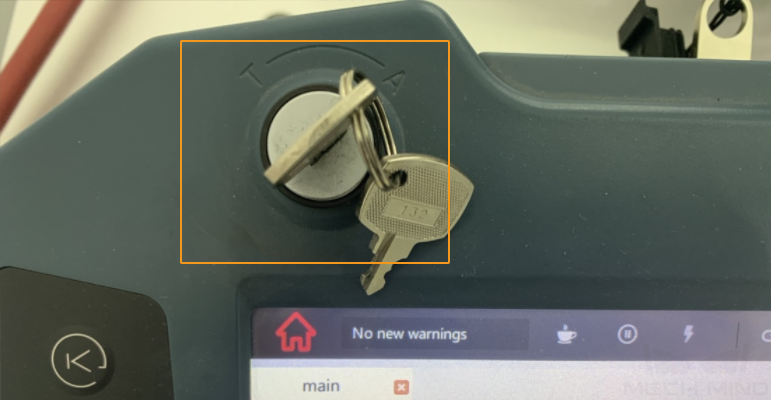
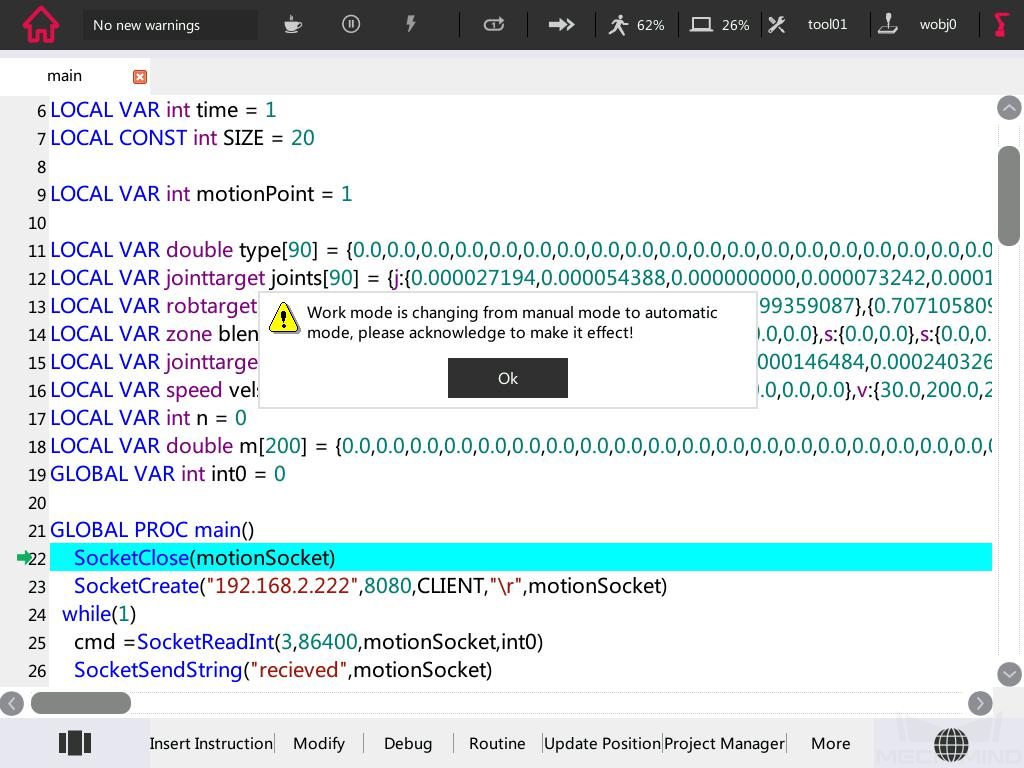
Switch the manual mode to automatic mode. The figure below shows the teach pendant in the automatic mode.
Select Ok in the pop-up window as shown below.
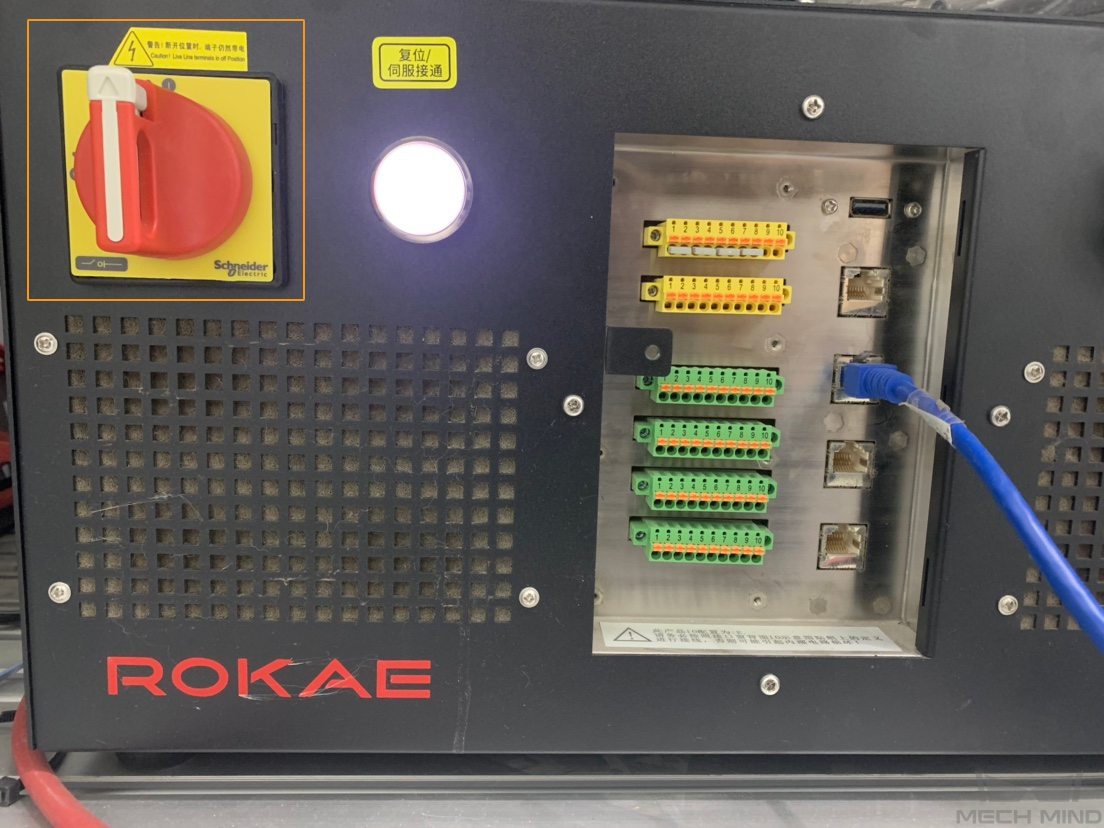
Press the button on the controller as shown in the figure below. If the once-flashing indicator light turns to be always on, the servo is successfully turned on in the automatic mode.
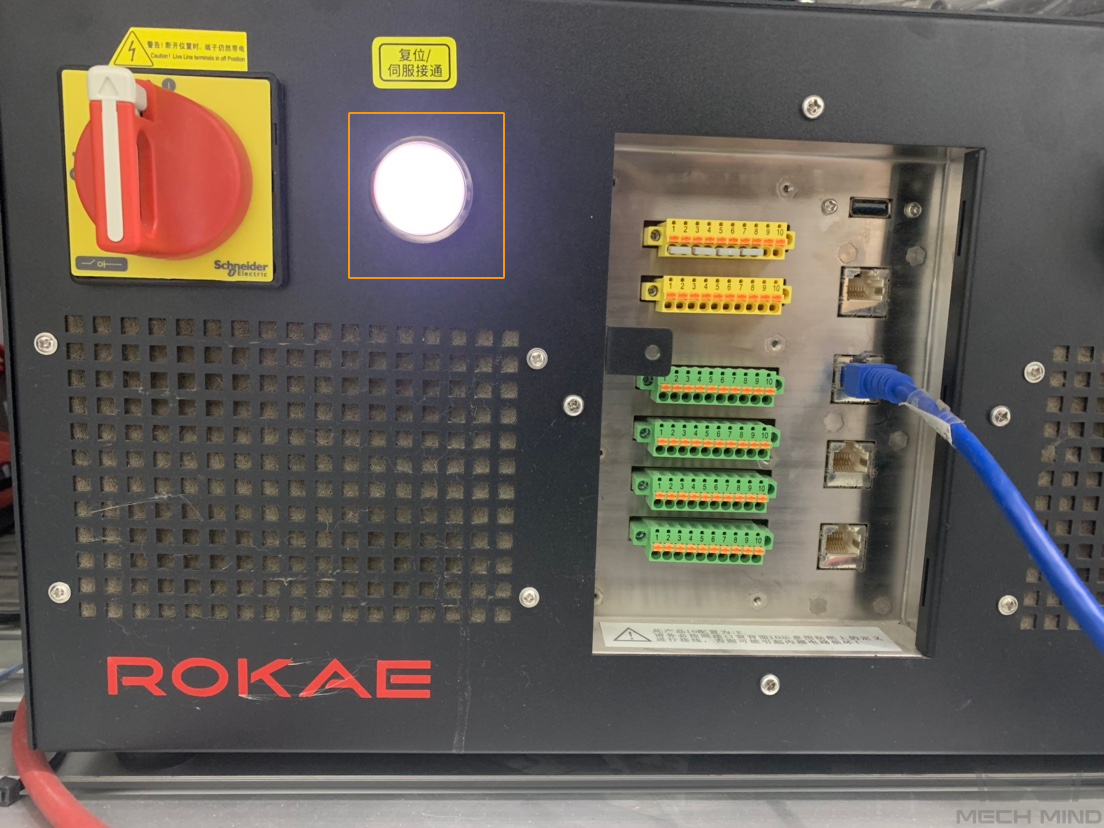
Press the R button in the lower right corner to power on the robot.

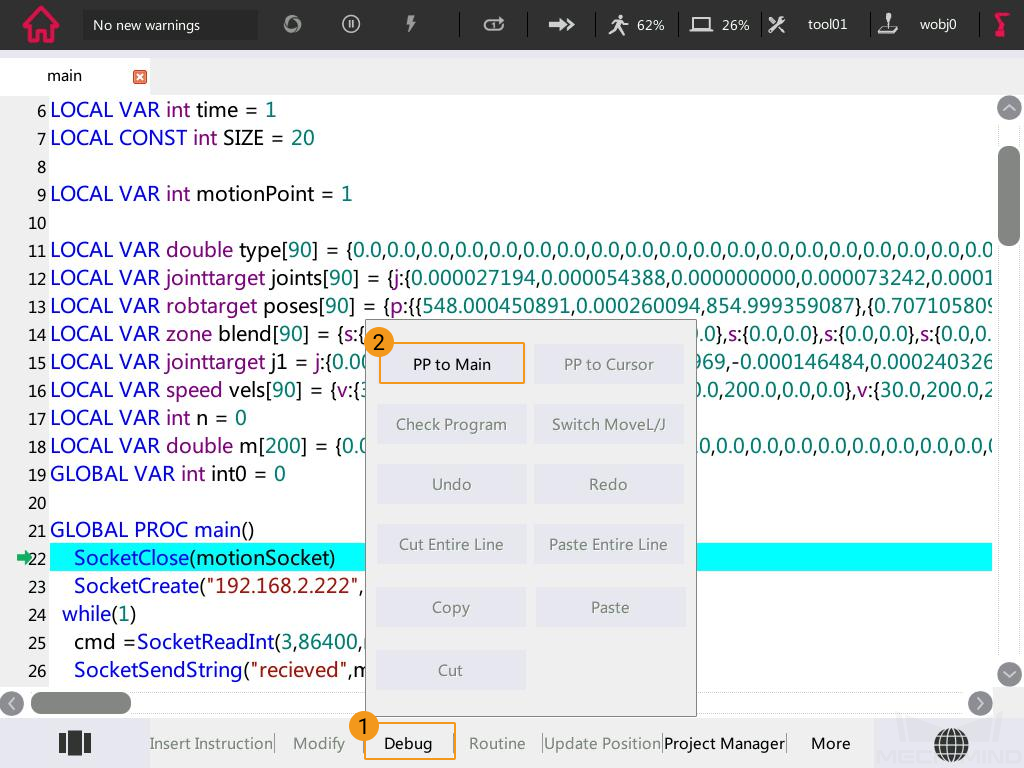
Press Debug and select PP to Main.
Click the icon as shown below to adjust the program’s running speed.

Press the button as shown below to run the program.

If the robot is connected successfully, a message saying Robot: server connected to the robot shows up in the Log panel of Mech-Center.
Please refer to the last part in Test Robot Connection to move the robot.
Common Operations
Backup and Restore Robot Files
Backup
Plug the USB flash drive into the USB port on the robot controller.
On the teach pendant, press the icon in the upper left corner, and then press Settings.
Press , and select Backup.
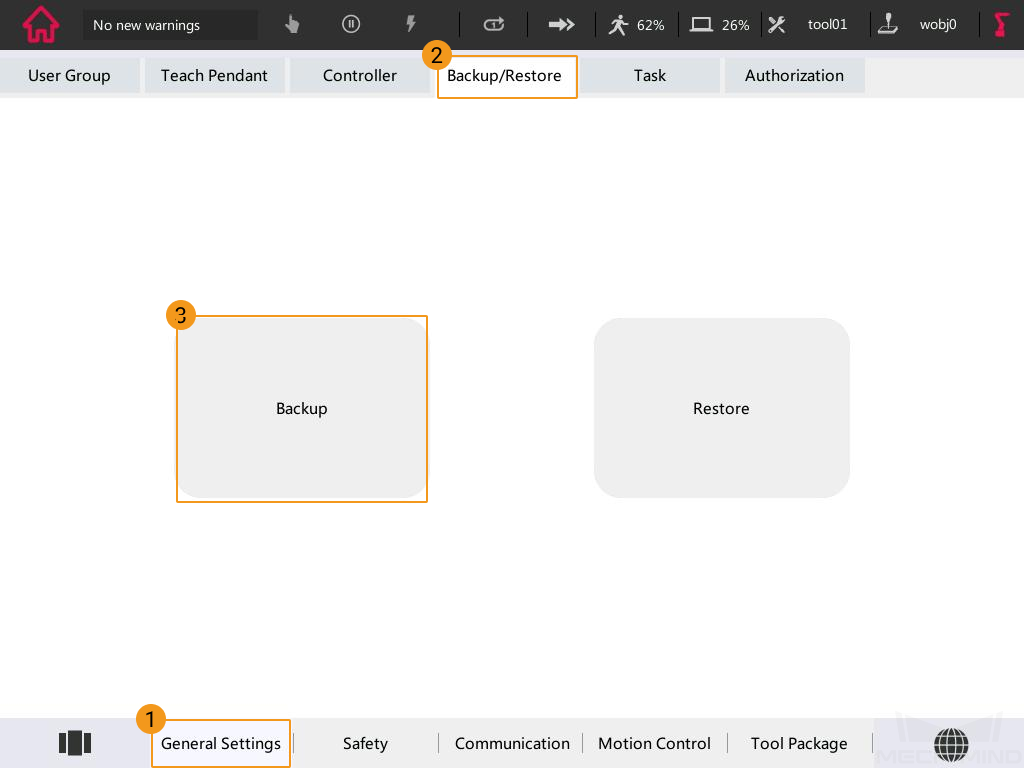
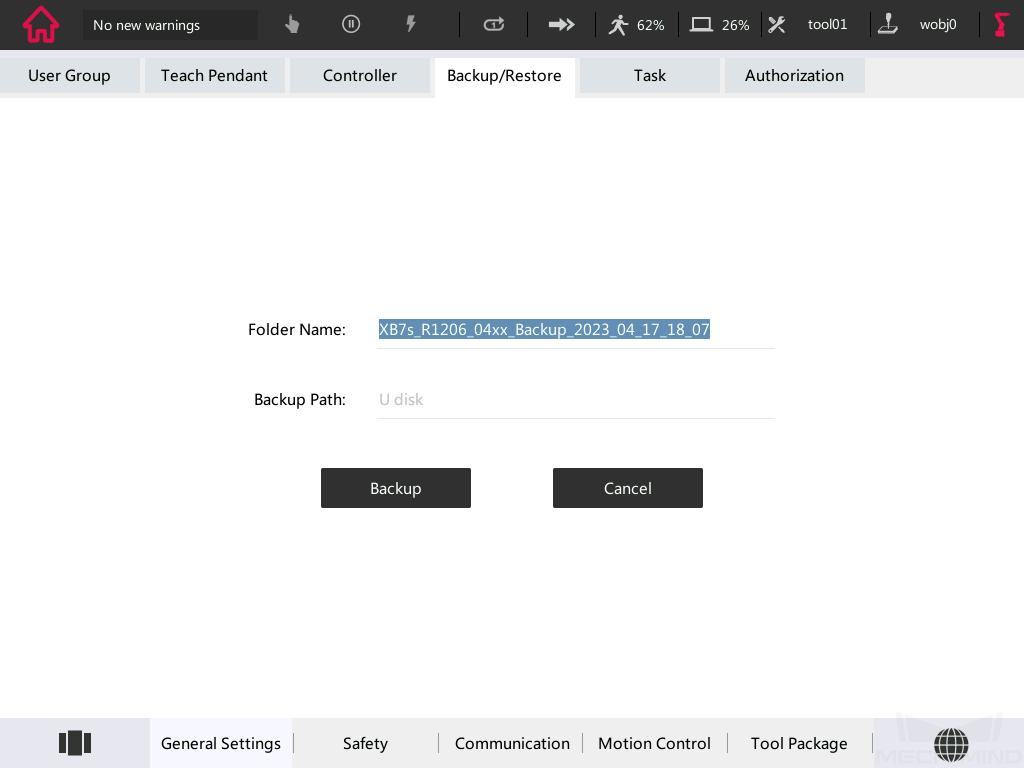
Select Backup in the pop-up window.
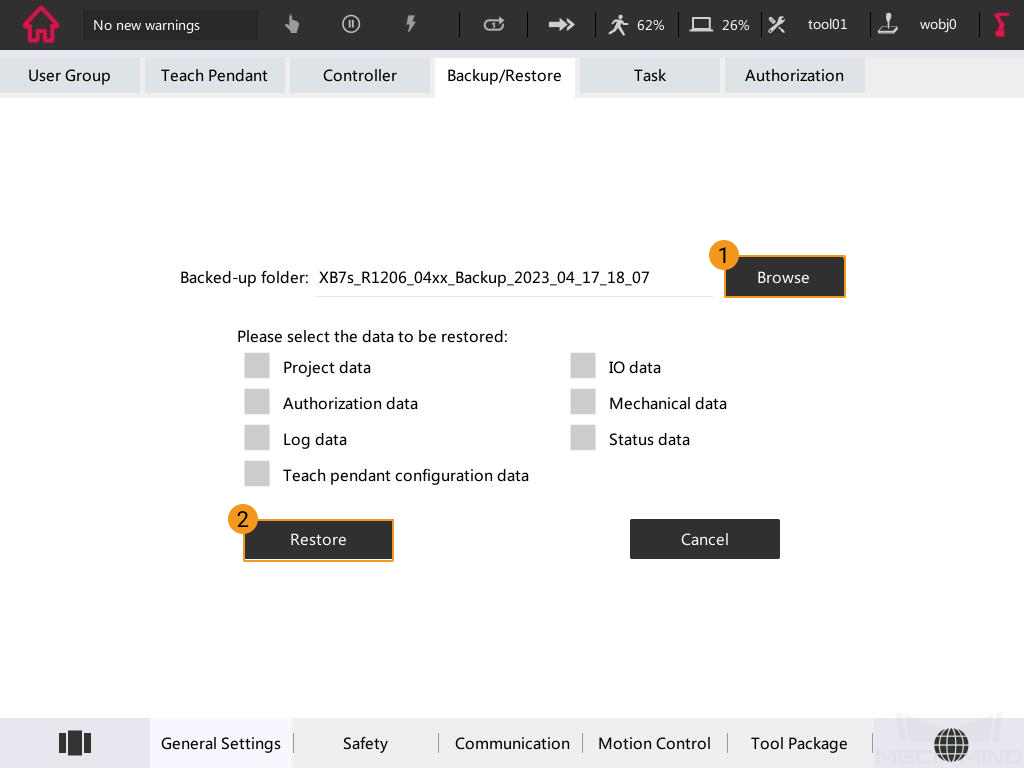
Restore
Press , and select Restore.
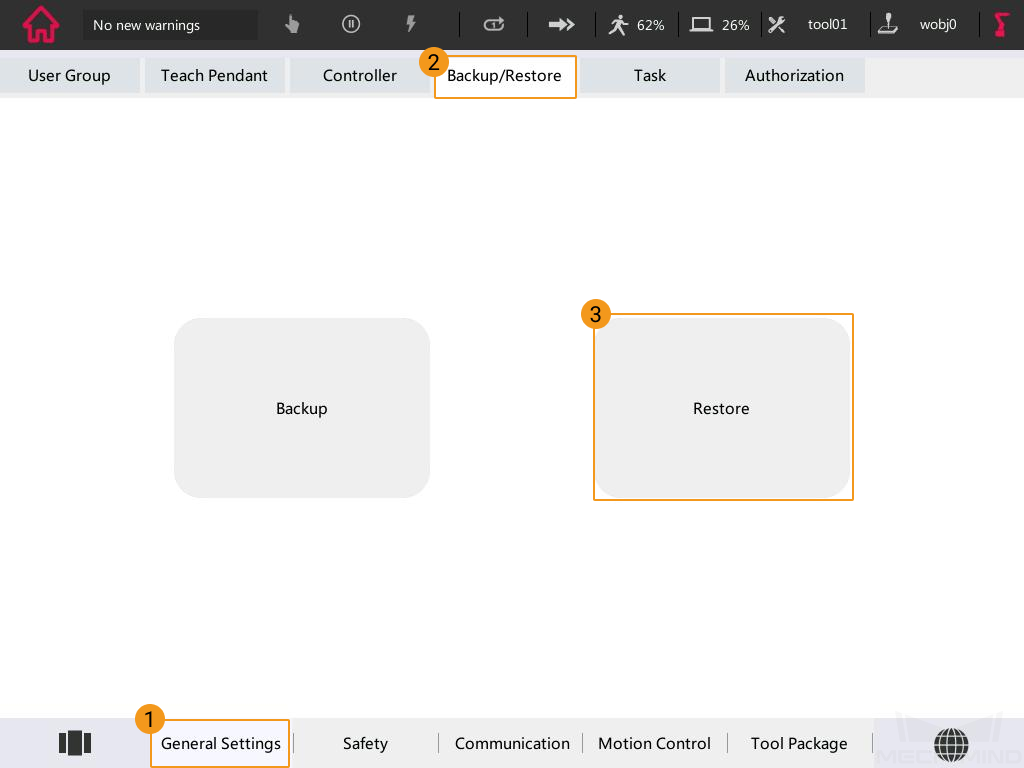
In the pop-up window, press Browse to select the directory where the backup files are stored. Then select the data to be restored according to the actual requirement, and press Restore.