AE Peitian Setup Instructions
This section introduces the process of loading the robot master-control program onto an AE Peitian robot.
The process consists of the following steps:
Please have a flash drive ready at hand.
Log In
Every time you open the teach pendant, you will need to log in with an account. The initial passwords are shown below.
Account |
Password |
Teacher |
PEACE |
OEM |
GRACE |
Admin |
OMNIPOTENT |

Check IP and Controller Compatibility
Go to .

Now you can check the IP information in the window as shown below.

IP Configuration
The IP address of an AE Peitian robot has been specified during programming, and you only need to select the IP adddress when loading the program files.
Load the Program File
Go to the folder where Mech-Mind Software Suite is installed, and locate the master-control program file task_main.arl. The path of the file is: xxx\Mech-Mind Software Suite-x.x.x\Mech-Center\Robot_Server\Robot_FullControl\ae.
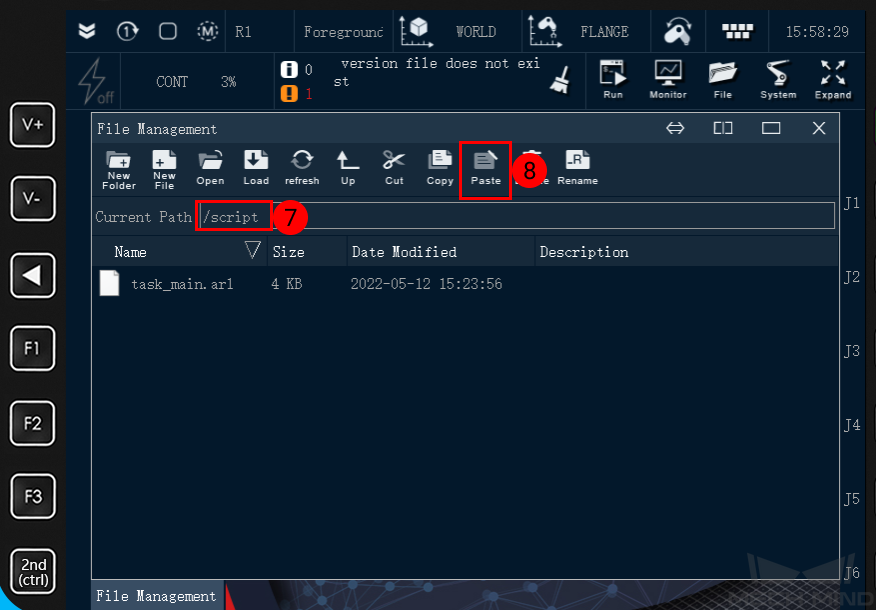
Use a USB flash drive to copy the program file task_main.arl and paste it into the /script folder of the robot system.
Go to , select USB(sim) in the list and open the folder.
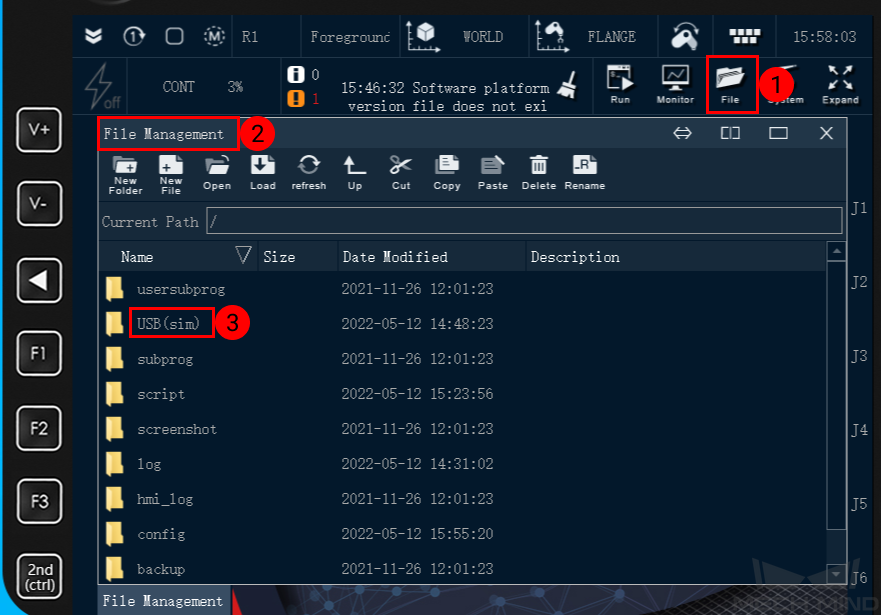
Select the file task_main.arl, and select Copy, and then select Up to go to the parent directory.

After opening the folder /script, select Paste to move the file task_main.arl into it.
Run the Program
Double click on task_main.arl to open the program file and then select Load.
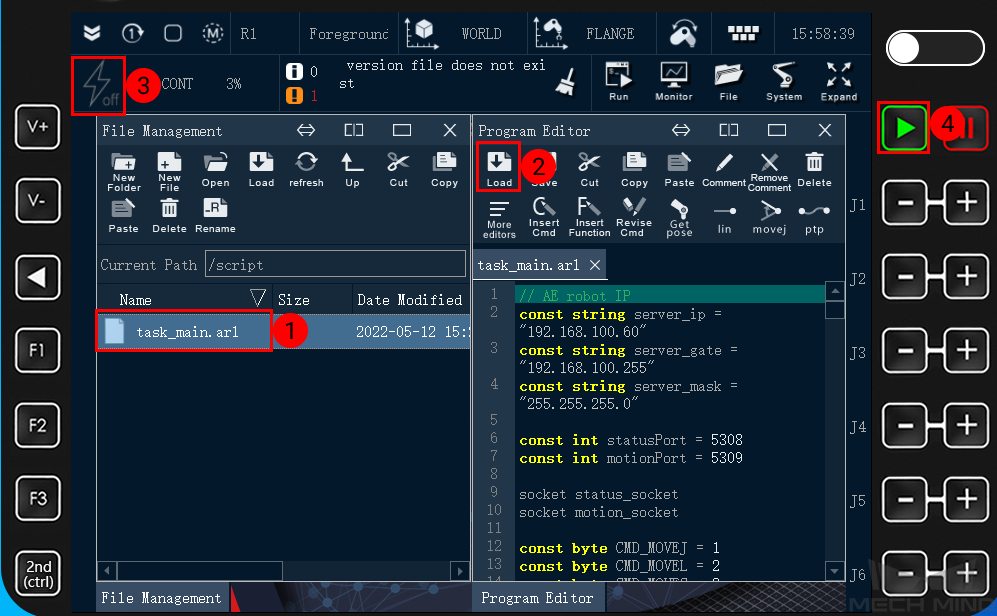
Press on
 , and then press
  to run the program.
Test Robot Connection
Configure Robot in Mech-Viz
Open Mech-Viz, click New project to create a new project.
Select the robot model in use in the next page.
Save the project by pressing Ctrl + S.
In the toolbar, change the Vel. (velocity) and Acc. (acceleration) parameters to 5%.
Right-click the project name in Resources and select Autoload Project.
Configure Settings in Mech-Center
Open Mech-Center and click on Deployment Settings.
Go to Robot Server, and make sure Use robot server is checked.
Check if the robot model displayed next to Robot type in Mech-Viz project matches the one in use.
Set the Robot IP address, and click Save.
Connect to Robot in Mech-Center
Click Connect Robot on the toolbar.
The robot is successfully connected if:
A message saying Robot: server connected to the robot shows up in the Log panel, and
A robot icon with the robot model shows up in the Service Status panel.
Move the Robot
In Mech-Viz, click Sync Robot on the toolbar to synchronize the pose of the real robot to the simulated robot. Then, click Sync Robot again to disable the synchronization.
Click the Robot tab in the lower right, and change the joint position of J1 slightly (for example, from 0° to 3°). The simulated robot will move accordingly.
Click Move real robot, the real robot should move accordingly.
Attention
When moving the robot, please pay attention to safety hazards. In the case of an emergency, press the emergency stop button on the teach pendant!