Capture Point Cloud Model
Capture Point Cloud Model Instruction
This tool is used to generate and save the target cloud model files required by Steps such as 3D Coarse Matching and 3D Fine Matching.
Operating Procedure of Capturing Point Cloud Model
Open the Mech-Vision project and click Tools -> Capture Point Cloud Model.

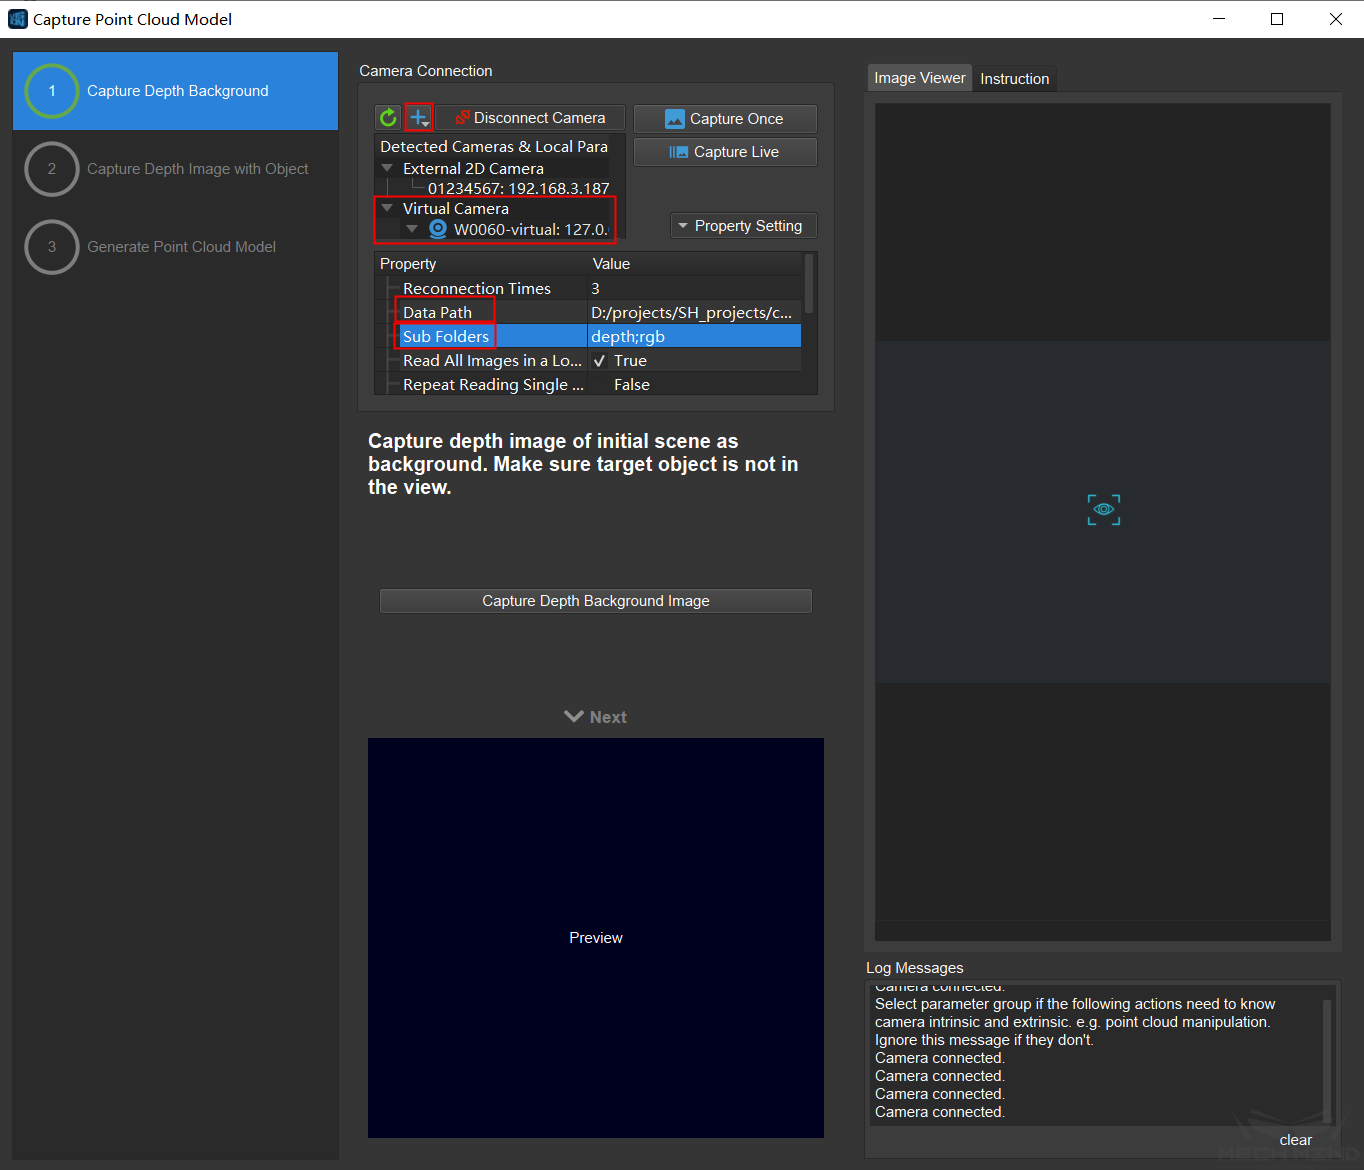
Connect to real camera and double-click the camera parameters group. Virtual camera is also available. Click the plus sign above the camera list to add a virtual camera. It is necessary to set the image data path and sub folders when using a virtual camera.
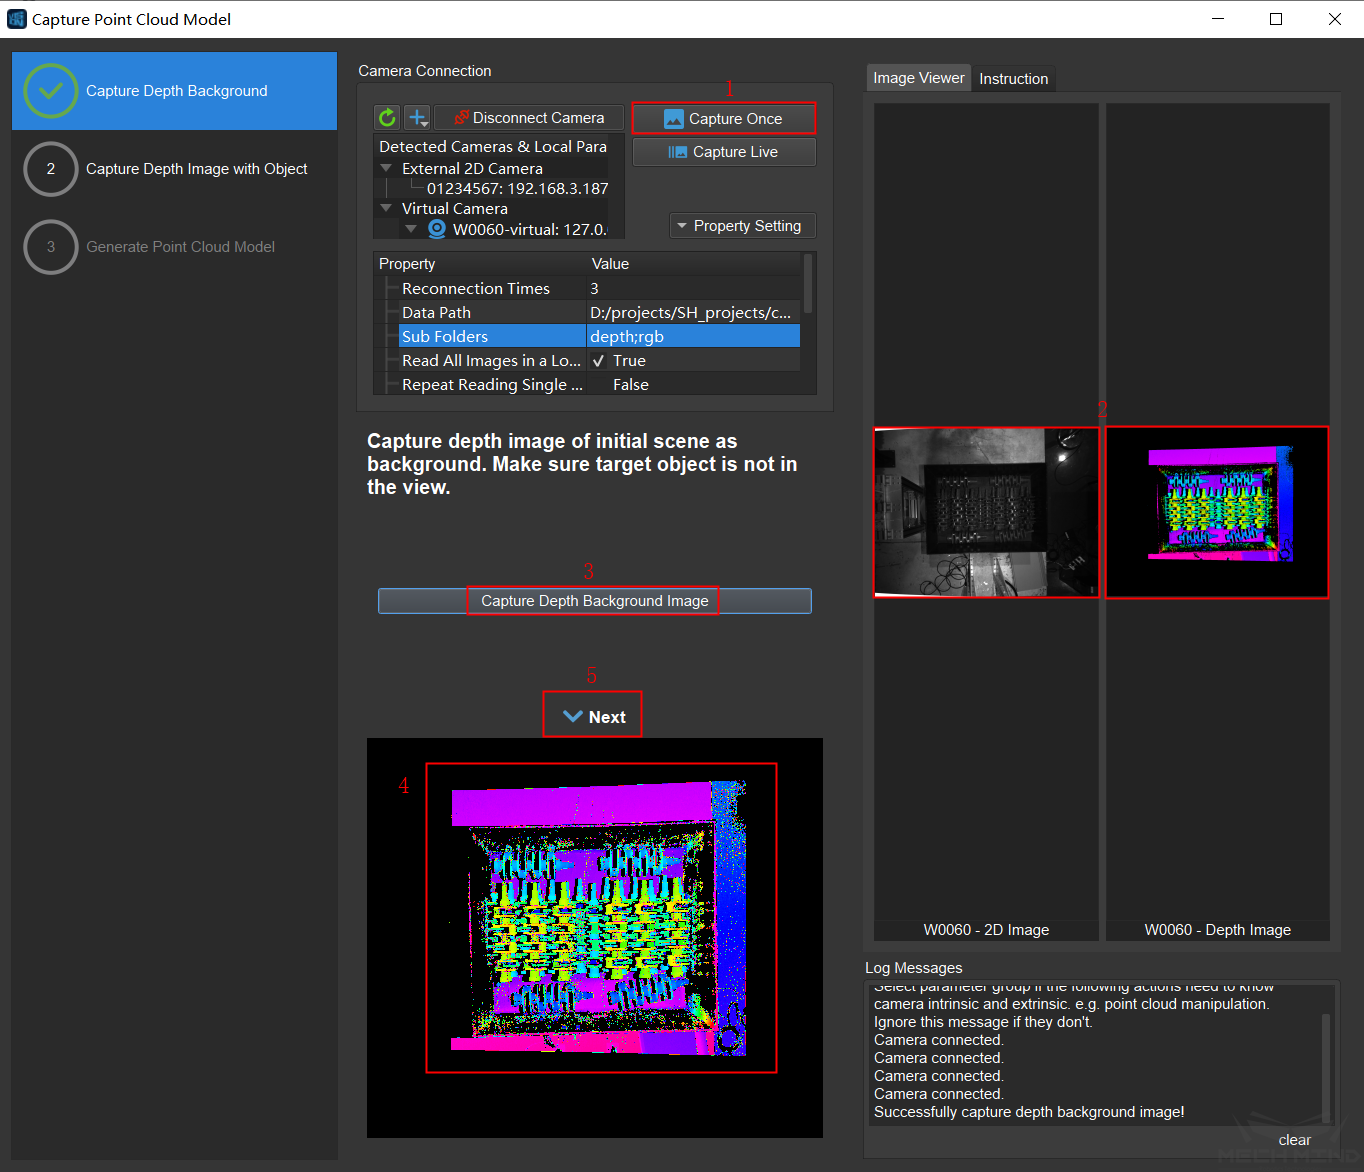
Click Capture Once, then the color image and depth image will be displayed in the image viewer on the right if the camera settings are correct. Make sure that the target object is not in the field of view, then click Capture Depth Background Image, and click Next after confirming that the background image in the preview box is correct.
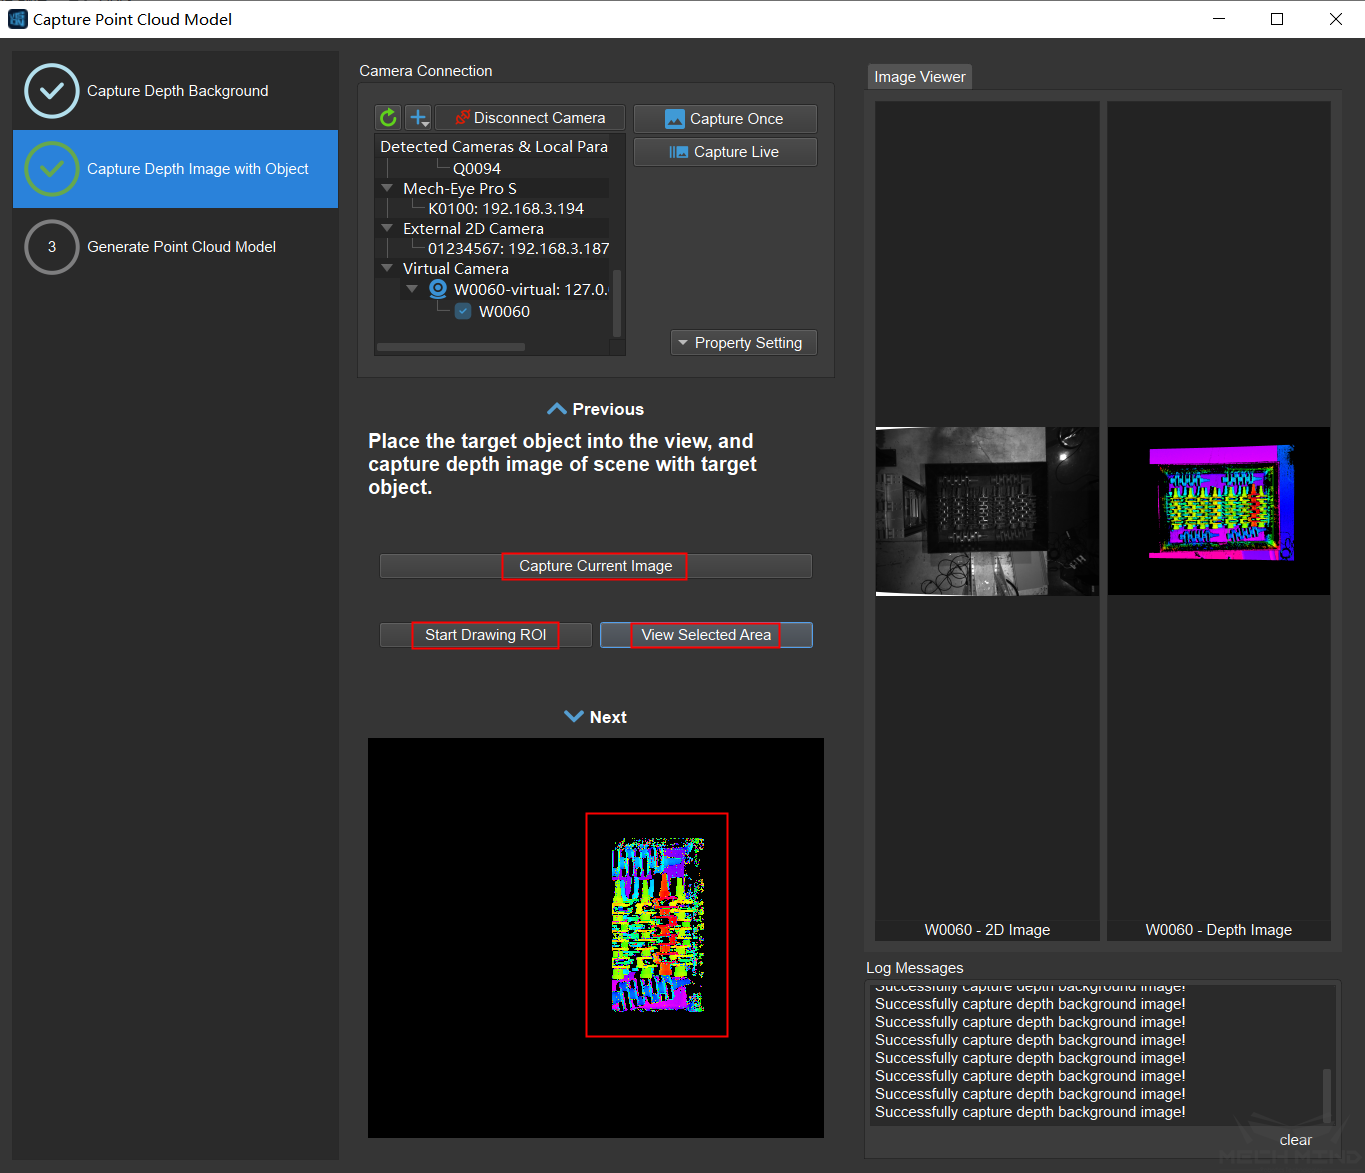
Place the target object in the field of view, click Capture Current Image, then click Start Drawing ROI, and draw the ROI box on the depth image. Click View Selected Area to confirm that the target object is in the ROI, and then click Next .
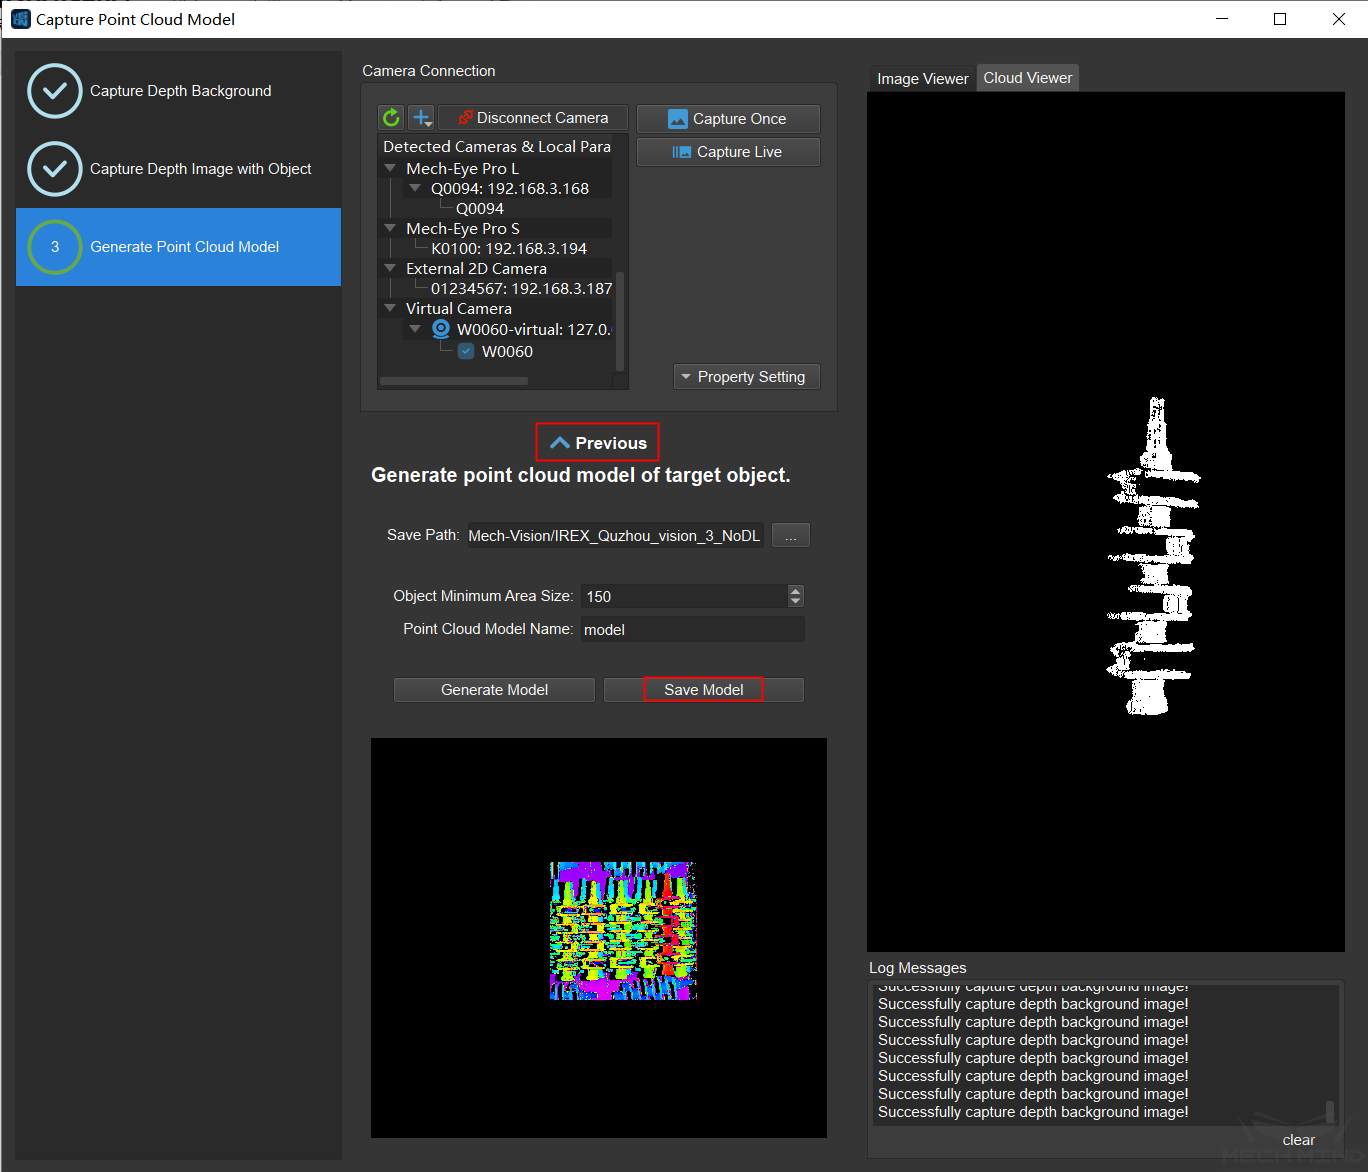
Modify the save path of the model file, the minimum area size of the object and the name of the point cloud model if needed. Then click Generate Model, the generated target object point cloud model will be displayed in the image viewer. Press and hold the left mouse key to rotate the point cloud, scroll the mouse wheel to zoom in and out, and press and hold the mouse wheel to pan the point cloud.
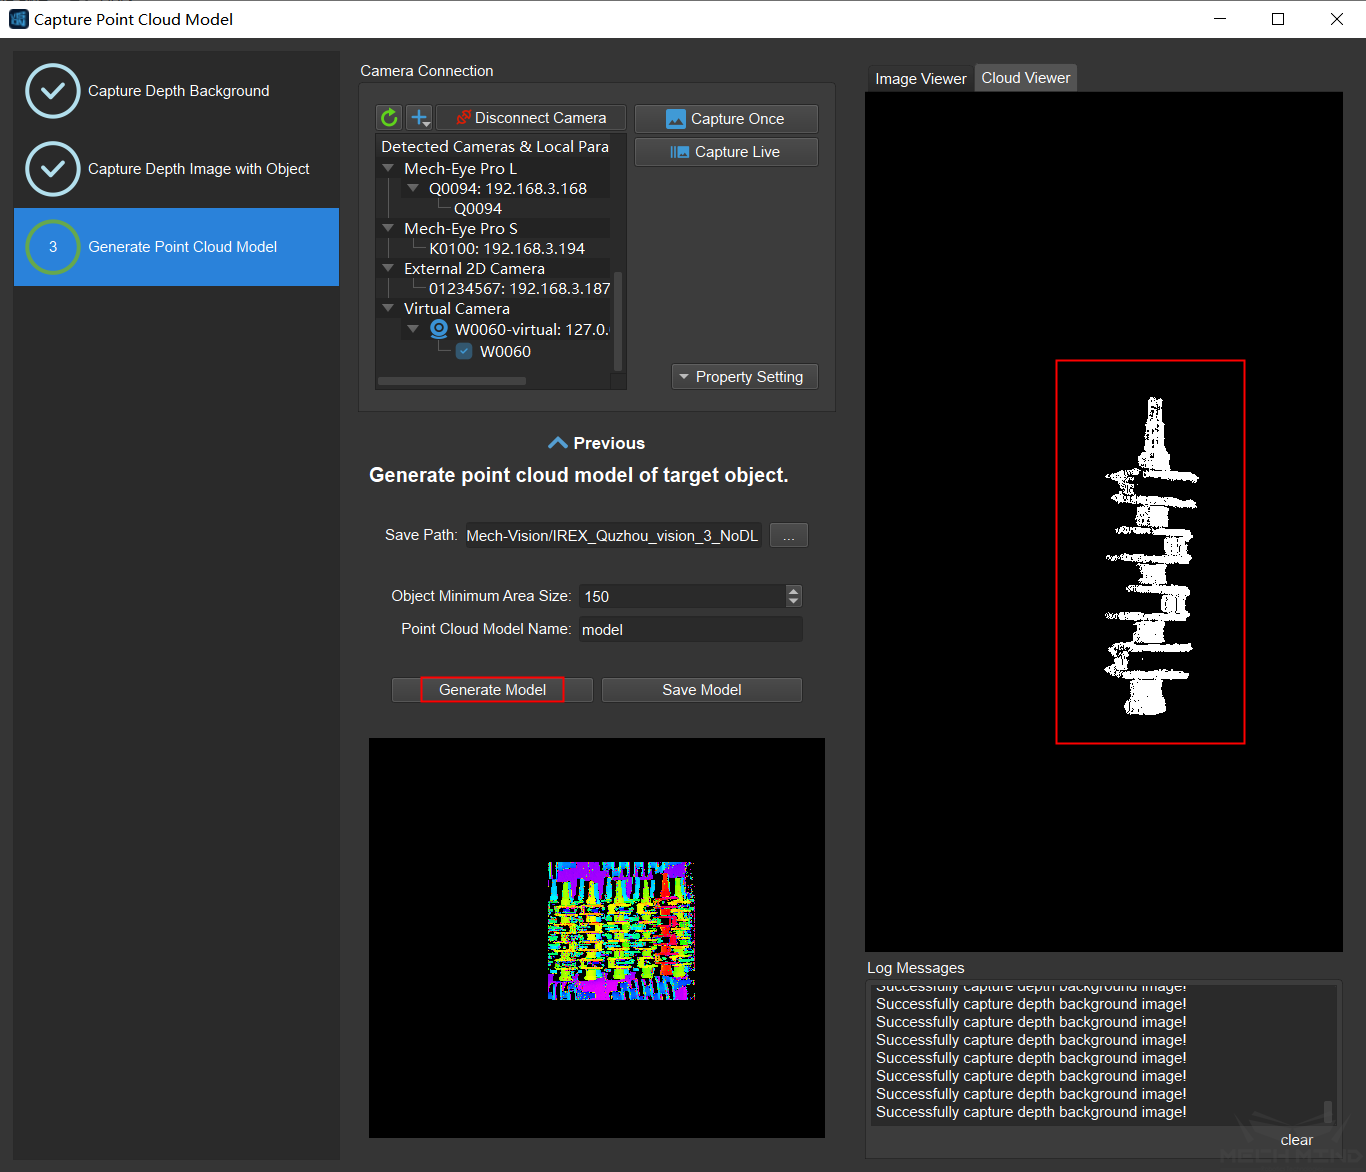
If the generated point cloud model is good, click Save Model. The model file will be saved to the set path. If the generated point cloud model is bad, click Previous to recapture image, draw ROI, and then try to generate model again.
