Pose Step Editor
Function
It is used to improve the usability of pose adjustment, the visualization of poses while editing, and reduce the learning cost of pose adjustment.
There are two modes of pose editor:
Preset Edit Mode: Can edit poses quickly by common functions such as reference frame transformation, adjustment, and sorting.
Customized Edit Mode: Adjust poses by adding corresponding Steps and the edited poses can be seen.
Interface Introduction
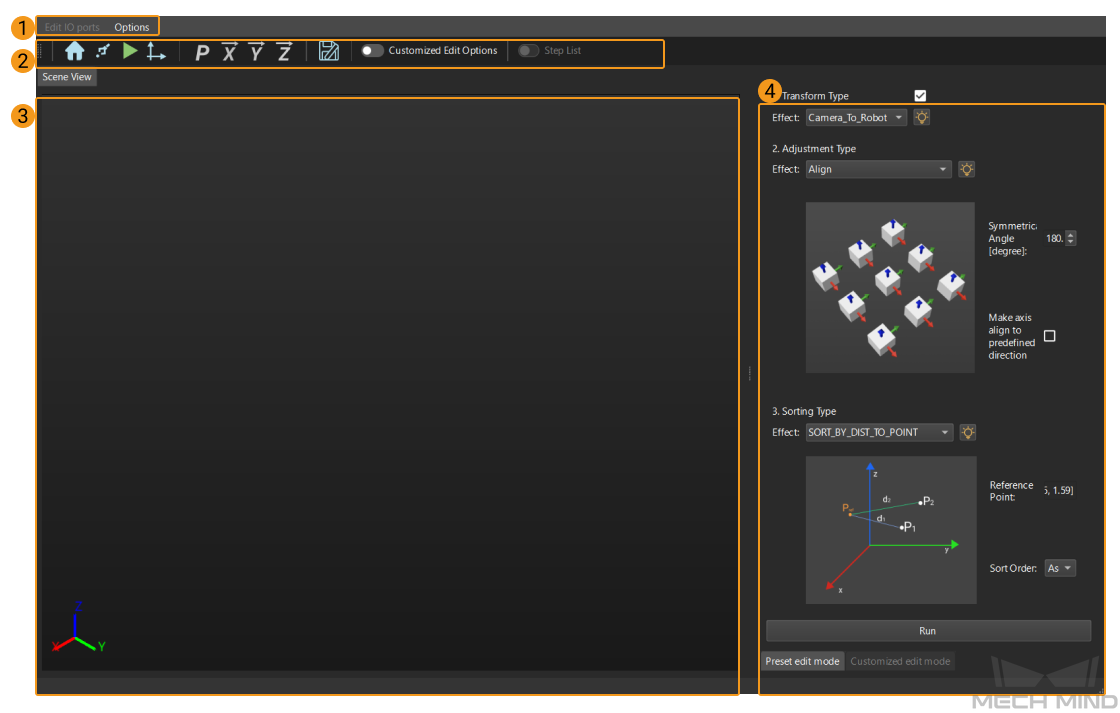
The interface of the pose editor, as shown below, consists of four parts:
Interface |
Description |
Menu Bar |
Edit IO ports, set dragger type, etc. |
Toolbar |
Edit and adjust poses. |
Scene View (visualization area) |
View edited poses for further adjustments. |
Editing Area |
Adjust poses and switch edit modes (the editing area differs with the different mode selected). |
Mode
Preset Edit Mode
There are three types of functions:
Transform Type: Two transform types, which can transform the reference frame of the pose by selecting camera to robot or robot to camera.
Adjustment Type: Three adjustment types: 1. Align; 2. Outwards; 3. Point to.
Sorting Type: Five sorting types: 1. Sort by cusom direction; 2. Sort by dist to point; 3. Sort by dist to point on xy plane; 4. Sort by position xyz; 5. Sort by row col.
Customized Edit Mode
First click the Customized Edit Options on the toolbar, and click Step List. Select the corresponding Step from the Step List and click Add.
Usage
The following section introduces how to use the Pose Step Editor.
Add the Step Adjust Poses in the project.
Run the project to get the input pose, and click Open pose editor to enter the editor.
Select and set an edit mode.
In Preset Edit Mode, please set Transform Type, Adjustment Type, Sorting Type, and click Run to preview the results.
In Customized Edit Mode, please add output quantity limit: 1. Click the Customized Edit Options, 2. Click Step List, 3. Select the number of displayed outputs, 4. Click Add, 5. Fill in the limit number, 6. Run and preview the results.
After finishing the pose editing, click the exit button to save the edited pose.
Run the project to review the results.