Pose Editing Widget
After selecting a pick point/geometric center in the Model Files List, you can perform pose editing in the Parameters and Display pane below the CAD Files List.
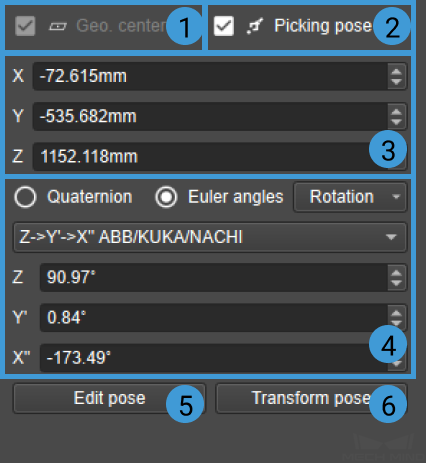
Check Geo. center to set the point as the geometric center.
Check Picking pose to set the point as a pick point.
Note
Every point cloud model must have one and only one geometric center, but can have one or multiple pick points. If the model has only one pick point, then this pick point also serves as the geometric center.
Location editing: adjust the location of the point by modifying its coordinates. You can type directly into the fields or adjust the values using the arrows to the right.
Orientation editing: select to display the orientation in quaternion or Euler angles. You can type directly into the fields or adjust the values using the arrows to the right.
Click on Rotation to quickly adjust the orientation using the options in the dropdown menu.
Click on Z->Y’->X” ABB/KUKA/NACHI to change the order of rotation of the Euler angles.
Hint
Please select the order of rotation consistent with that of the robot you are using.
Click on Edit pose to edit the pose data directly.
Click on Transform pose to adjust the pose relative to the selected reference frame.