Install the CRX Plugin
This topic introduces how to install the Mech-Mind 3D Vision Interface plugin (“CRX plugin” for short) on a CRX series robot.
Prerequisites
Additional controller software packages:
R651 or R632 (karel)
R648 (User Socket Msg)
Ensure that the versions of Mech-Mind Vision System Software and robot controller are compatible.
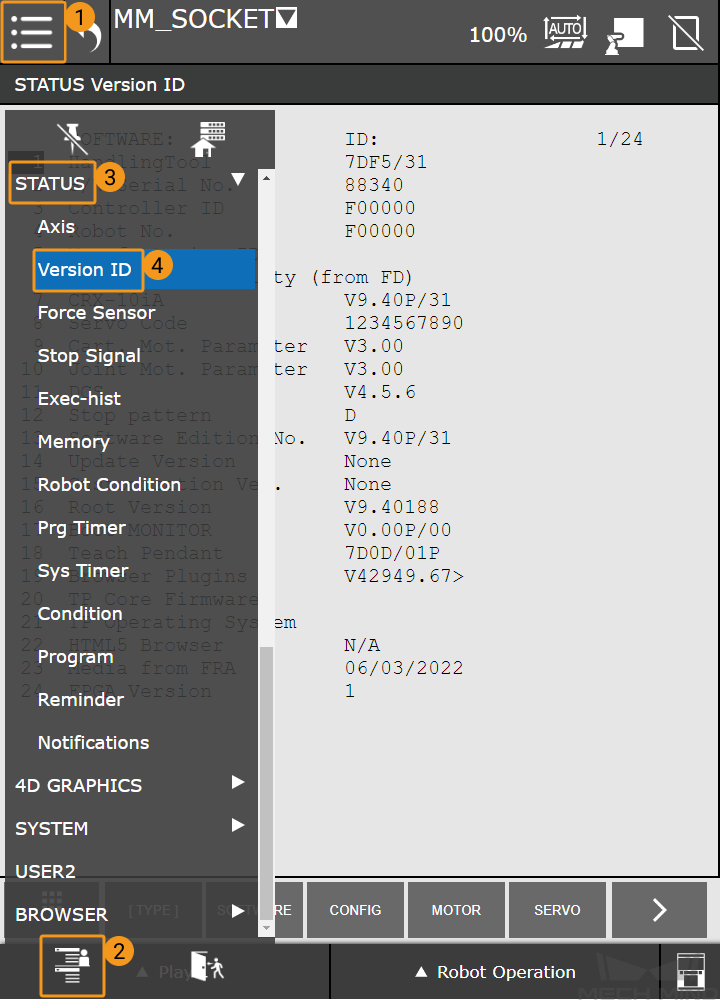
To check the version of the robot controller software, press the Menu icon in the upper left on the tablet teach pendant, and press  in the lower left to view the complete menu, and then select STATUS > Version ID to check the robot controller software version.

Tip
The tablet teach pendant displays two types of menus, i.e., the frequently used menu and the complete menu. After pressing the Menu icon in the upper left on the teach pendant, you can press in the lower left to switch between the two menus.
Install the CRX plugin
Follow these steps to install the CRX plugin.
Go to xxx\Mech-Mind Software Suite-x.x.x\Mech-Center\Robot_Interface\Robot_Plugin\Fanuc_CRX_Plugin in the installation directory of Mech-Mind Software Suite and find the installation file in the IPL format.
Copy the installation file to your USB flash drive, and then connect the USB flash drive to the USB port on the side of the robot controller.
Attention
The USB port on the teach pendant cannot be used to install the CRX plugin.
Check if the current mode of the teach pendant is Manual mode. If the teach pendant is already in the Manual mode (
 ), please skip this step. If the teach pendant is in the Auto mode (
 ), please press the icon to switch it to the Manual mode.
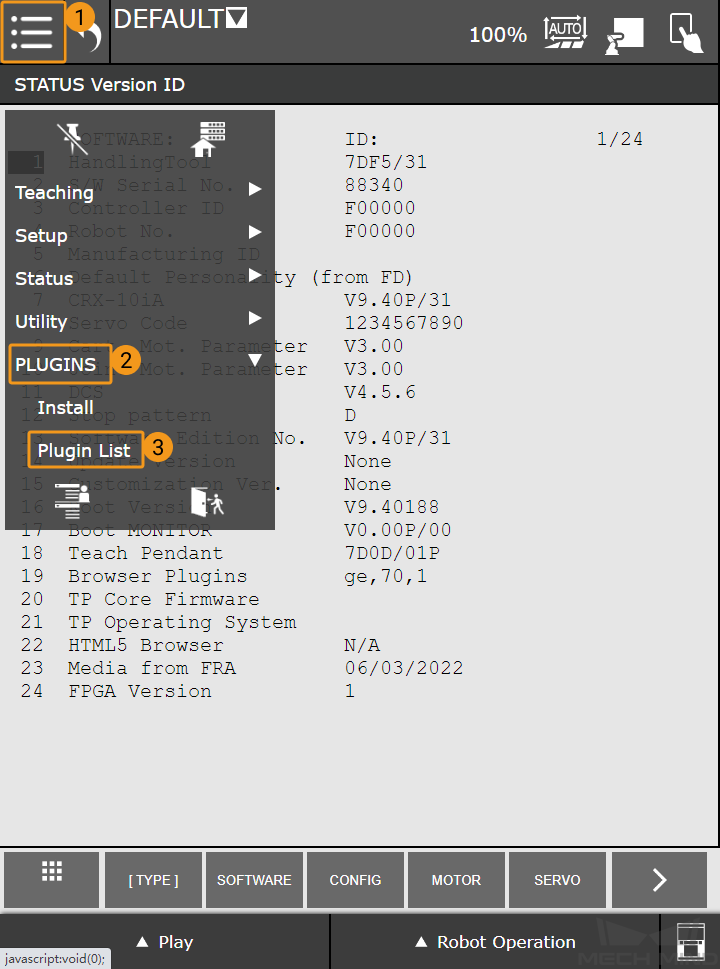
Press the Menu icon in the upper left corner on the teach pendant’s touch screen to switch to the frequently used menu, and then select PLUGINS > Install.

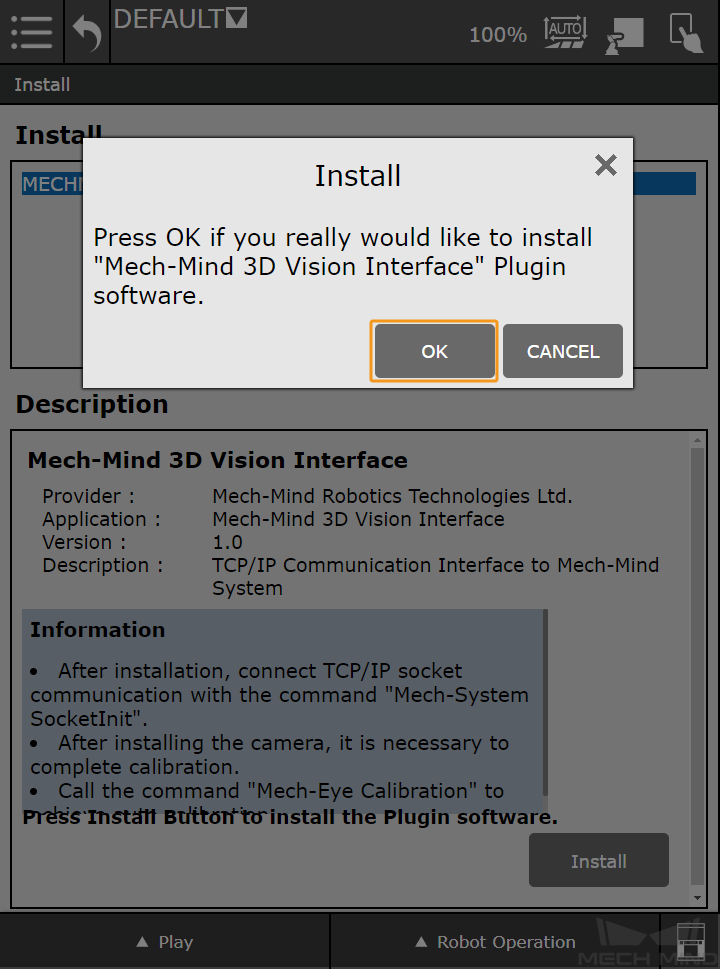
Press the Install button to install the plugin.
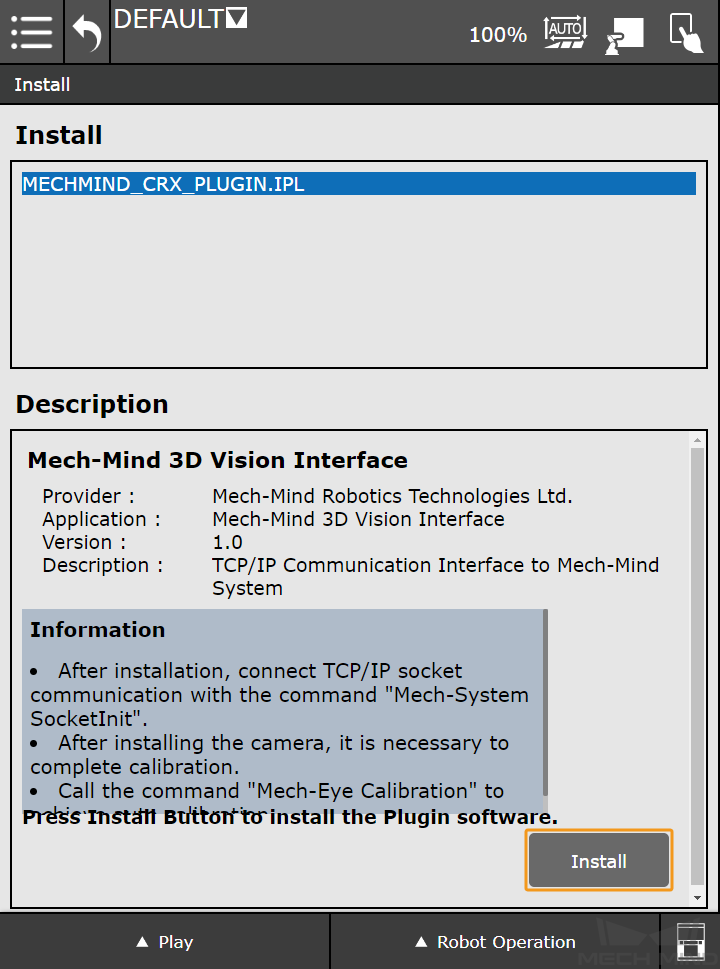
Select OK in the pop-up dialog box.
After the CRX plugin is installed successfully, please power off the controller and then restart it.

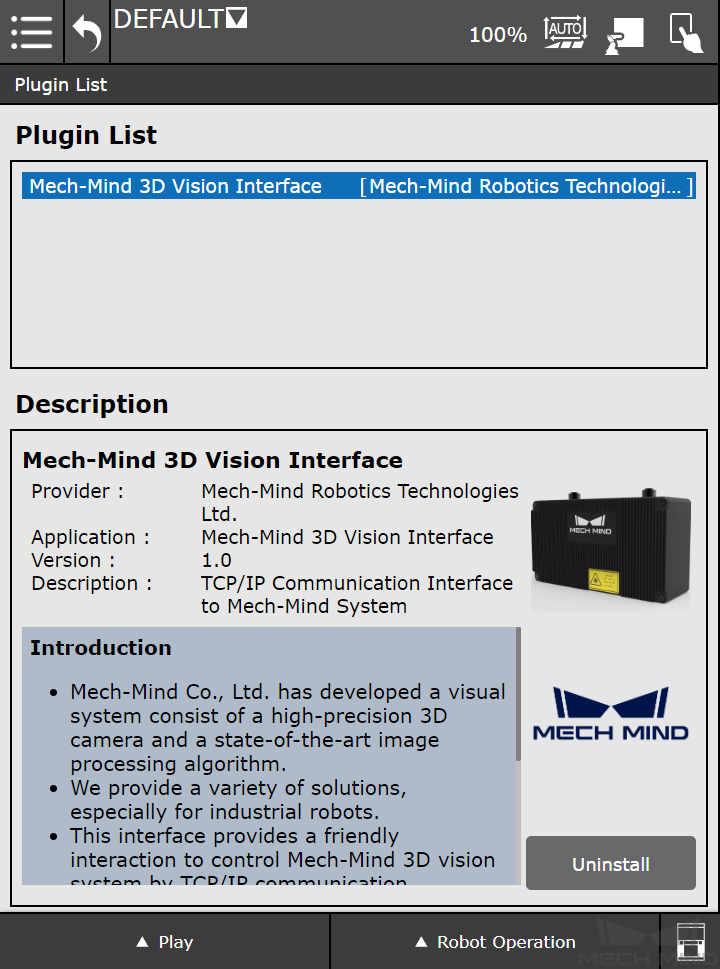
After the controller is restarted, press the Menu icon in the upper left corner, and select PLUGINS > Plugin List to view the installed plugins.