Example Programs
This section introduces the process of creating two simple picking programs:
Picking with Mech-Vision: applicable to scenarios where only a Mech-Vision project is used.
Picking with Mech-Viz: applicable to scenarios where both Mech-Vision and Mech-Viz projects are used for path planning.
Note
In actual application, please configure the end effector and define the TCP correctly beforehand.
Picking with Mech-Vision
The example program below triggers Mech-Vision to capture images and move the robot to the vision point.
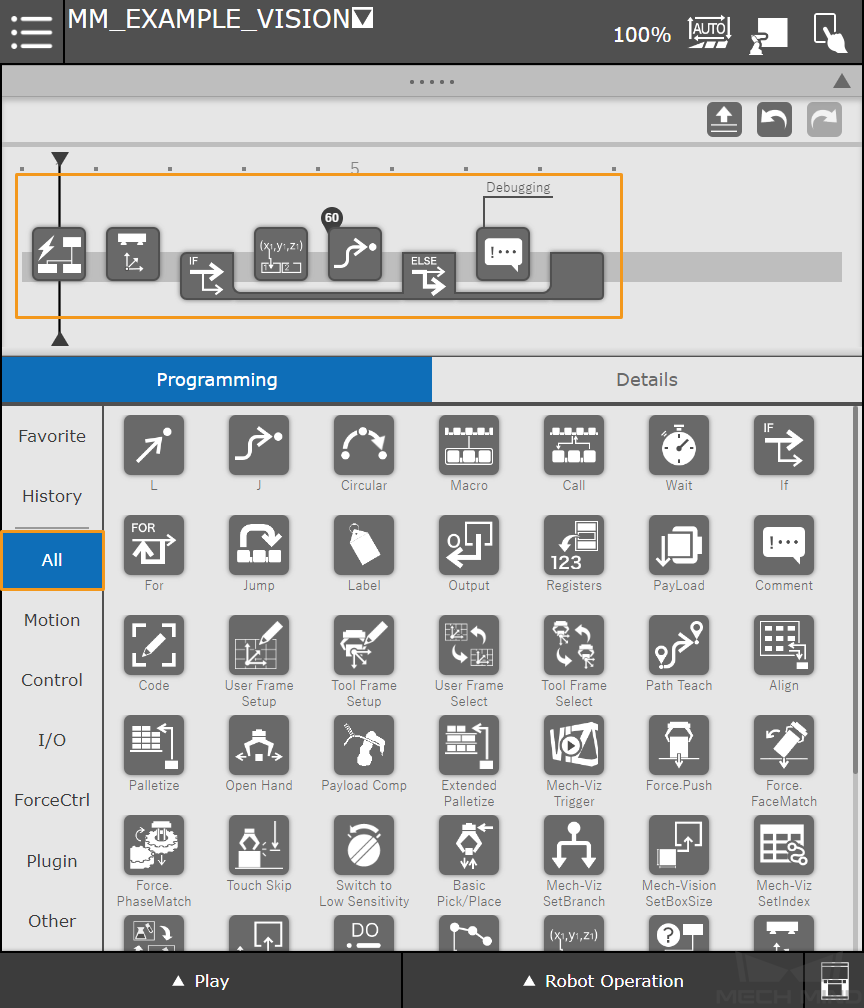
Create a new robot program (the name of the robot program in this example is MM_EXAMPLE_VISION). Select Programming and follow the order below to drag the commands in the ALL tab to the program line.
Mech-Vision Trigger → Mech-Vision GetData → If → Mech-System GetPose → J → ELSE → Comment
Tip
Press Comment in the program line, and then you can enter a comment, e.g., “Debugging”, in the Details panel.
General workflow of the program is:
The Mech-Vision Trigger command triggers the specified Mech-Vision project to run.
The Mech-Vision GetData command obtains the vision result from Mech-Vision and stores the status code in a register (R[52] for example).
The If command determines whether the vision result is received successfully.
If the vision result is received successfully, the Mech-System GetPose command will store the first vision point sent from the Mech-Vision project to a specified register (R[60] for example), and then the robot will move to the first vision point in the J (joint) motion type.
If the vision result is not received successfully, a debugging will be performed. The detailed programming of the debugging process is omitted in this example.
Press If and configure the parameters as shown below.

The If command will check the status code which is stored in R[52]. If the value of R[52] is 1100, the vision result is received successfully, or else a debugging process should be performed.
Press J and configure the position register as shown below.
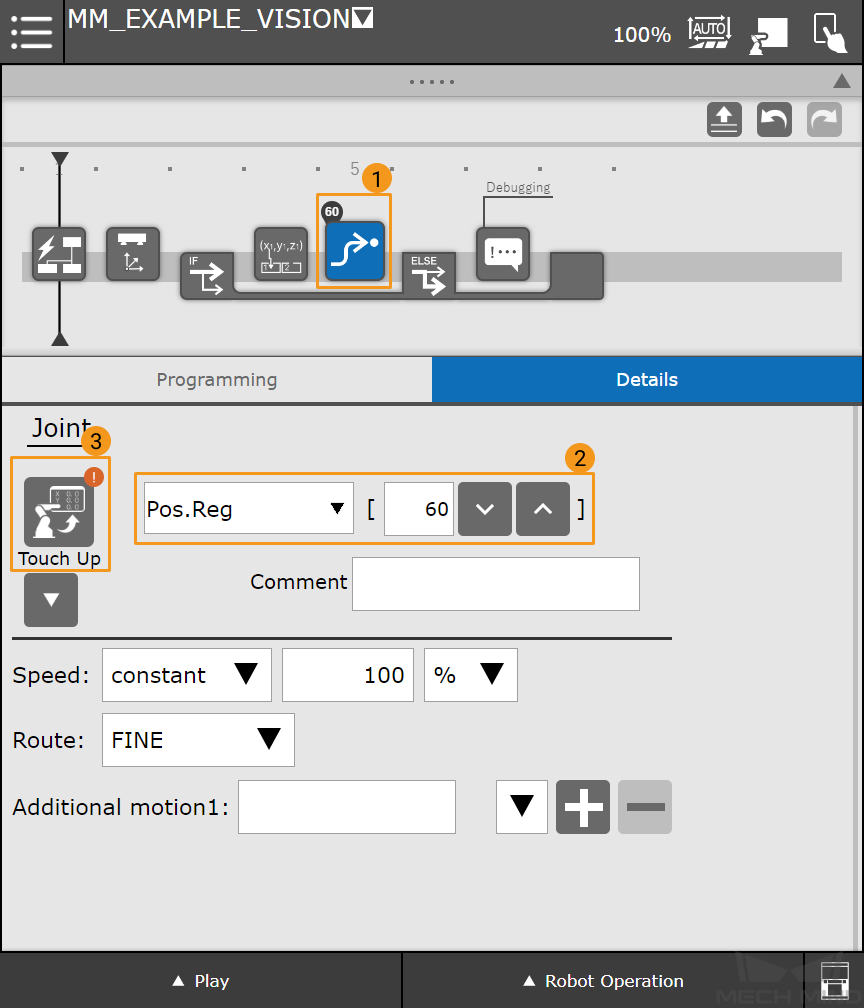
The first vision point sent from the Mech-Vision project is stored in PR[60] as TCP. Once the vision result is received successfully, the robot will move to the PR[60] position in moveJ motion type.
Now you have built a simple program that uses Mech-Vision for picking. Once you have switched the teach pendant to the Automatic mode, you can select Play in the lower left corner and reduce the velocity. Then you can press Run to run the program.
Picking with Mech-Viz
All waypoints in the path planned by Mech-Viz can be sent to the robot via Standard Interface. The example program below triggers Mech-Viz to plan a path and move the robot to a waypoint in the path.
Create a new robot program (the name of the robot program in this example is MM_EXAMPLE_VIZ). Select Programming and follow the order below to drag the commands in the ALL tab to the program line.
Mech-Viz Trigger → Mech-Viz GetData → If → Mech-System GetPoseJPS → J → ELSE → Comment
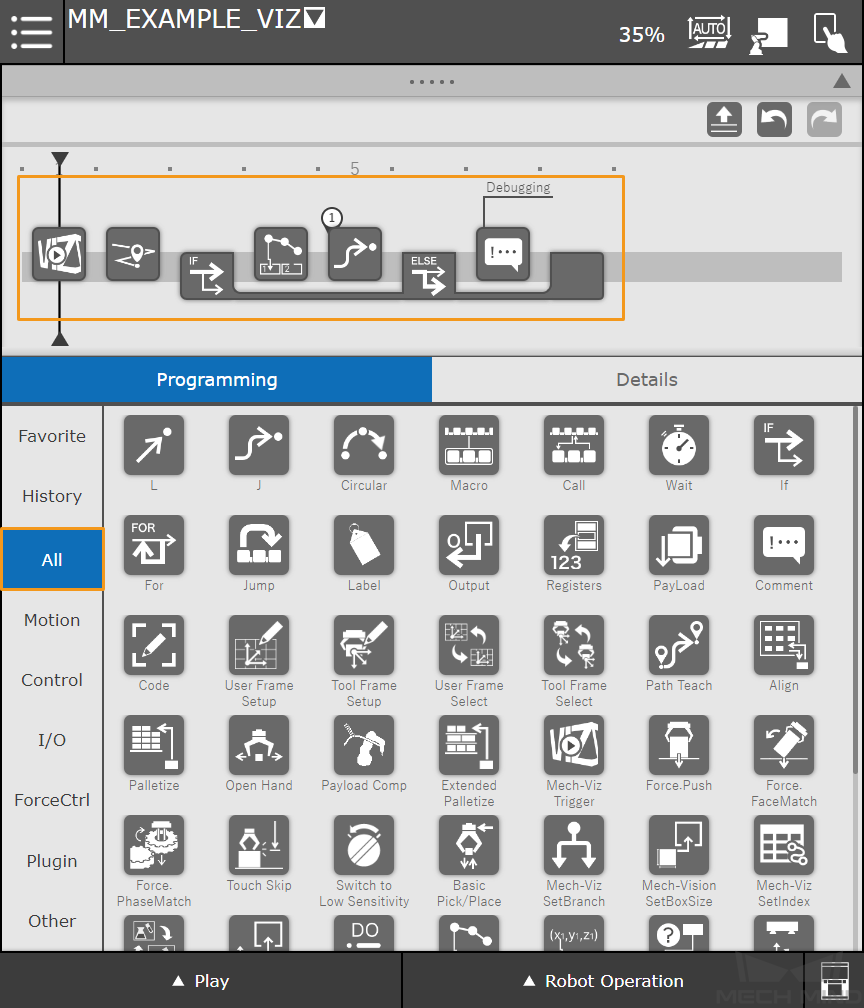
General workflow of the program is:
The Mech-Viz Trigger command triggers the Mech-Viz project to run.
The Mech-Viz GetData obtains the planned path from Mech-Viz and stores the status code in a register (R[53] for example).
The If command determines whether the planned path is received successfully.
If the planned path is received successfully, the Mech-System GetPoseJPS command will store the first waypoint sent from the Mech-Viz project to a specified register (R[60] for example), and then the robot will move to the first waypoint in the J (joint) motion type.
If the planned path is not received successfully, debugging will be performed. The detailed programming of the debugging process is omitted in this example.
Press If and configure the parameters as shown below.
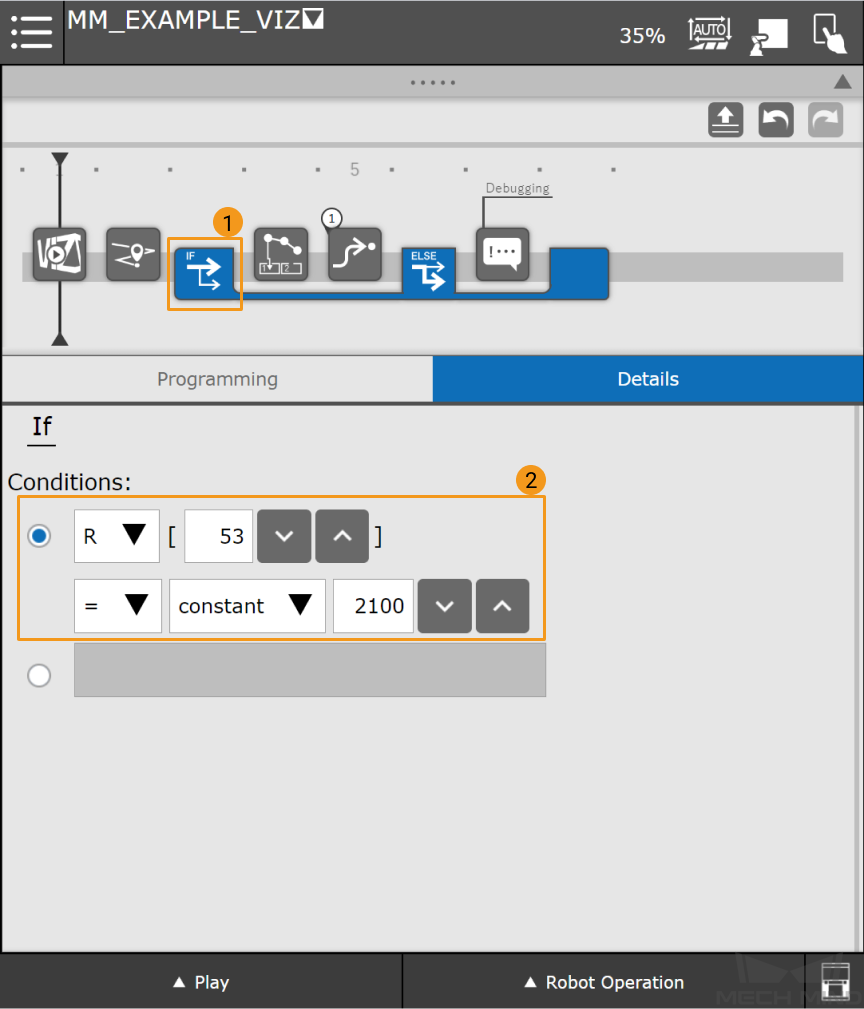
The If command will check the status code which is stored in R[53]. If the value of R[53] is 2100, the planned path is received successfully, or else a debugging process should be performed.
Press J and configure the position register as shown below.

The first waypoint sent from the Mech-Viz project is stored in PR[60] as joint positions. Once the planned path is received successfully, the robot will move to the PR[60] position in the J (joint) motion type.
If you want Mech-Viz to send waypoints in TCP, please modify the Return Value Type in Mech-Viz GetData to TCP.

Now you have built a simple program which uses Mech-Viz to plan the path for picking. Once you have switched the teach pendant to the Automatic mode, you can select Play in the lower left corner and reduce the velocity. Then you can press Run to run the program.