Configure Robot Tools and Workobjects
Once you finish the configurations in this chapter, you will be able to:
Have the robot tool displayed in the 3D simulation area.
Add robot tools to collision detection.
Allow Mech-Viz to plan the path and picking strategy for the robot.
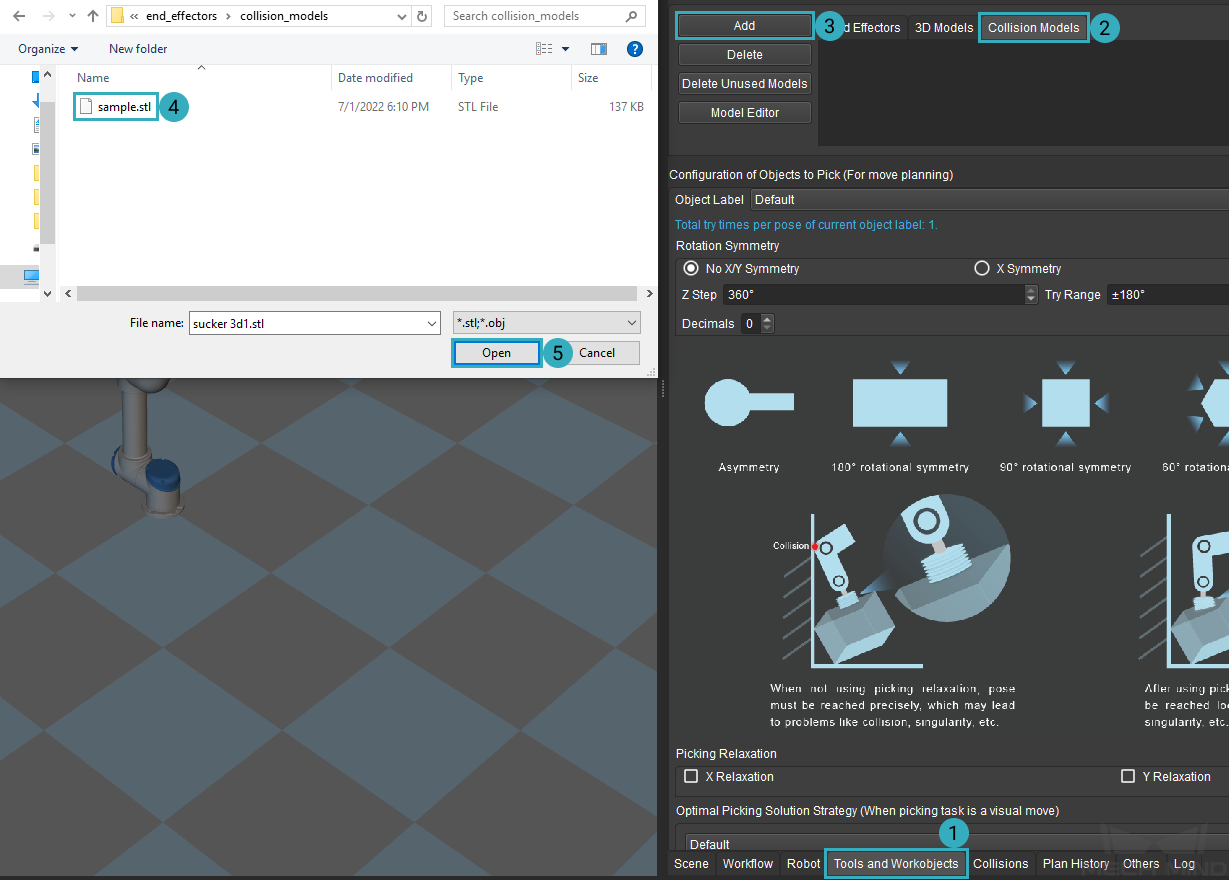
Add Collision Model
The robot tool model file used in the example project is located in \sampleviz\end_effectors\collision_models.
Click on the Tools and Workobjects tab in the lower right.
Click on the Collision Models tab at the top.
Click on Add on the left.
Select the sample STL file from the above location.
Click on Open.
Adjust Model Position
The added tool model may not be in the correct position and thus requires adjustment.
In the figures below, the left one is a correctly positioned tool model, but the model that you just added probably looks like the one on the right.
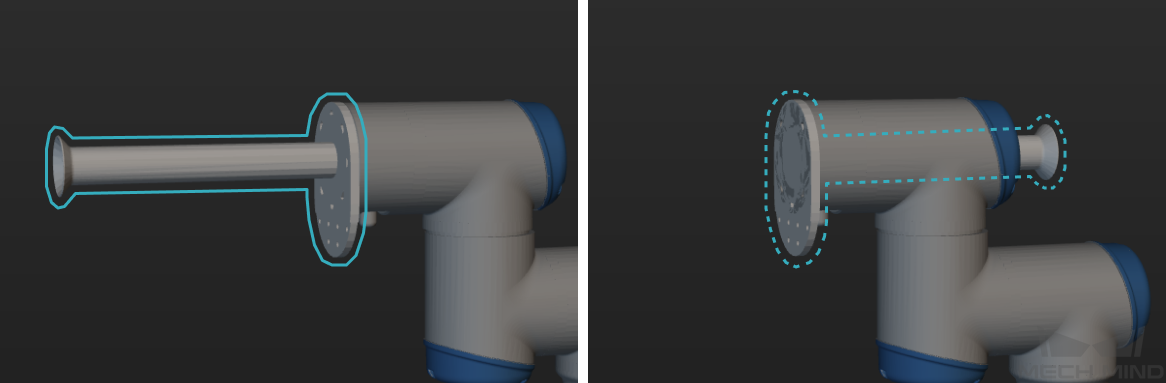
With the axes displayed, you can see that the tool model is flipped about its Y-axis (green).
So in this case, all you need to do is flip it around.
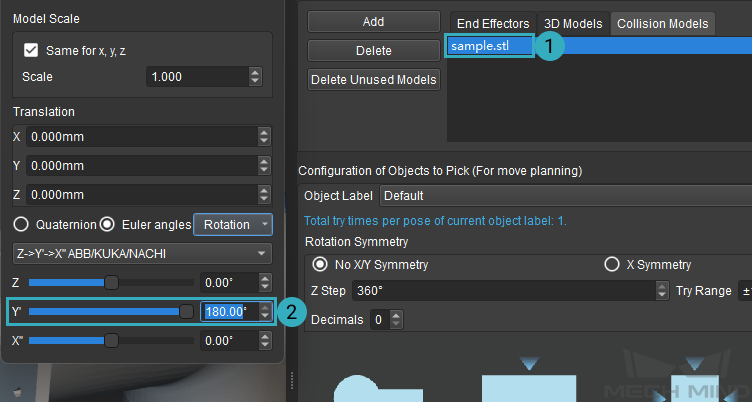
Double-click on the model name in the Collision Models tab.
In the pop-up window, change the value of Y’ to 180°.
Hint
In this window, you can adjust the scale, position and rotation of the model. In real applications, please adjust these parameters according to your actual needs.
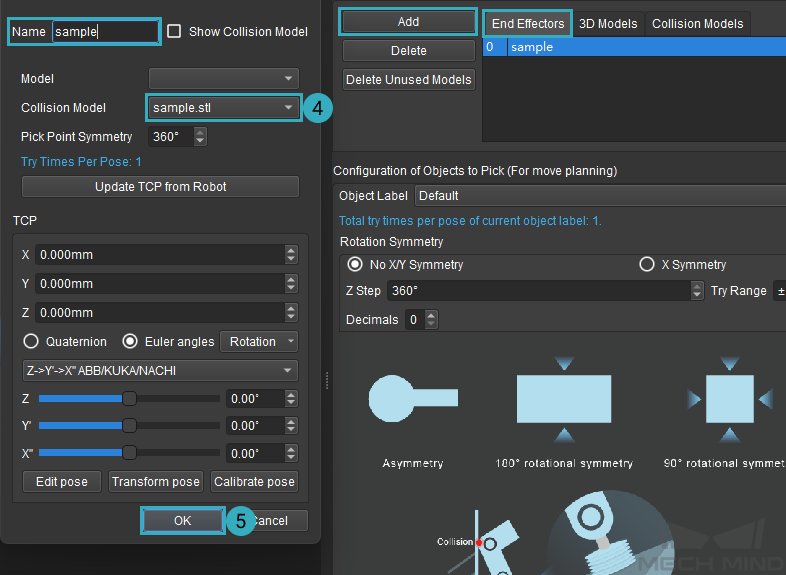
Add End Effector
After adding the tool model to Collision Models, you need to add it to End Effectors as well for adjusting the TCP and switching tools when multiple tools are used.
Click on the End Effectors tab to the left of Collision Models.
Click on Add.
In the pop-up window, type in a name for the robot tool.
Select the corresponding model from the drop-down menu of Collision Model.
Click on OK at the bottom to save the changes.
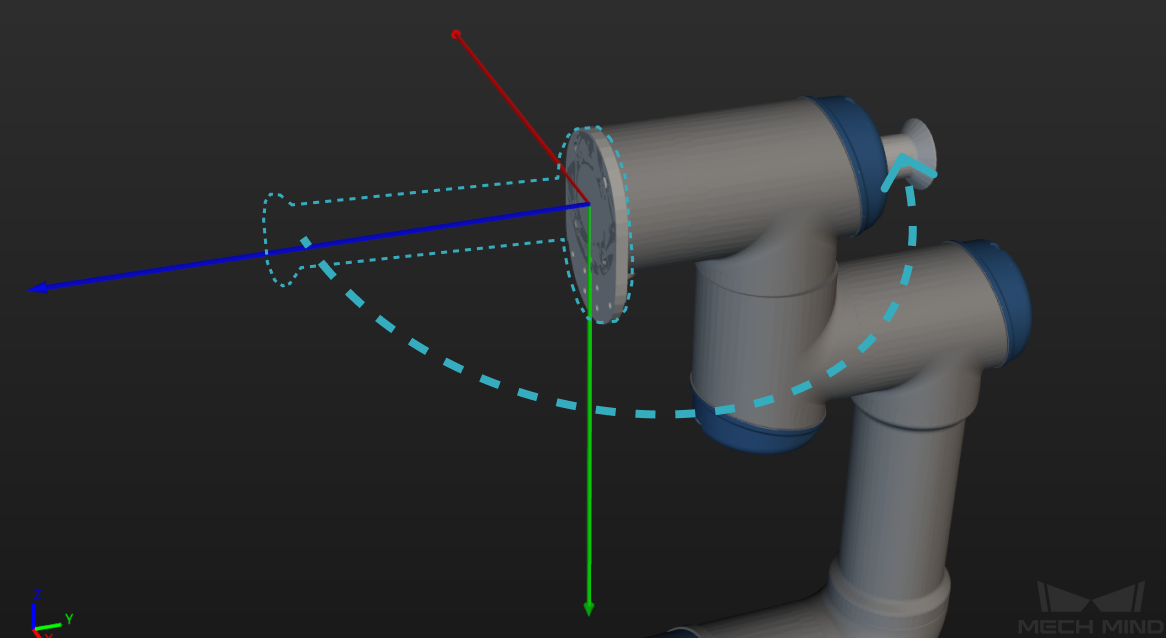
Adjust Tool Center Point (TCP)
In the 3D Collision Area, the TCP is represented by the origin of the axes. Its default position is at the center of the robot flange. After adding a robot tool, you’ll need to move the TCP to where the tool actually interacts with workobjects.
Double-click on the model name in the End Effectors tab.
In the pop-up window, increase the value of Z until the TCP is at the tip of the tool.
Click on OK to save the changes.

Note
In real applications, please input the calibrated TCP values. You can also use the Update TCP from Robot button to automatically fetch the current TCP values set on the robot.
The figure below shows the TCP before (left) and after (right) the above adjustment.

Configure the Workobject
After configuring the robot tool, you’ll need to configure the workobject (in this case, the carton) so that Mech-Viz can plan the robot path and picking strategy according to the characteristics of the workobject.

The following sections in the Tools and Workobjects tab can be configured:
Rotation Symmetry: Here you can set the rotational symmetry of the workobject. In the example project, the carton’s top surface is to be picked by the robot. This surface is a rectangle, and it overlaps with itself if you rotate it 180° about the its Z-axis (blue). Since in our simple example, the carton will be placed upright and picked by its top surface, you can think of the carton as not having X- or Y-axis symmetry. Therefore, the options to choose are: No X/Y Symmetry, 180° for Z Step, and ±180° for Try Range.
Picking Relaxation: In carton picking scenarios, usually no picking relaxation is set. Because the rim of the suction cup has to be parallel to the carton surface, thus ensuring a firm grasp on the carton. Therefore, the robot must reach the picking pose precisely.
Optimal Picking Solution Strategy: This parameter determines how much the robot tool is rotated during picking. In our example, set it to Default to avoid unnecessary rotation after the carton is picked up, which may result in dropping of the the carton.
If picking relaxation is set, the robot doesn’t have to reach the picking pose precisely.