Exposure Assistant
This tool is to help you obtain the optimal 3D exposure parameter settings. It works in two moes: AutoMode, ManualMode. You can open this tool via .
AutoMode
Click on Scan Once in the lower right corner of the Exposure Assistant window, as shown below.

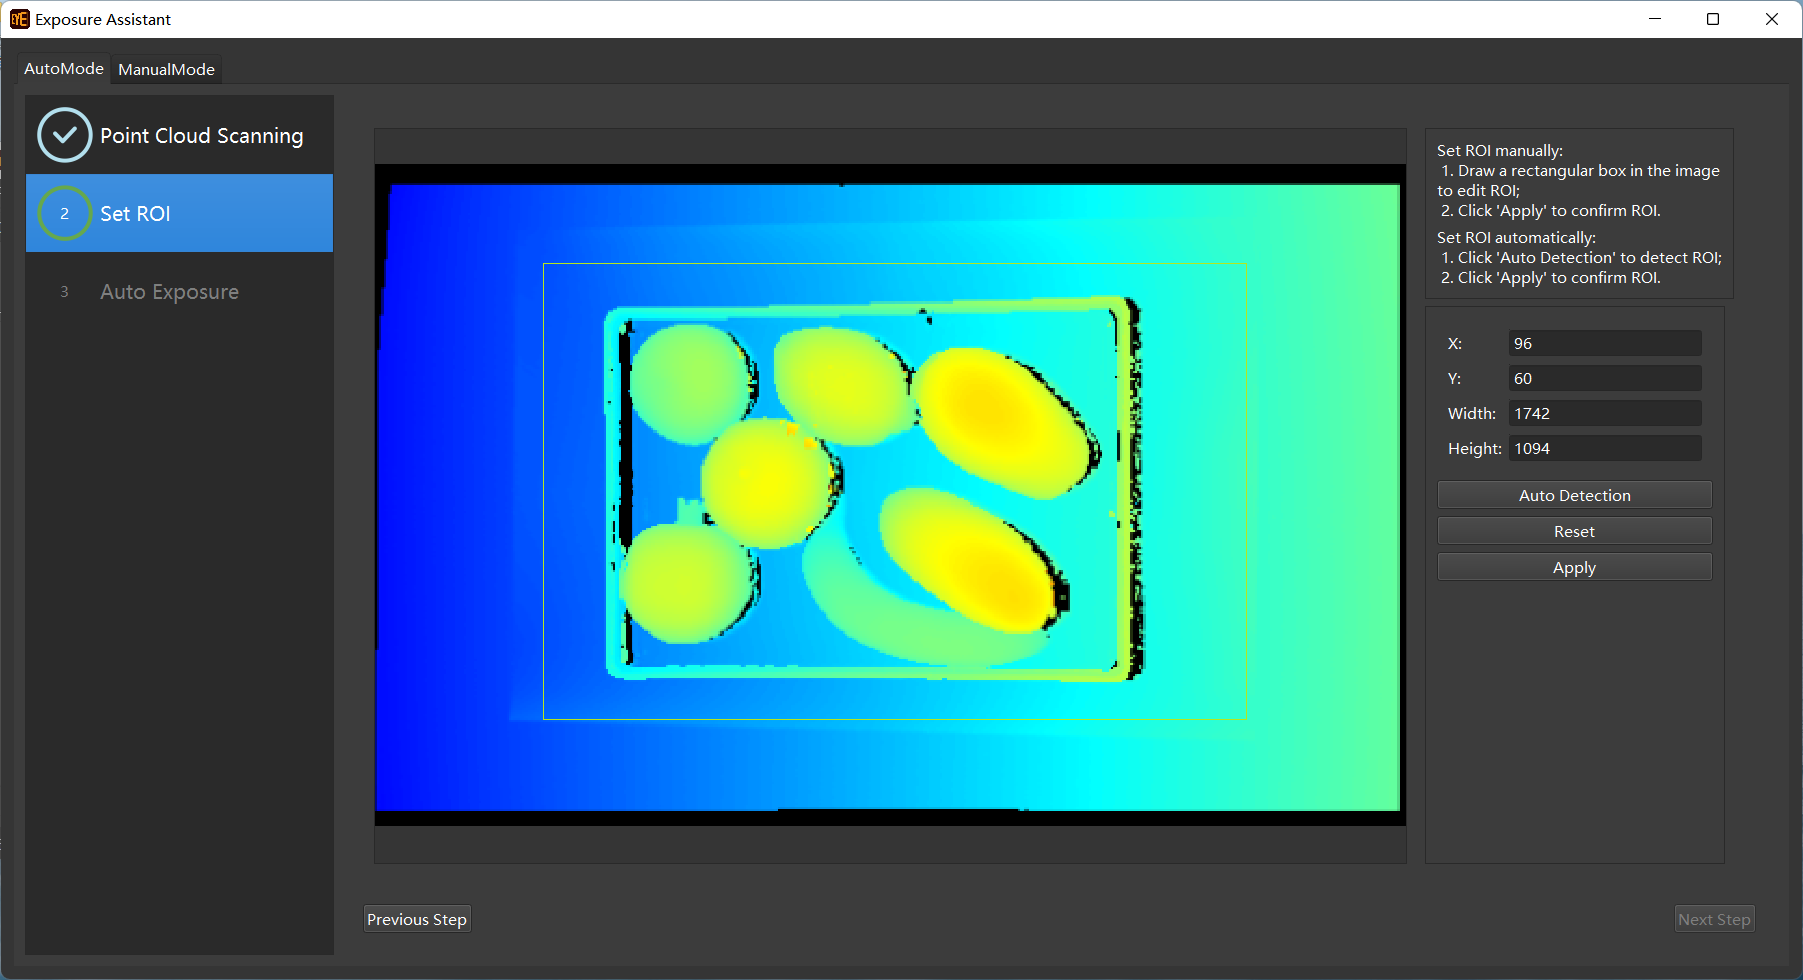
In AutoMode, the software will automatically set an ROI. If you need to customize the ROI, please manually set the ROI and click on Apply. Click on Next Step.
Click on Start to obtain the optimal 3D exposure parameter settings, as shown in the figure below.
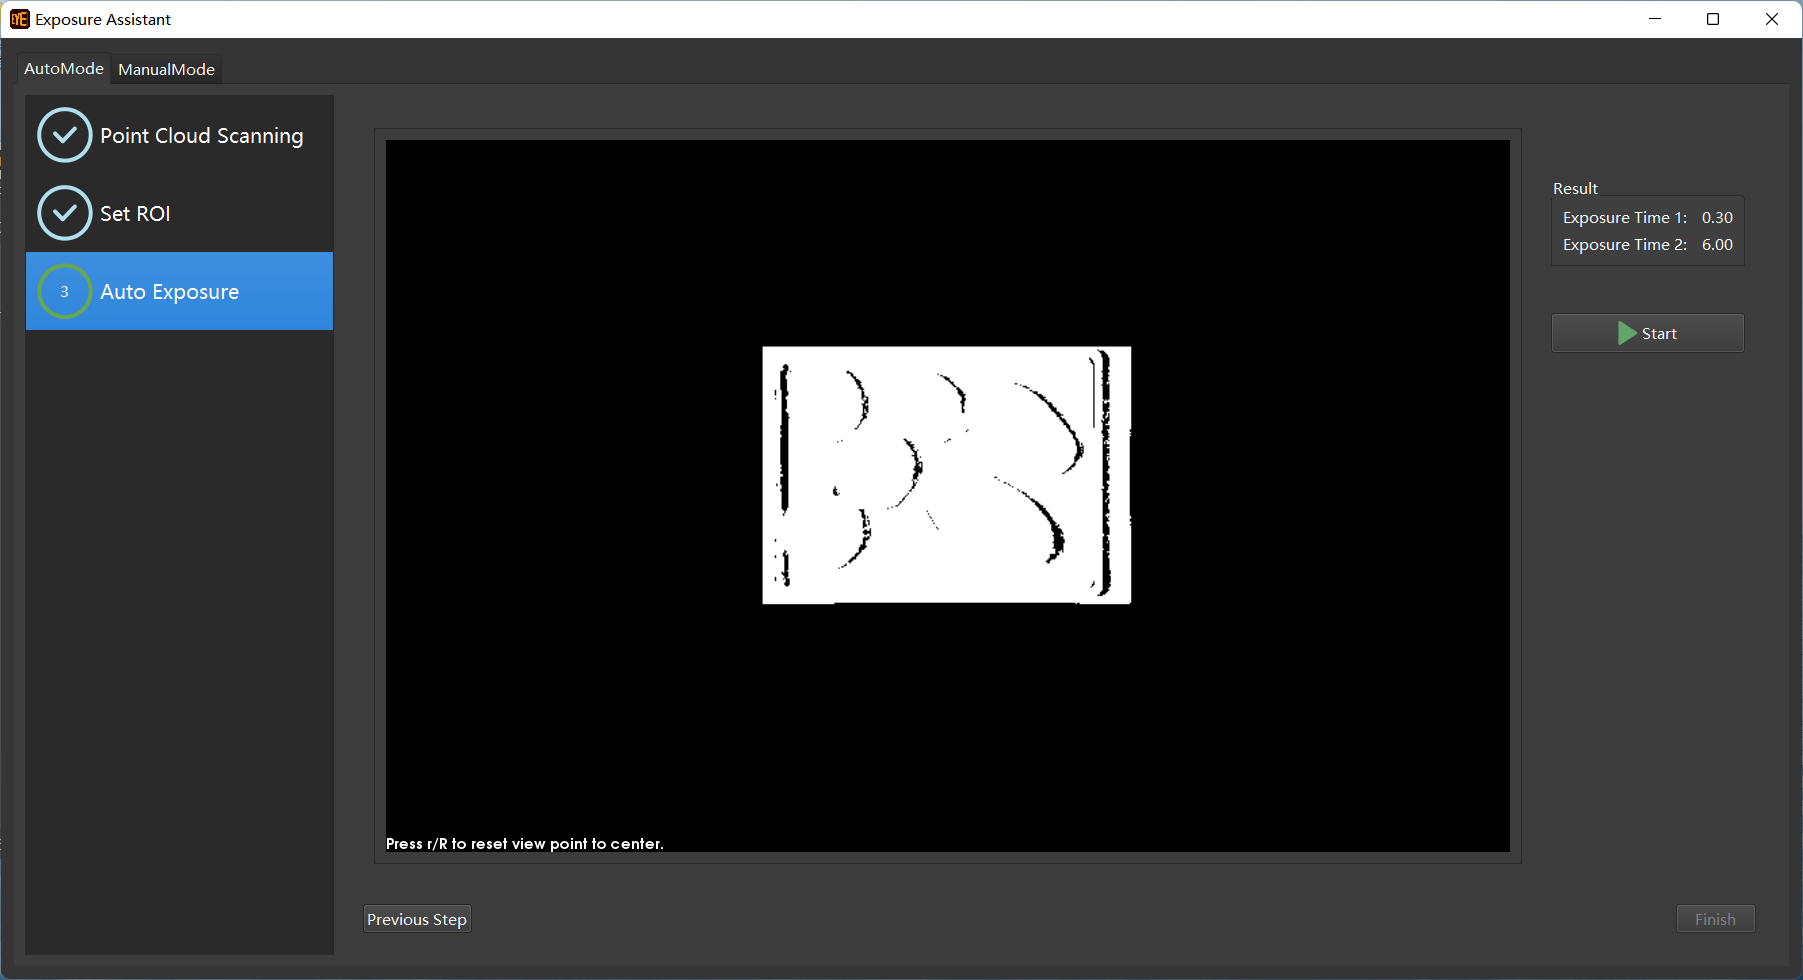
Please manually copy the optimal 3D exposure parameter settings into the camera’s 3D exposure parameters, i.e., scan multiplier, exposure time(s).
ManualMode
Interface
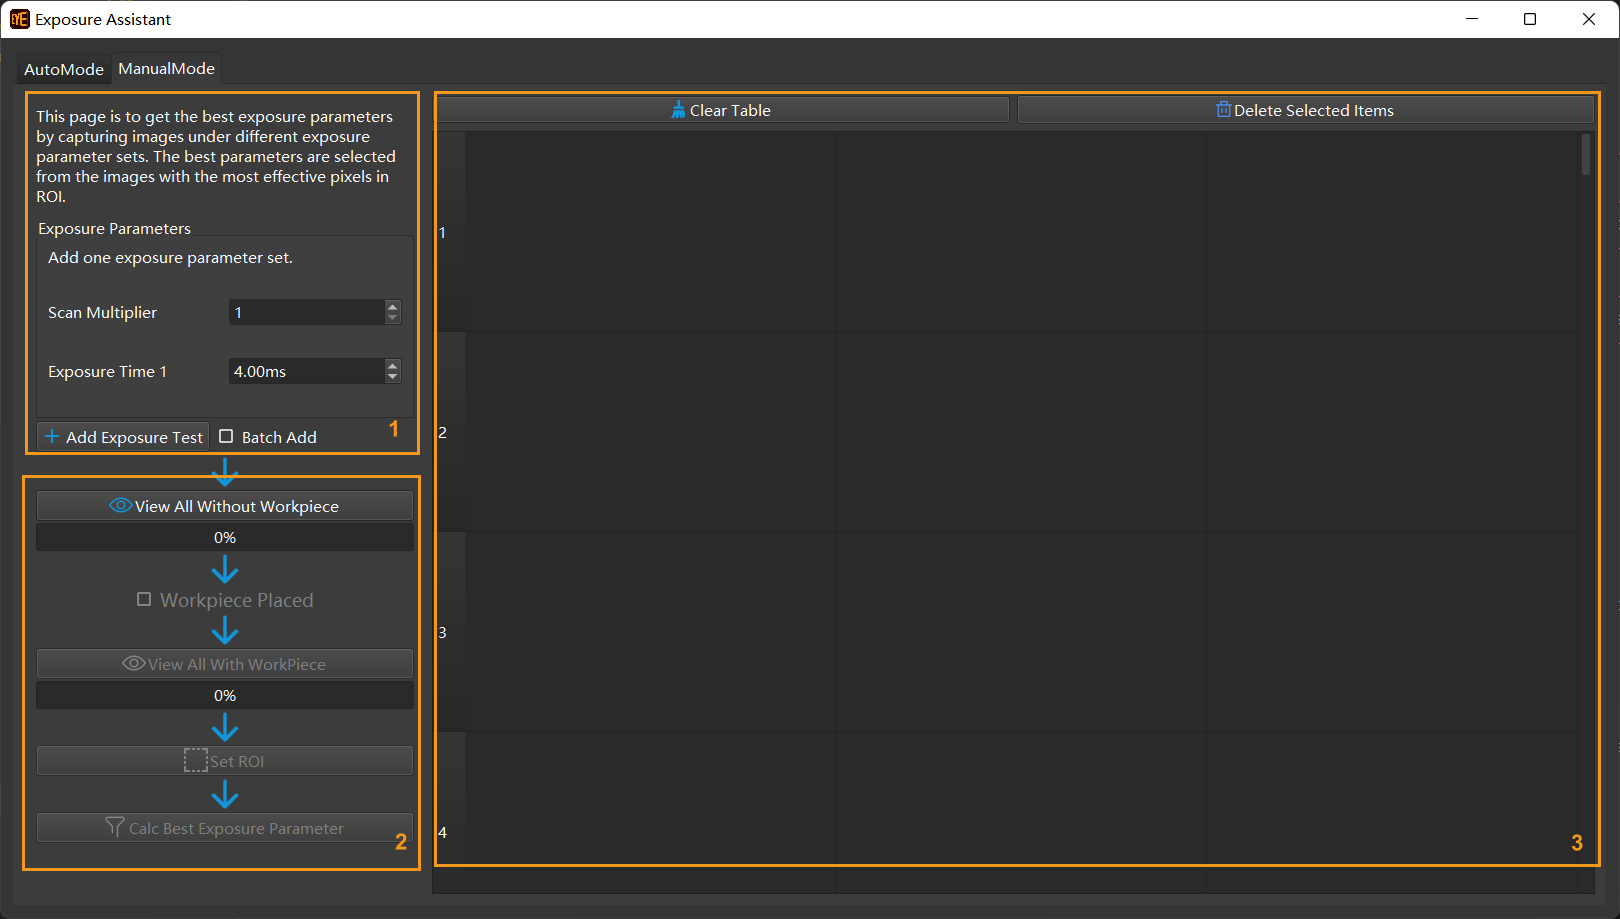
The interface of Exposure Assistant in the manual mode is as shown below:
No. |
Section |
Use |
1 |
Exposure parameters |
You can add test samples by adding different settings on scan multiplier and exposure time for testing in this section. |
2 |
Workflow |
After adding all the test samples required, you can start the workflow to obtain the optimal parameter settings. |
3 |
Test samples |
All the test samples added are shown here. You can delete test samples or modify sample parameter settings in this section. |
Steps
1. Add test samples
There are two ways to add test samples: add single exposure test and batch add.
Attention
For dark objects please set longer exposure times. For reflective objects, please set shorter exposure times. For laser cameras, the scan times (in ms) must be multiples of 4.
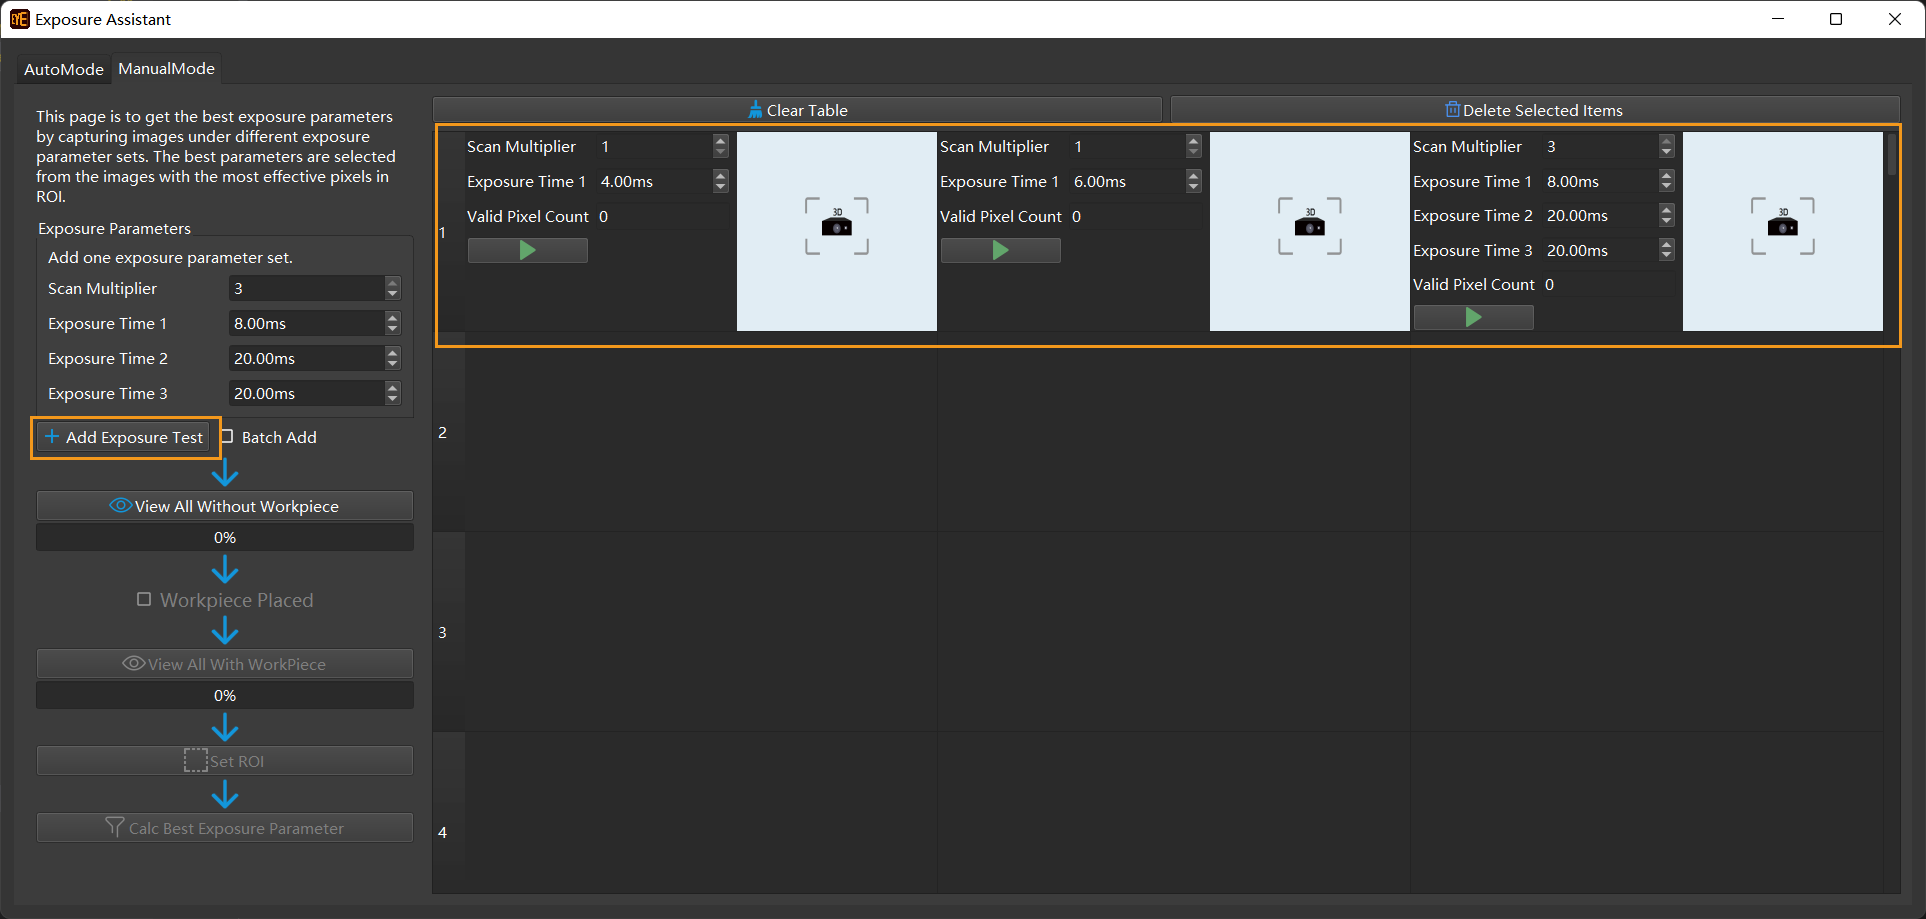
Add single exposure test
You can set the scan multiplier and exposure time(s) for a new test sample and click on Add Exposure Test to add the test sample.
The new sample added will appear on the right.
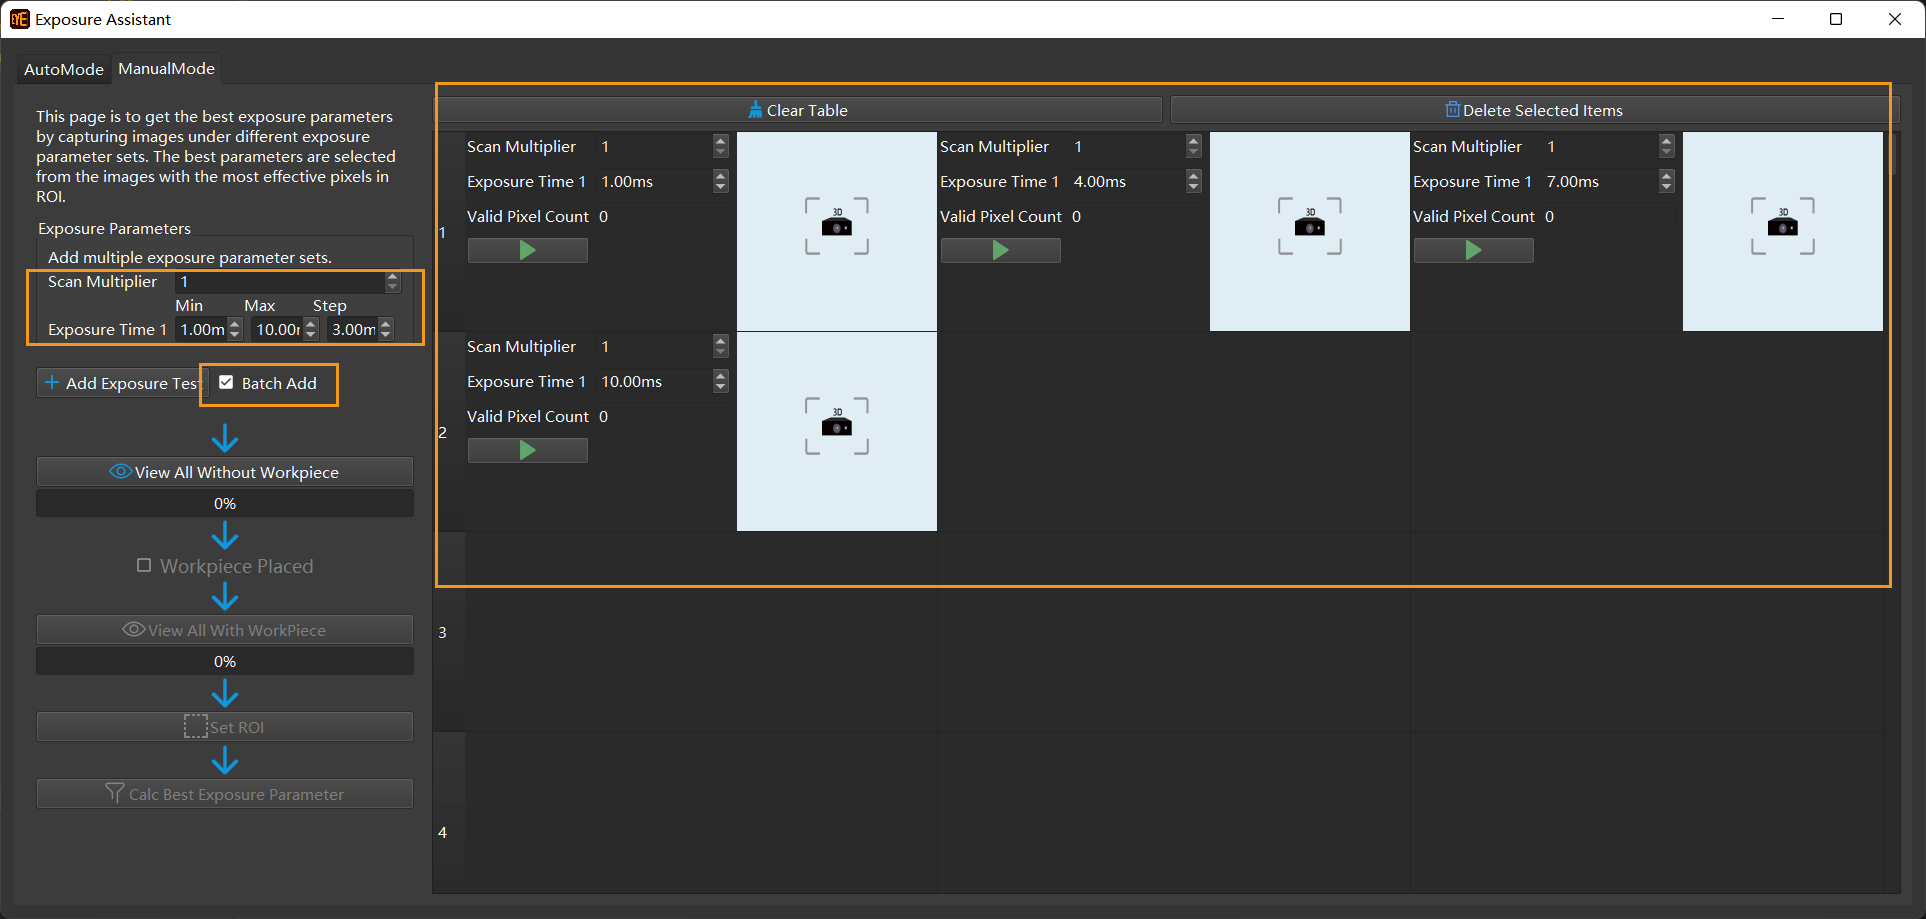
Batch add
After checking the box Batch add, please set the scan multiplier for the test samples in the batch to add, and set the min, max and step for generating the exposure times for the test samples.
When done setting, please click on Add Exposure Test to add the batch. The new samples added will appear on the right.
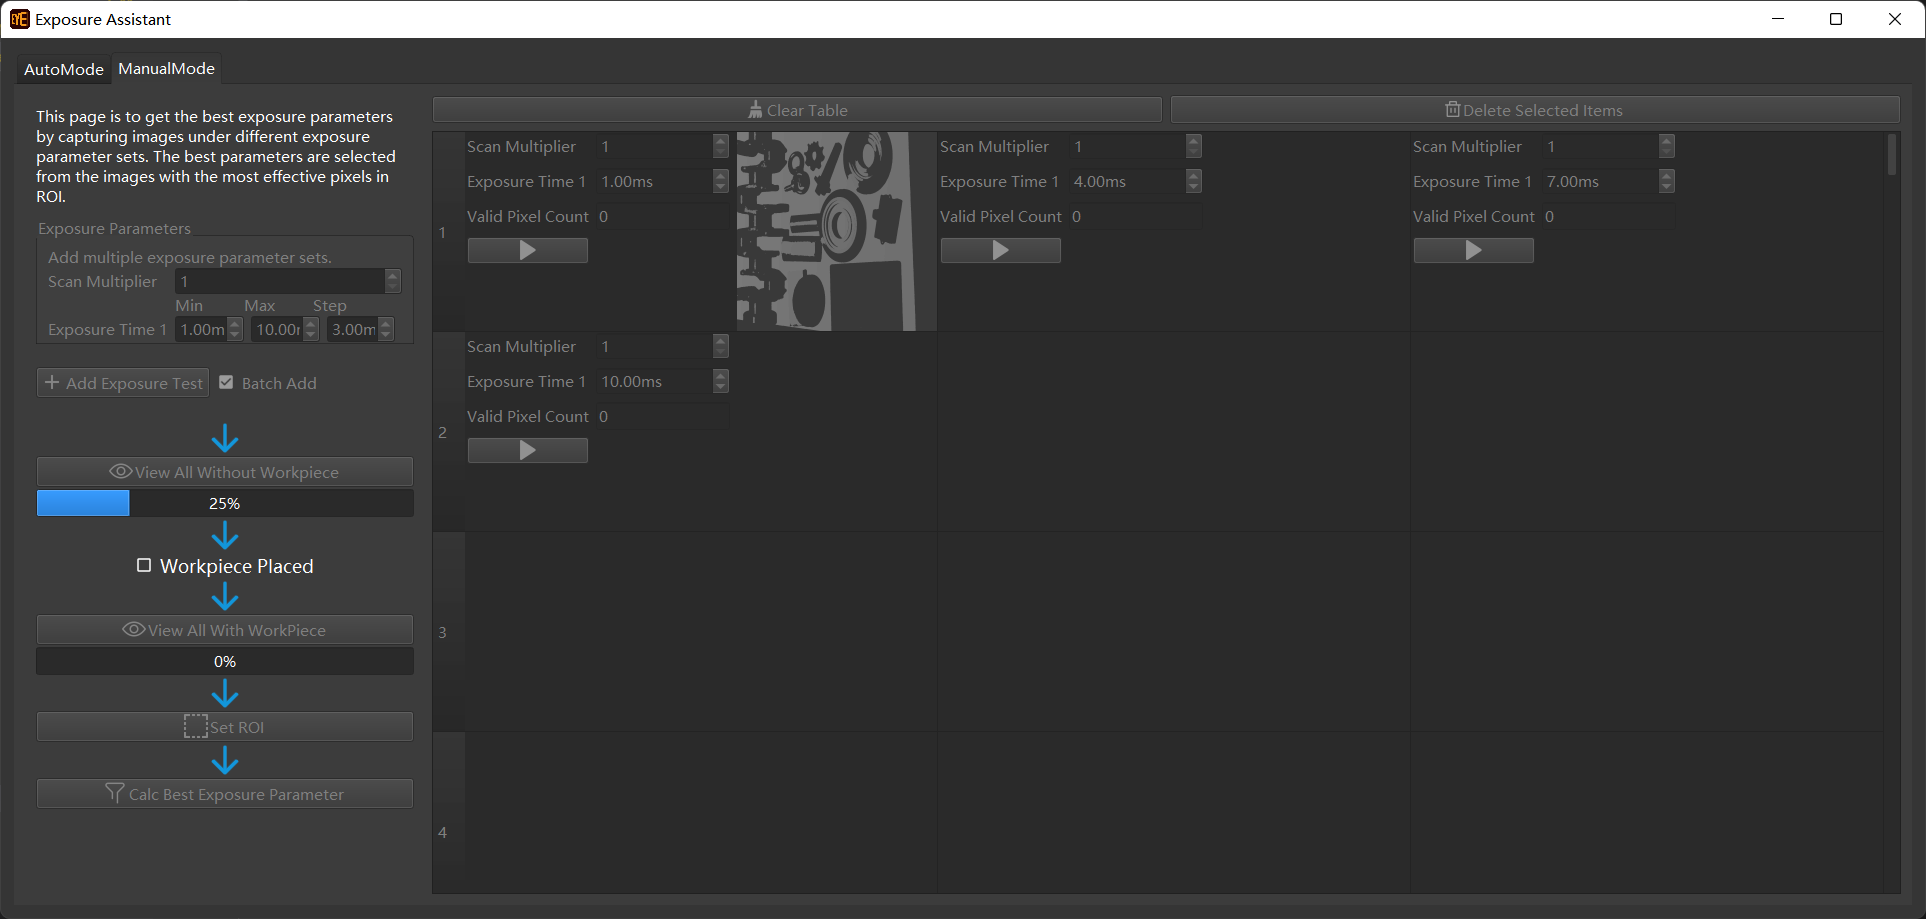
2. View all without workpieces (objects)
After clicking on View All without Workpiece, the software will start the exposure tests on the scene without objects sample by sample and will show the progress by displaying captured images in completed samples.
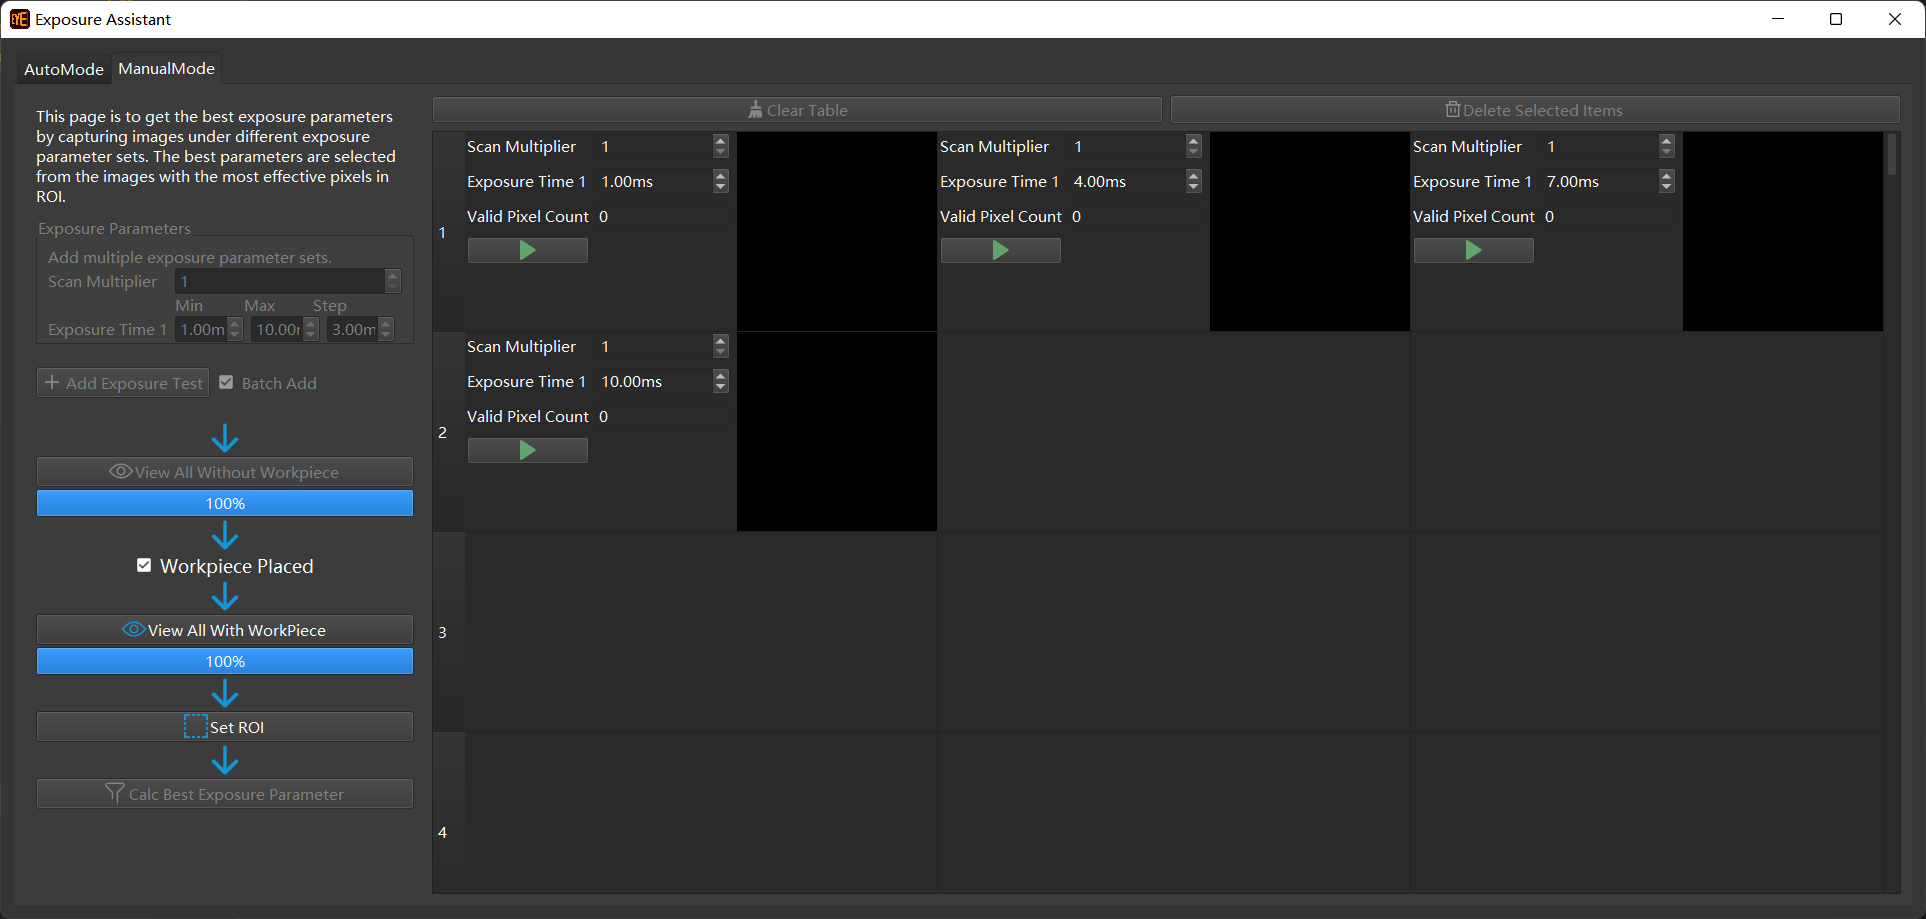
1. Place workpieces (objects)
After the software is done capturing images of the scene without objects for all test samples, please place the objects into the scene, and check the box Workpiece Placed.
4. View all with workpieces (objects)
After you click on View All without Workpiece, the software will start the exposure tests on the scene with objects sample by sample and will show the progress by displaying captured images in completed samples.
5. Set ROI
After clicking on Set ROI, you can set the ROI on the image in the first test sample on the right.
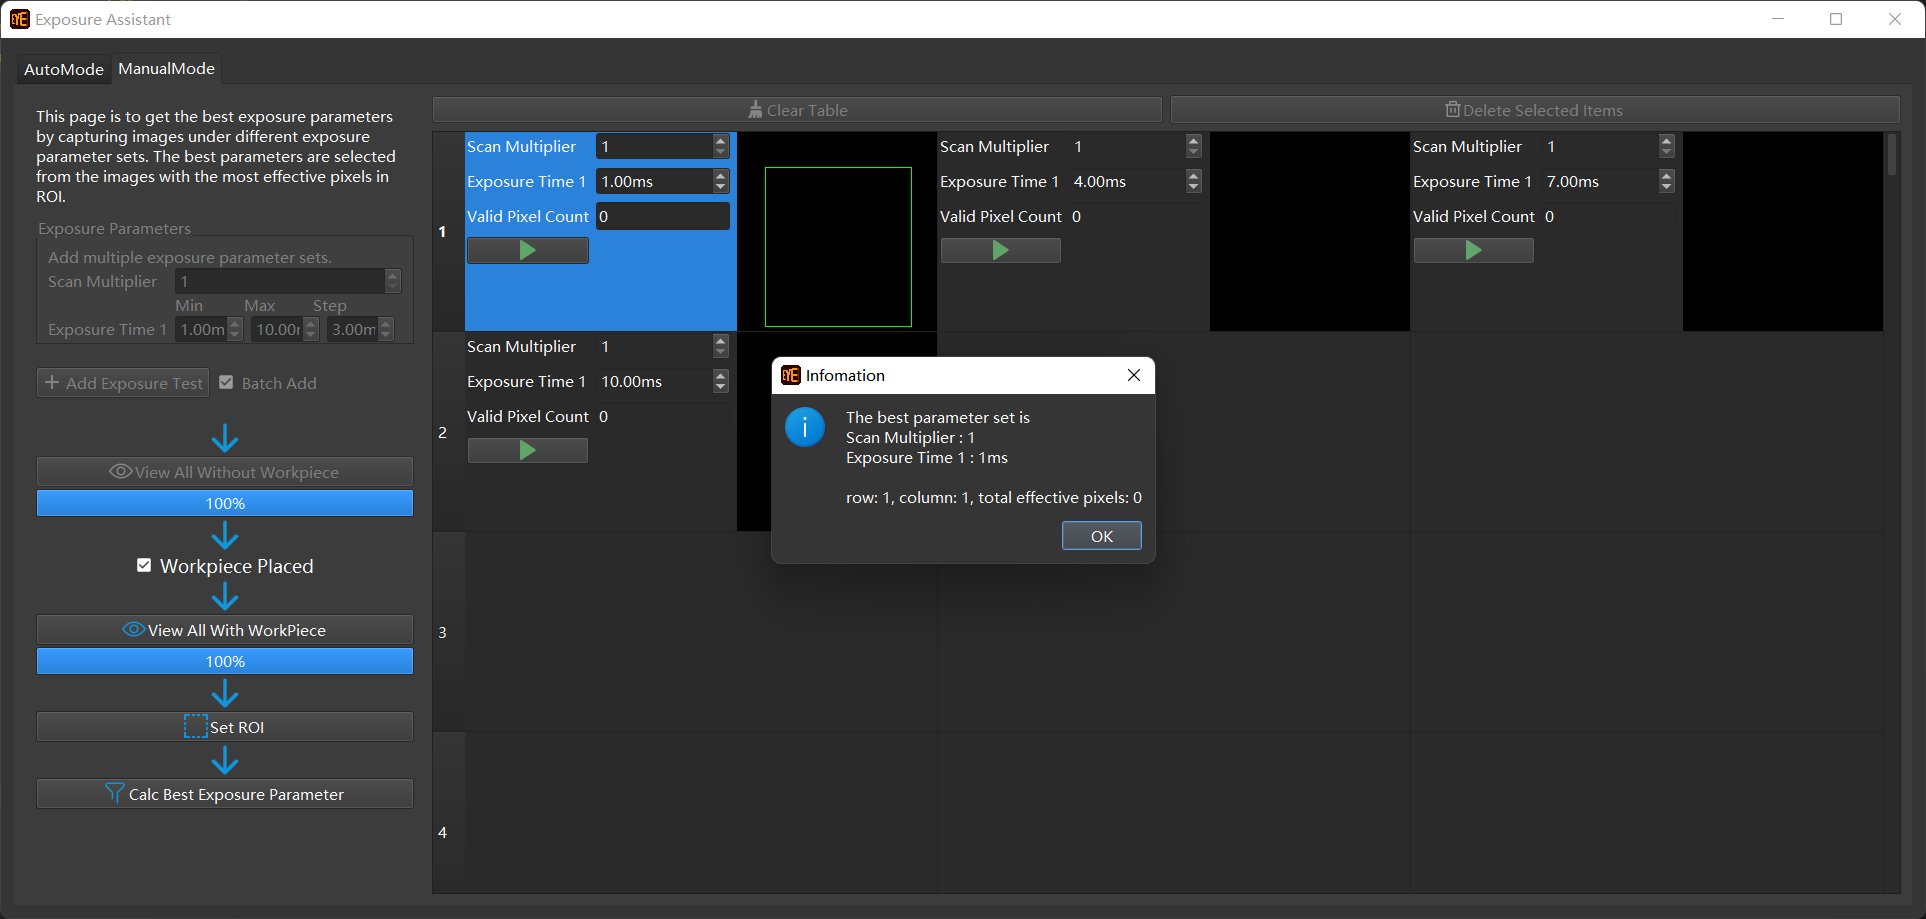
6. Calculate optimal exposure parameter settings
After clicking on Calc Best Exposure Parameter, a window indicating the optimal exposure parameter settings will pop up. The optimal parameter settings are obtained from the test set with the largest quantity of effective pixels.
7. Apply the optimal exposure parameter settings to the camera
After getting the optimal exposure parameter settings, you can close the Exposure Assistant and a pop-up window will ask you if you want to apply the optimal settings to the camera. Please click on OK to apply the settings.