Use the Object Detection Module
Please click here to download an image dataset of rotors. In this section, we will use an Object Detection module and train a model to detect the rotors in the image and output the quantity.
Create a new project and add the object detection module: Click on New Project in the interface, name the project, and select a directory to save the project. Click on
 in the upper right corner of the Modules panel and add the Object Detection module.
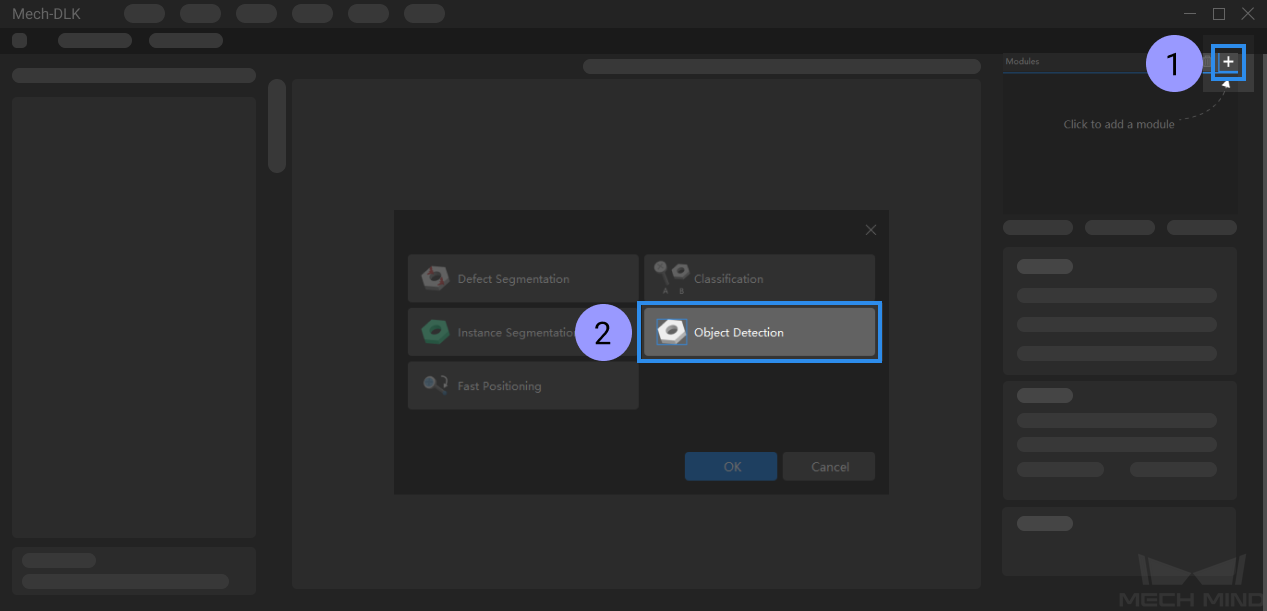
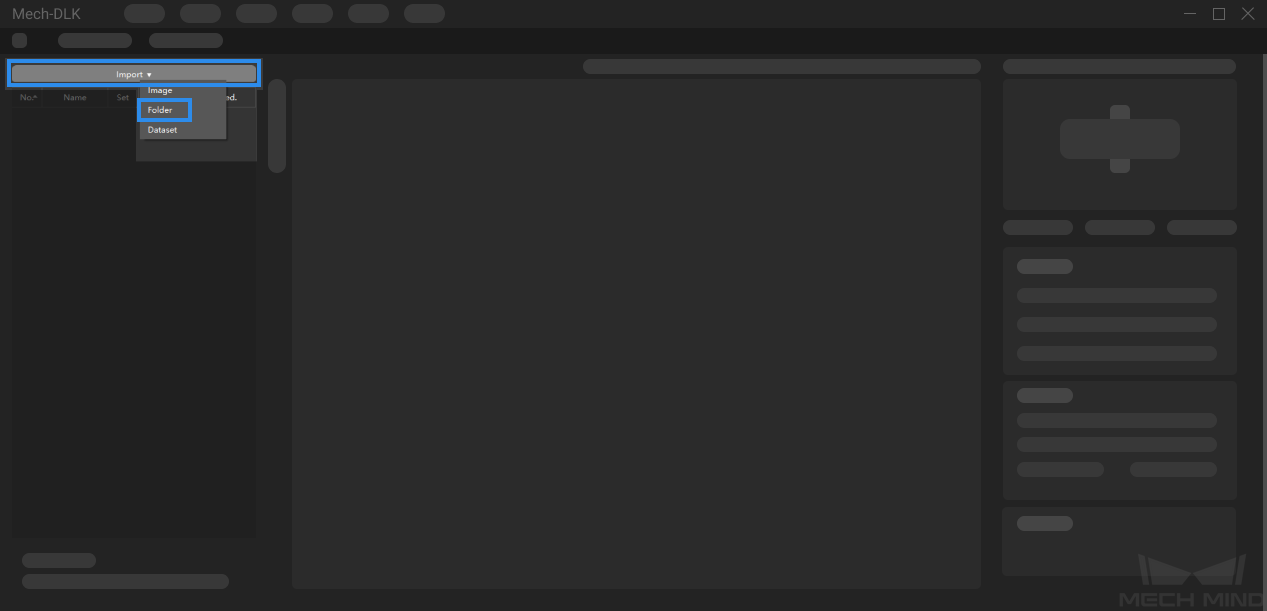
Import the image dataset of rotors: Unzip the downloaded dataset file. Click on the Import button in the upper left corner, select Folder, and import the image dataset.
Select an ROI: Click on the ROI Tool button
 and adjust the frame to select the bin containing rotors in the image as an ROI, and click on Apply to save the settings. Setting the ROI can avoid interferences from the background and reduce processing time.
Split the dataset into the training set and validation set:
By default, 80% of the images in the dataset will be split into the training set and the rest 20% will be split into the validation set. Please make sure that both the training set and validation set include objects of all classes to be detected, which will guarantee that the algorithm can learn all different classes and validate the images properly.
If the default training set and validation set cannot meet this requirement, please click on
 and drag the slider to adjust the proportion.
You can also right-click the individual image and switch it to the training/validation set manually.

Create Labels: Select Labeling and click on the
button in the Classes panel to create labels based on the type or feature of different objects. In this example, the labels are named after the rotors.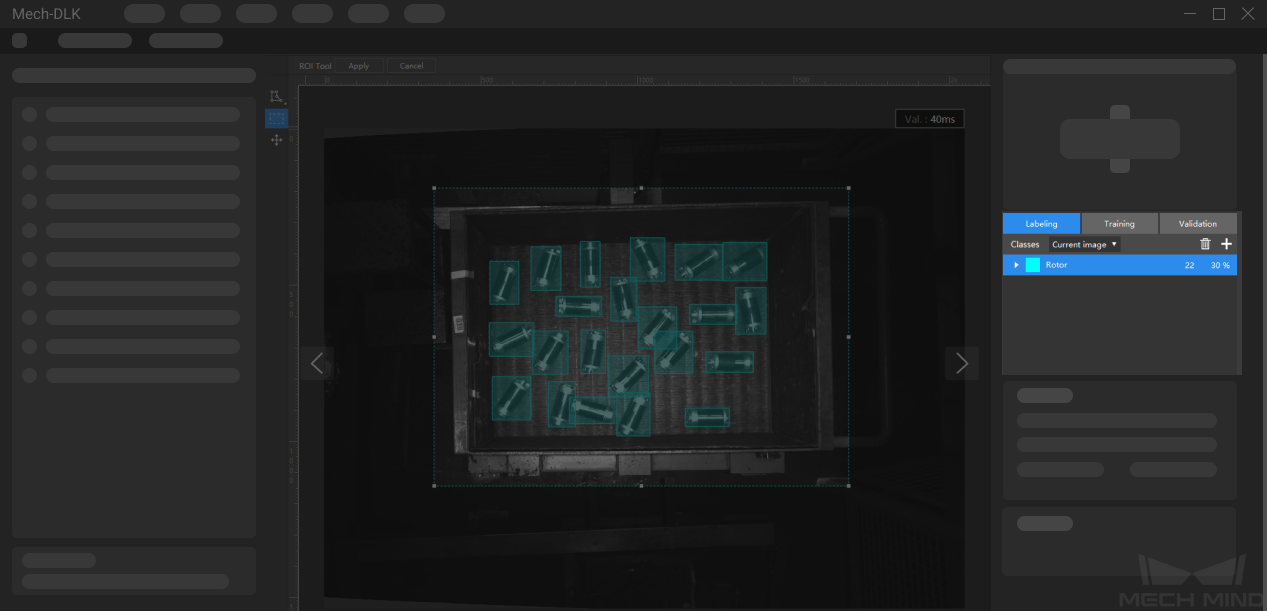
Label images: Right-click on the
 button and select a suitable tool to label the image. Please select the rotors as precisely as possible and avoid including irrelevant regions. Inaccurate labeling will affect the training result of the model.
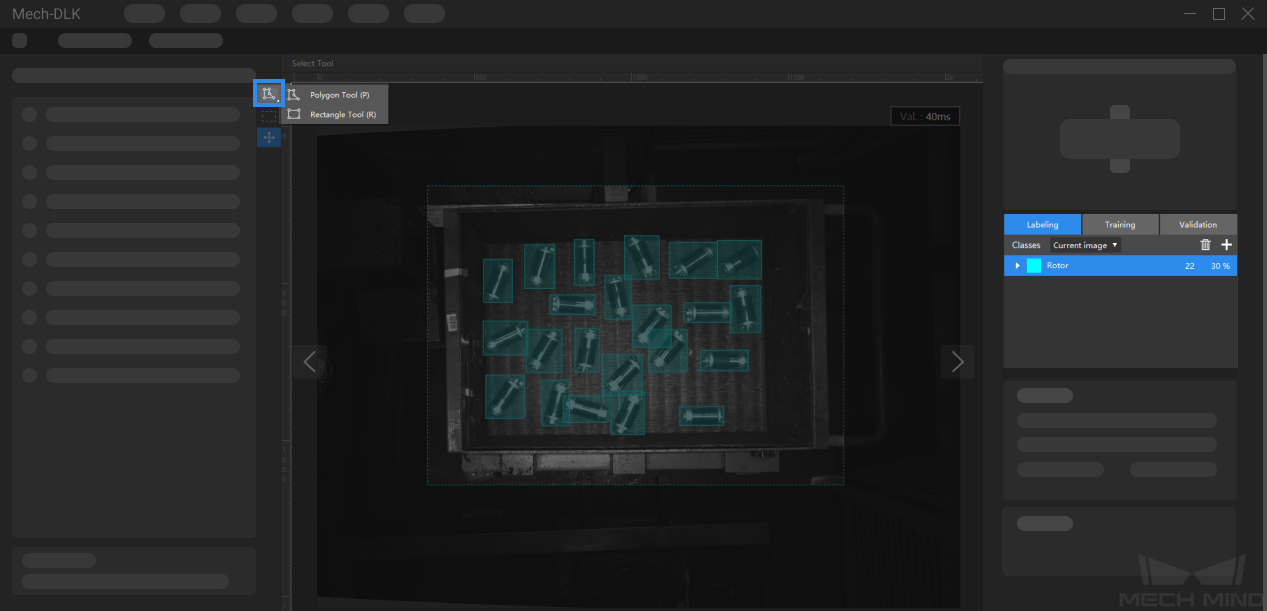
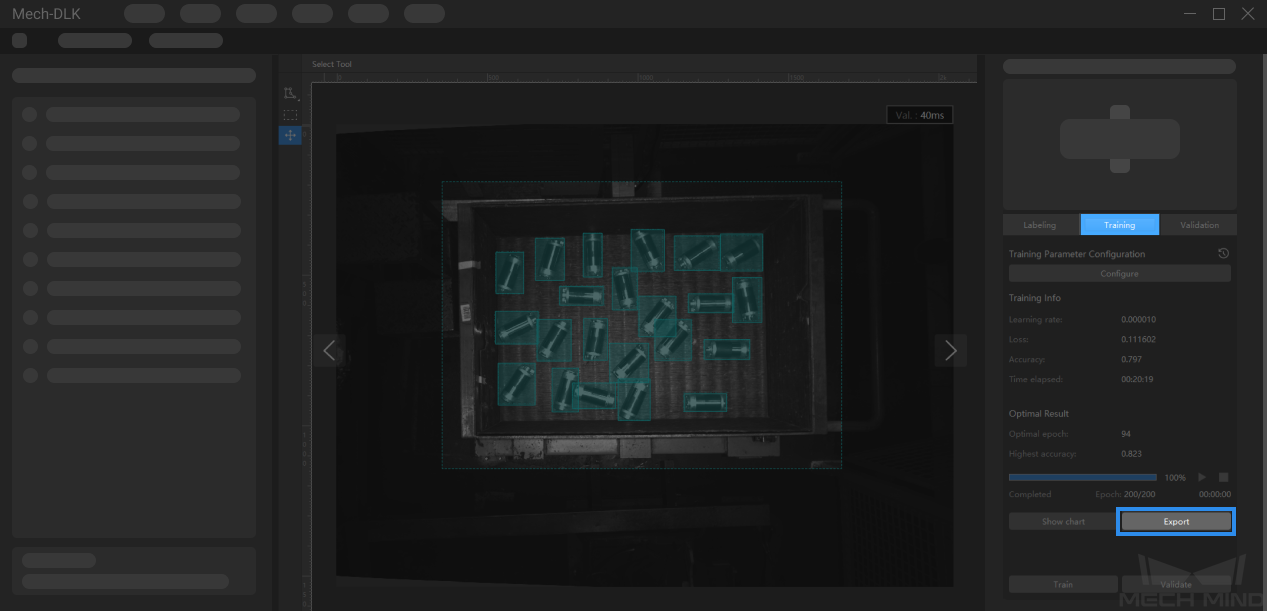
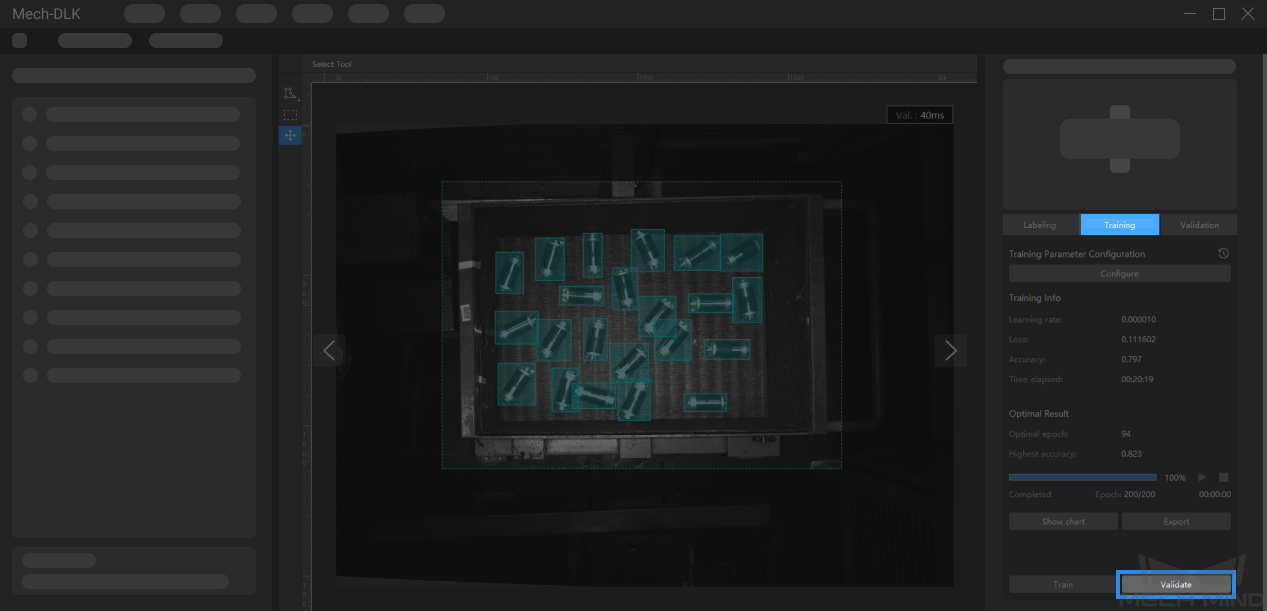
Train the model: Keep the default training parameter settings and click on Train to start training the model.

Validate the model: After the training is completed, click on Validate to validate the model and check the results.
Export the model: Click on Export and select a directory to save the exported model. You can deploy the model according to actual needs.