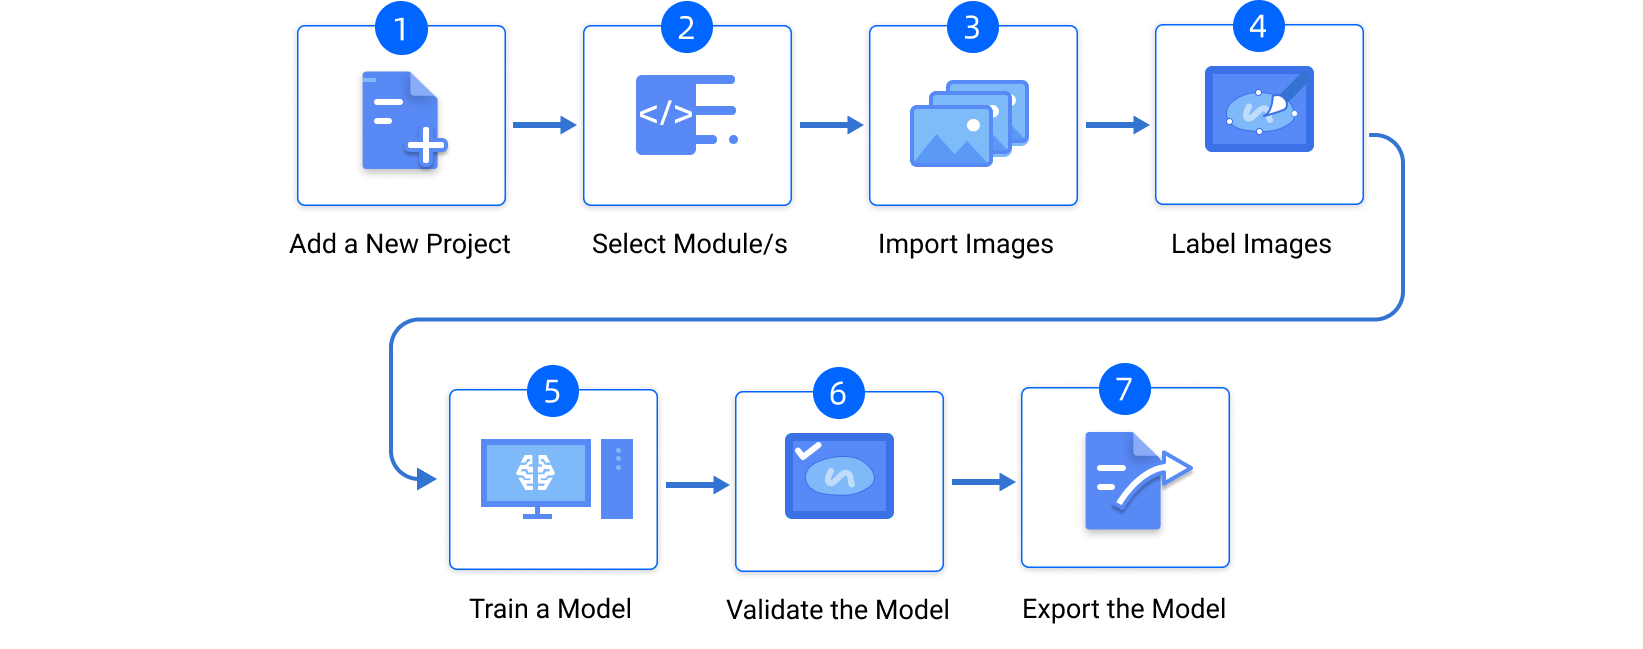
Train Your First Model
This section shows how to train and export an example model that can be used for defect segmentation. The data used for training is from an image dataset of connectors.
Preparation
Click here to download the image dataset and unzip the file.
Training Process
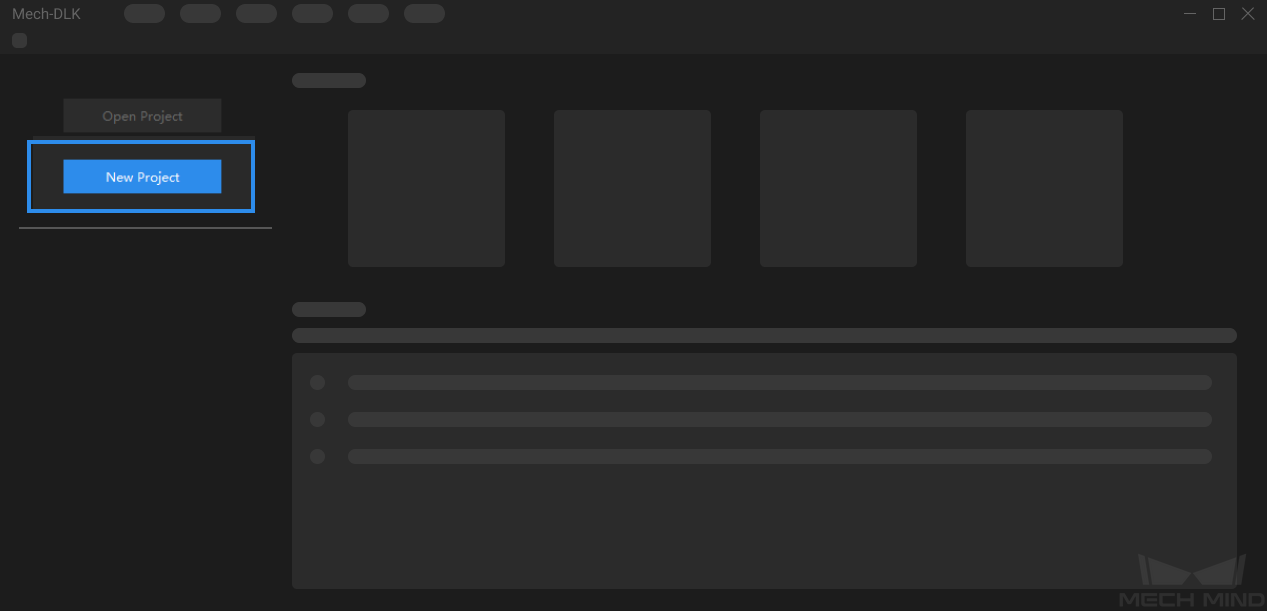
Create a New Project
Click on New Project in the interface, name the project, and select a directory to save the project.
Add the Defect Segmentation Module
Click on
 in the upper right corner of the Modules panel to add a module. Select Defect Segmentation and then click on OK.
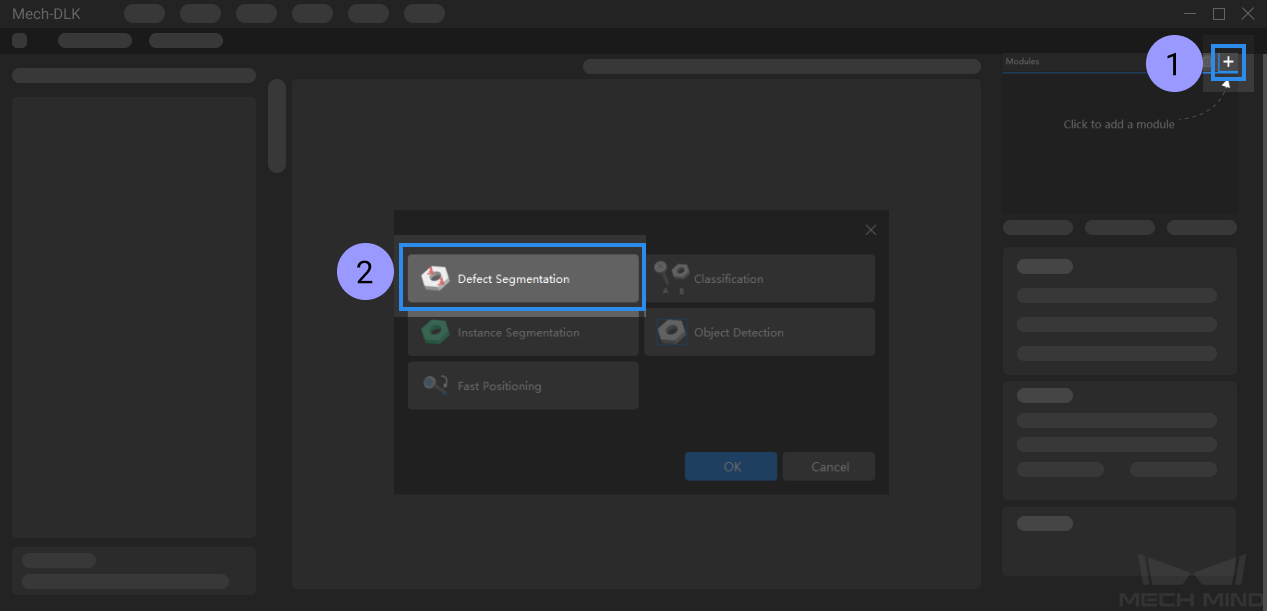
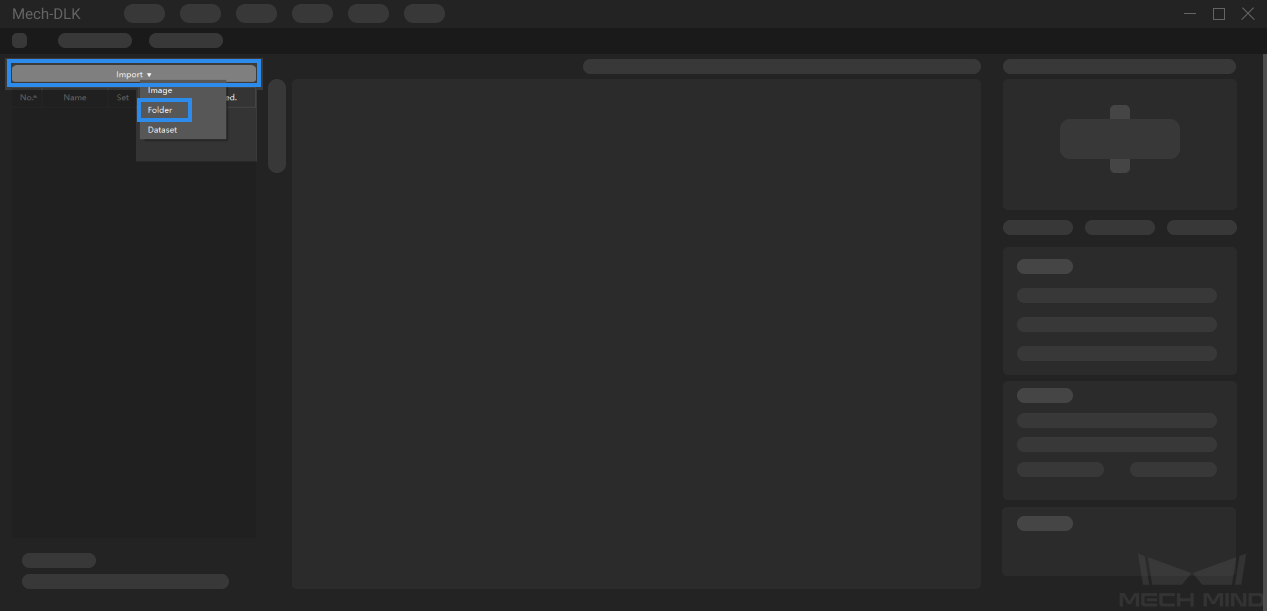
Import Data
Click on the Import button in the upper left corner, select Folder and import the image dataset you have downloaded.
Labeling
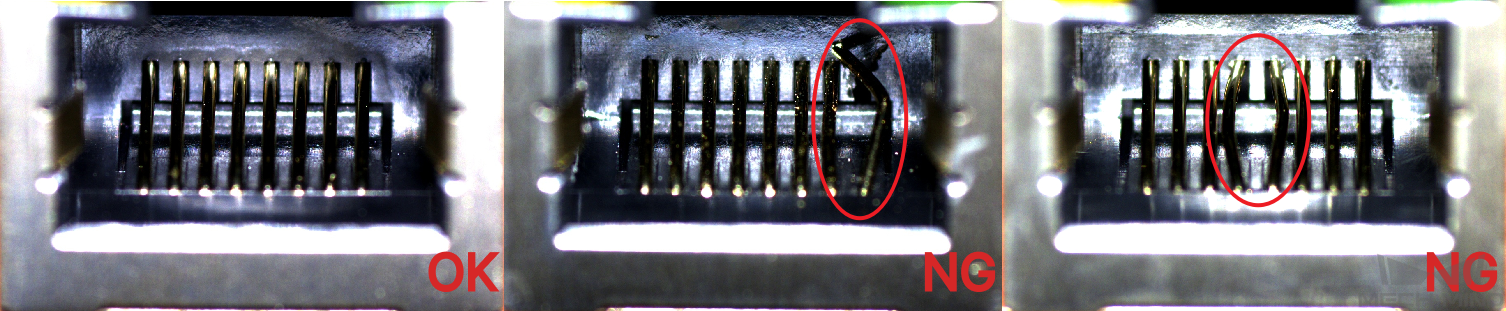
In this example, you will need to label the OK images and NG images in each dataset. OK means that the connectors meet quality requirements and NG means that there are defects such as deformations and fractures on the connectors.
For NG images, click on
 and then hold the left mouse button to select the regions with defects. Click on
  to use the eraser tool to remove the labeled region.
Hint
After selecting the regions with defects, right-click to confirm the selection and exit the polygon tool.
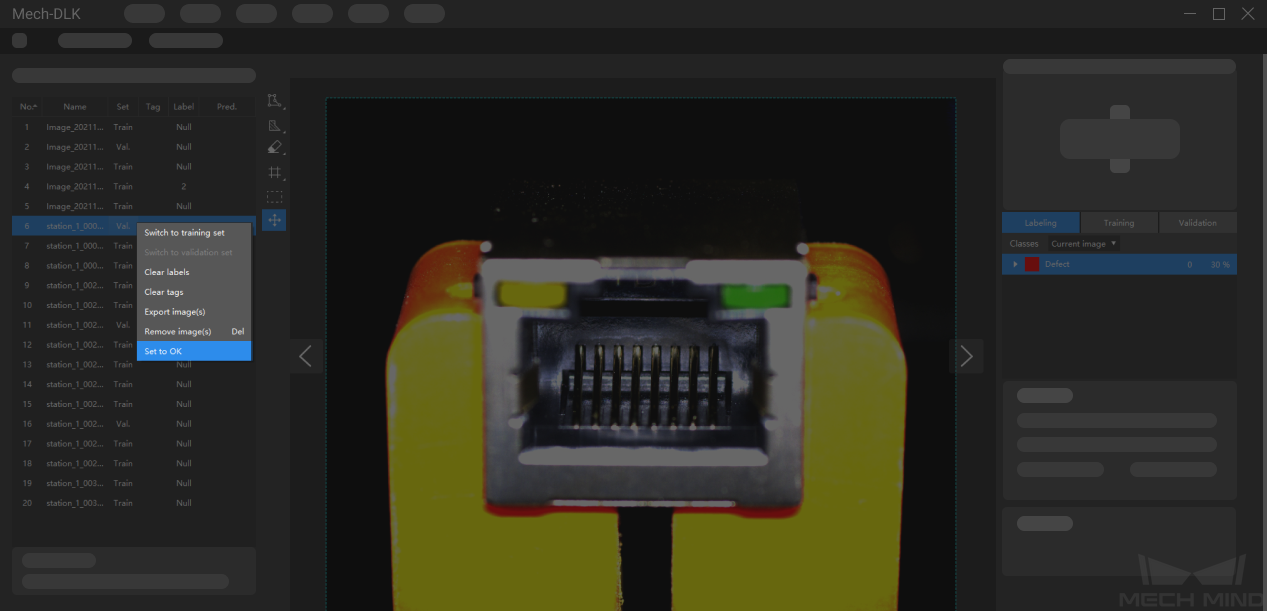
For OK images that do not contain any defect, please select the image and then right-click and select Set to OK in the context menu. Please make sure that there is at least one OK image in each dataset.
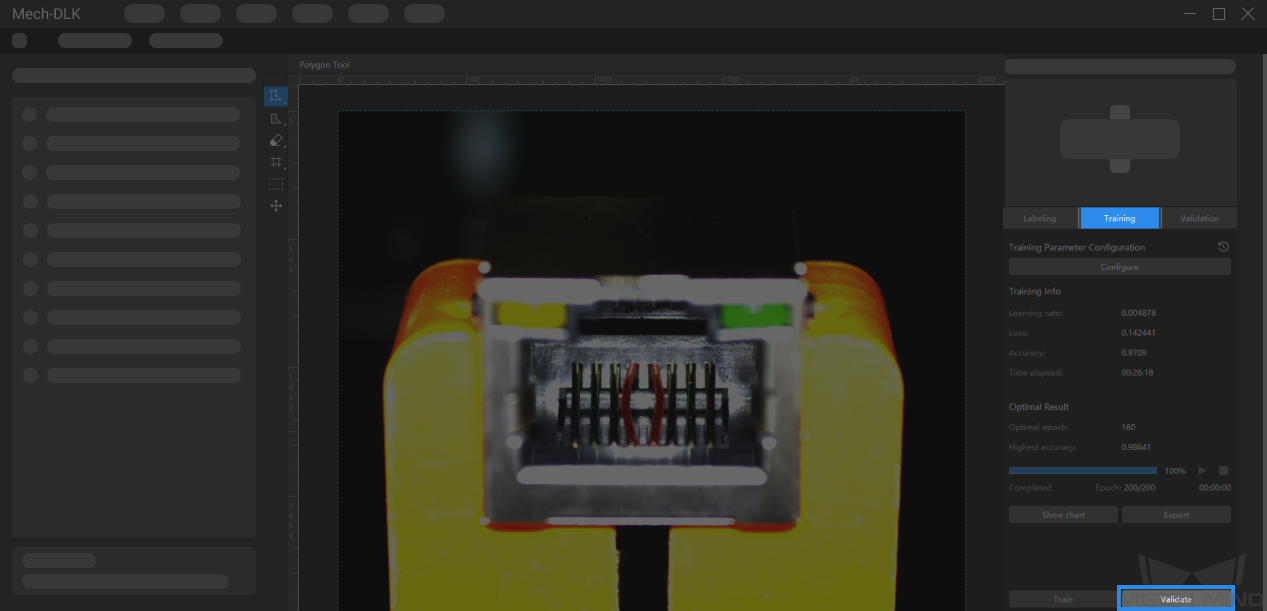
Train the Model
Select Training and then click on Train in the lower right corner of the interface to start training the model.

Validate the Model
After the training is completed, click on Validate to validate the model and check the results.
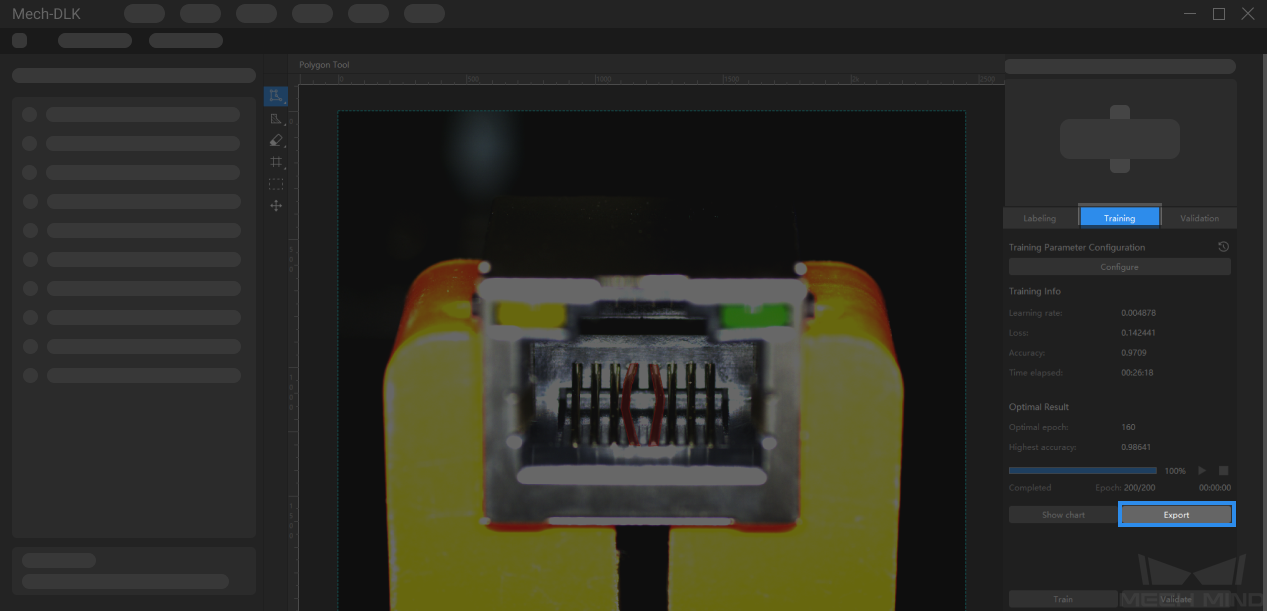
Export the Model
Click on Export and select a directory to save the exported model (with file extension dlkpack). Then you can deploy the model according to actual needs.