Tag and Filter Images
Tags
The image tag management panel is in the lower right corner of the software interface. You can tag a single image, or select multiple images and tag them. In this way, you can manage a large number of images according to their characteristics.

Typical Usage Scenarios
For using the Defect Segmentation module:
If the objects in the images have multiple types of defects, the images need to be divided by defect types, and you can divide the images by adding tags.
If it is hard to instantly determine whether the current image contains any defects, you can tag the image first to make a judgment on the image later.
After validation, you can tag the images with poor validation results, so that you can export the tagged images in groups for optimizing the model.
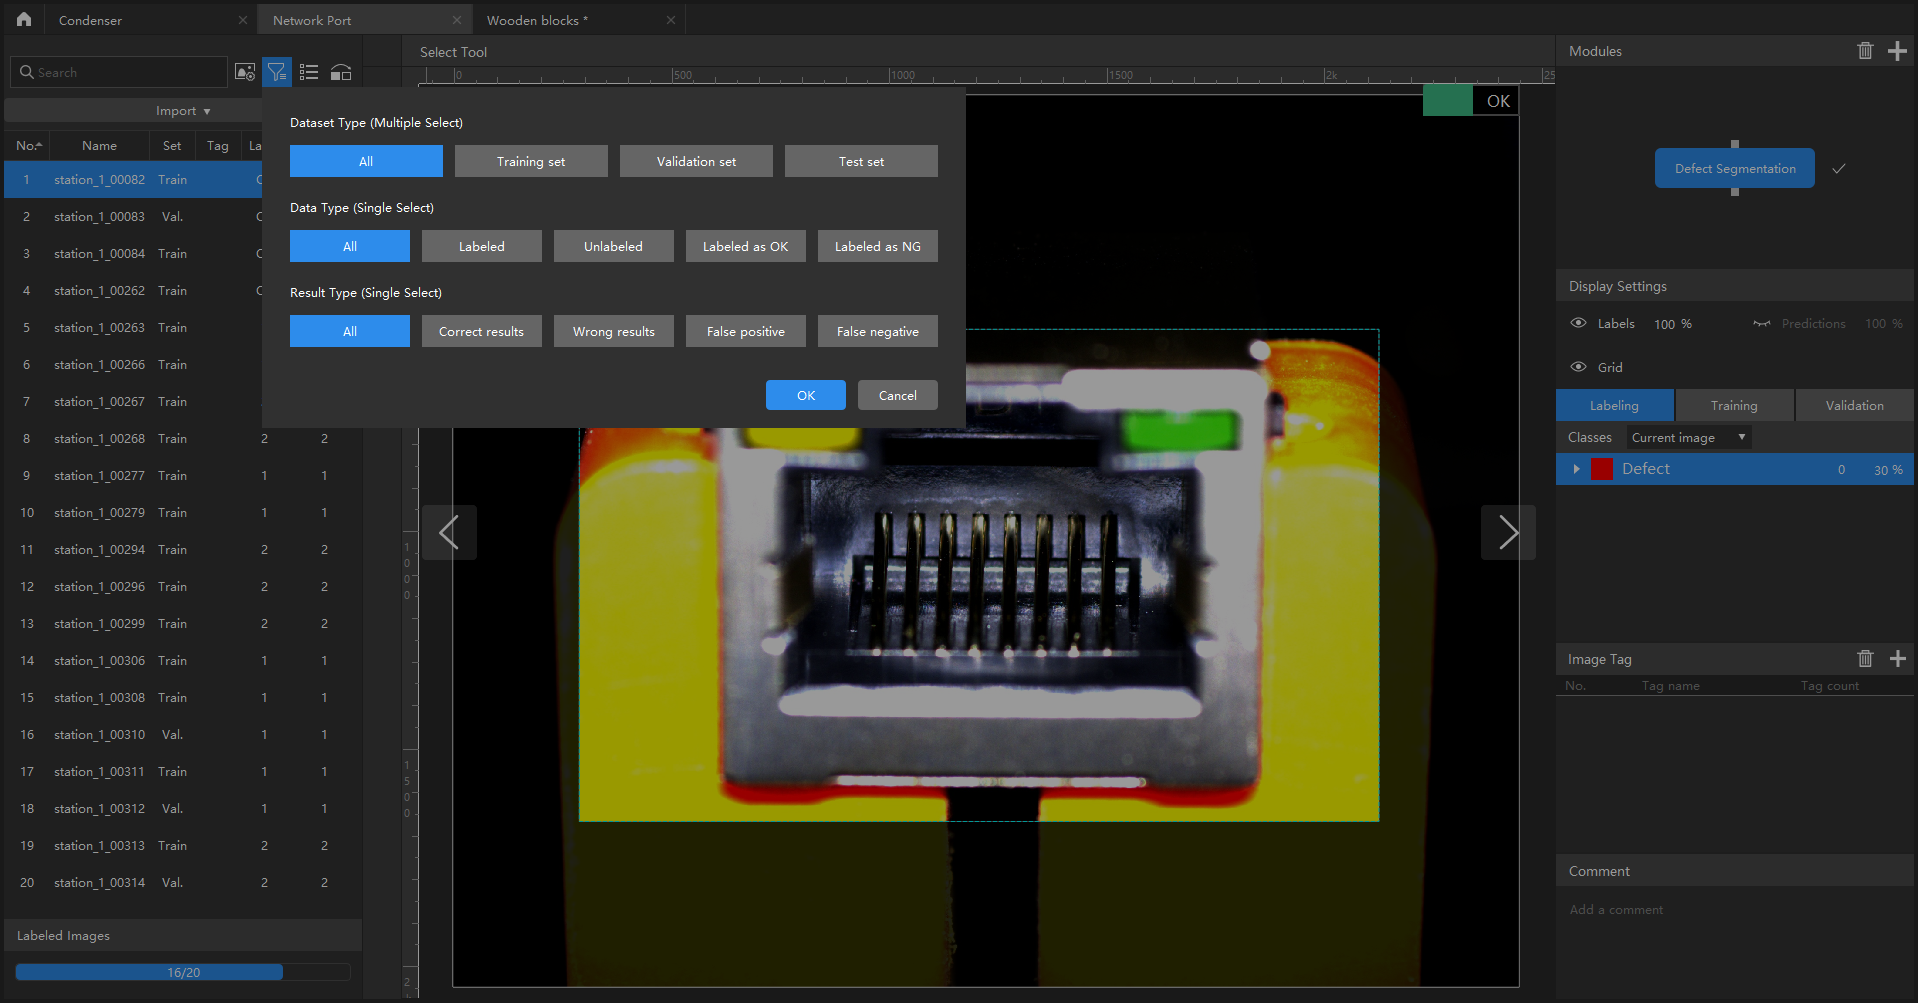
Image Filtering
You can set the filtering conditions to conveniently select specific images from datasets. Below is an example of image filtering for the Defect Segmentation module.
Typical Usage Scenarios
View the results of the dataset division. When the data set division is complete, you can check the content of each dataset by filtering by dataset type, and check whether the division results need to be adjusted.
Check the data labeling results. During the labeling, you can view the labeling progress and labeling results by filtering by data type.
Check the model prediction results. After validation, you can view the validation results by filtering by result type. For instance, when a defect segmentation model made an incorrect prediction, you can select the images with incorrect predictions by selecting False positive and False negative for the result type, which helps you analyze whether the reason for prediction mistakes is incorrect labeling.