Use the Fast Positioning Module
Please click here to download an image dataset of connectors. In this section, we will use a Fast Positioning module and train a model to rotate the connectors in the images to a specified orientation.
Create a new project and add the fast positioning module: Click on New Project in the interface, name the project, and select a directory to save the project. Click on
 in the upper right corner of the Modules panel and add the Fast Positioning module.
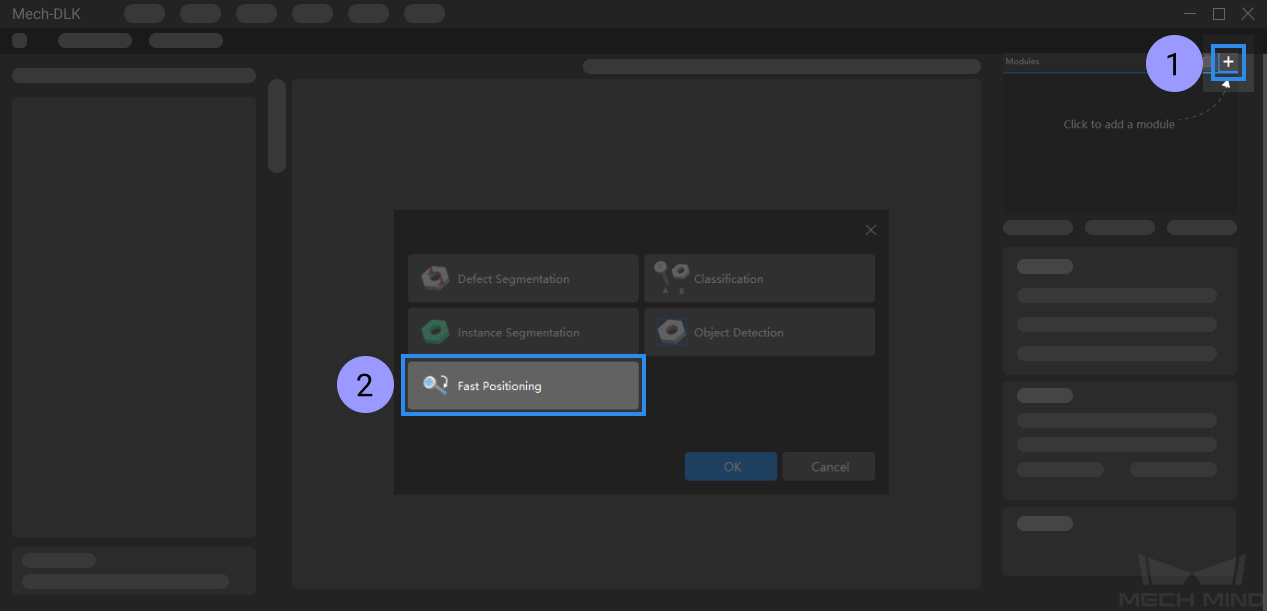
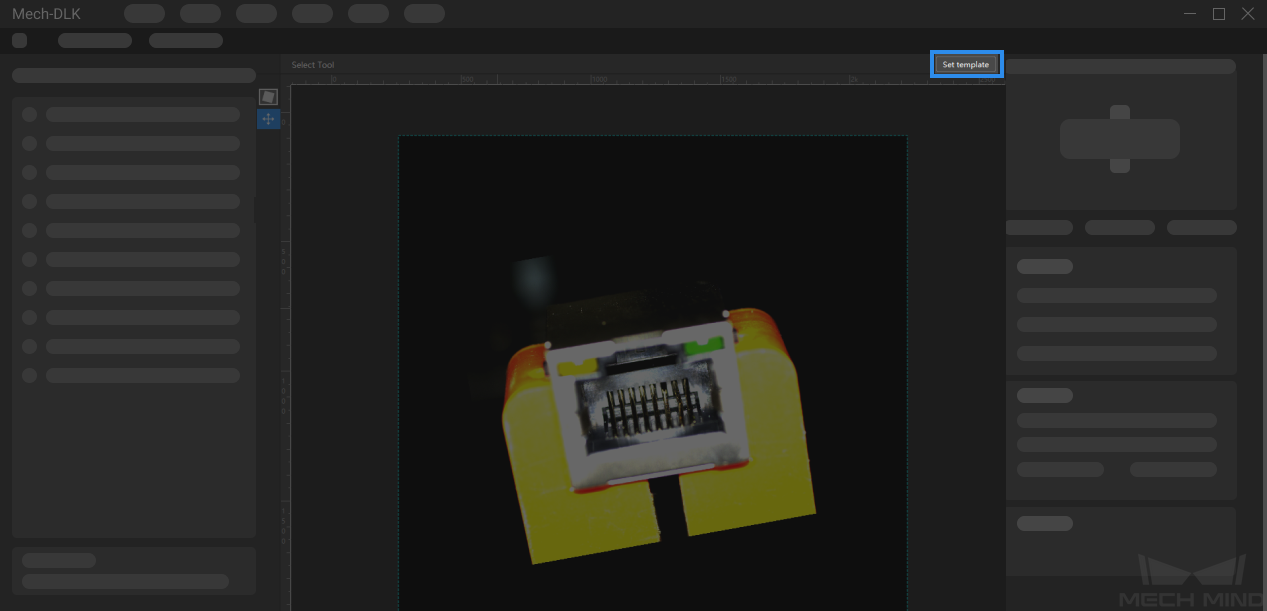
Set a template:
Click on Set Template and select two regions that contain features. Click on Draw under feature1 to select the first feature and then click on Draw under feature2 to select the second feature. Then click on Next to adjust the expected image orientation.

Drag the slider or click on
 and
and  to adjust the image to an expected orientation, and click on Finish to confirm settings.
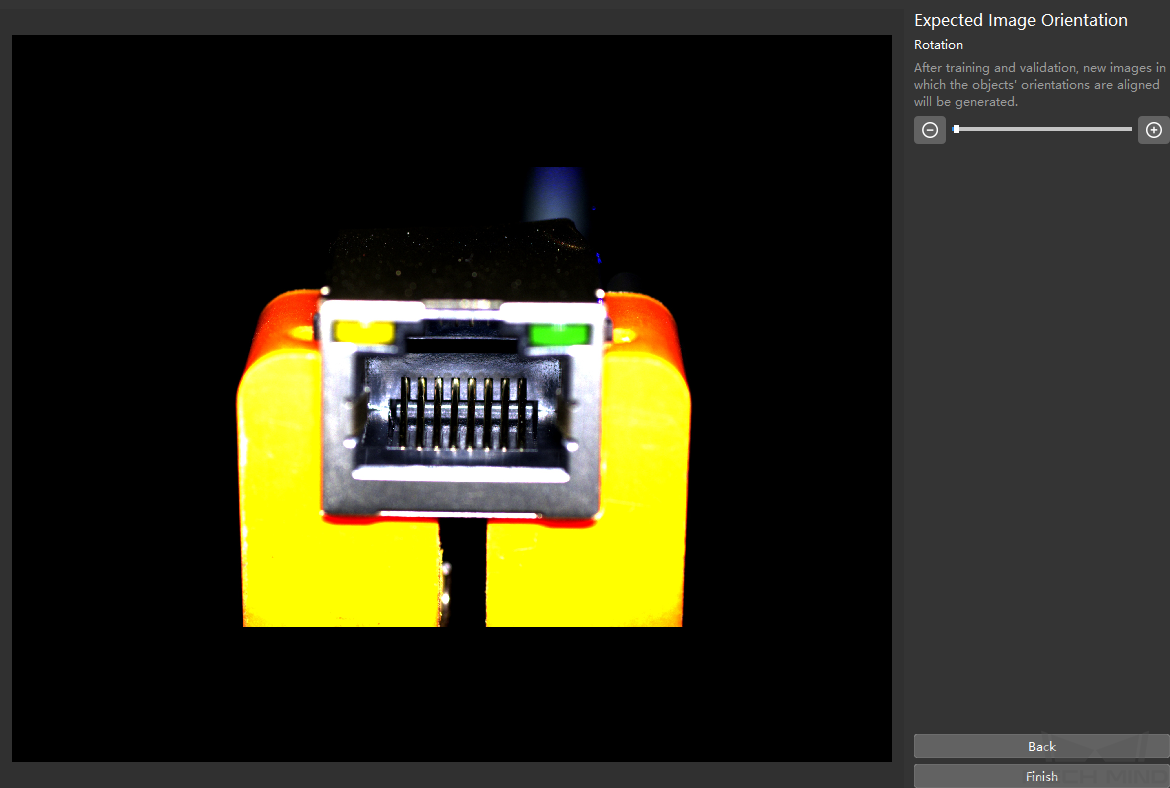
Modify the labeling: Click on
 and then go to Set template, the labeled image will appear in the window. You can drag the feature frames to adjust the feature regions and re-adjust the expected orientation in the same way that you set it the first time.
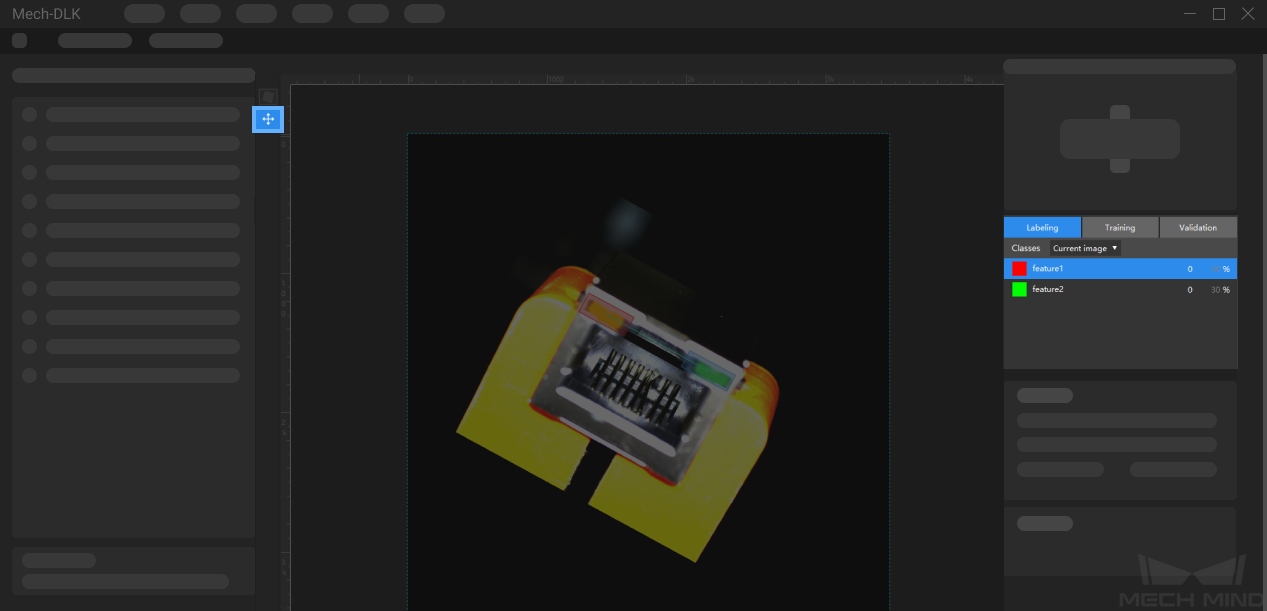
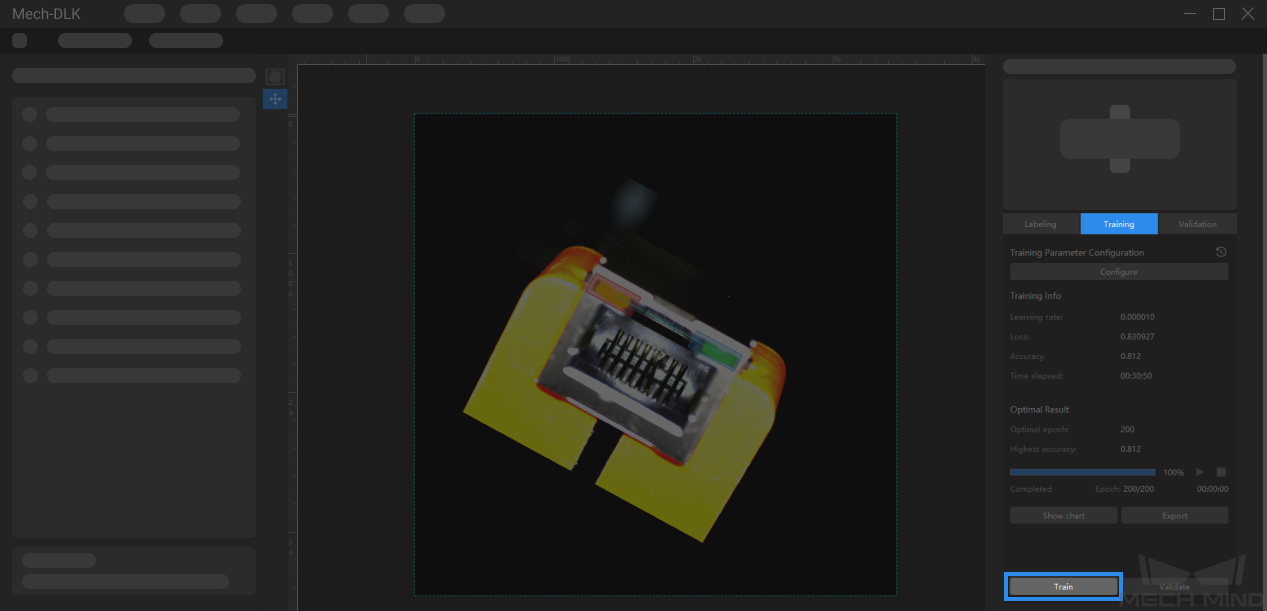
Train the model: Keep the default training parameter settings and click on Train to start training the model.
Validate the model: After the training is completed, click on Validate to validate the model and check the results.

Export the model: Click on Export and select a directory to save the exported model. You can deploy the model according to actual needs.
