ELITE Calibration Program
This topic introduces the process of automatic hand-eye calibration when an ELITE robot communicates with Mech-Mind Vision System through Standard Interface.
The process consists of the following steps:
Attention
Before proceeding, please make sure that:
The Standard Interface communication has been set up according to Set up Standard Interface Communication with Elite.
The Lua script is running in the background. Otherwise, the communication between the robot and Mech-Mind Software Suite cannot be established.
Open Needed Variables
As the calibration point received from Mech-Mind Software Suite will be stored in variables V099 (TCP) and P099 (JPs), please open these variables first according to the following steps.
On the teach pendant, press .
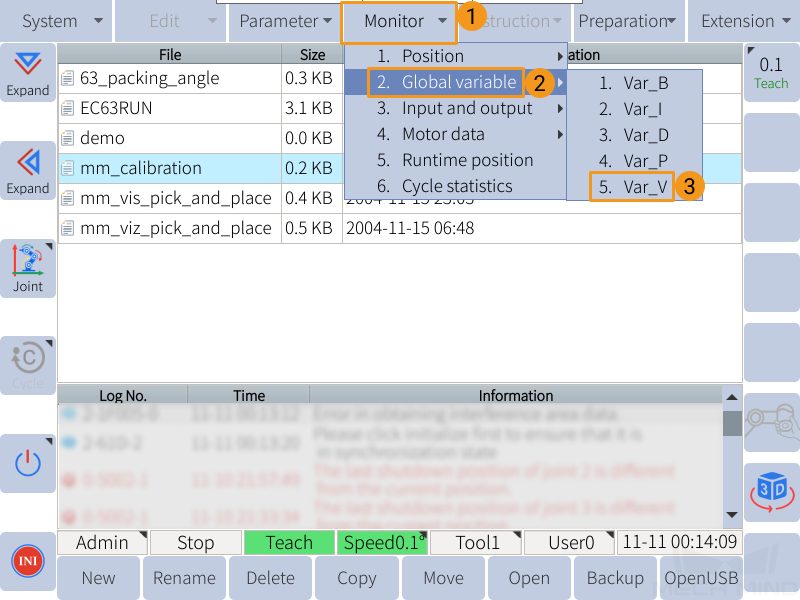
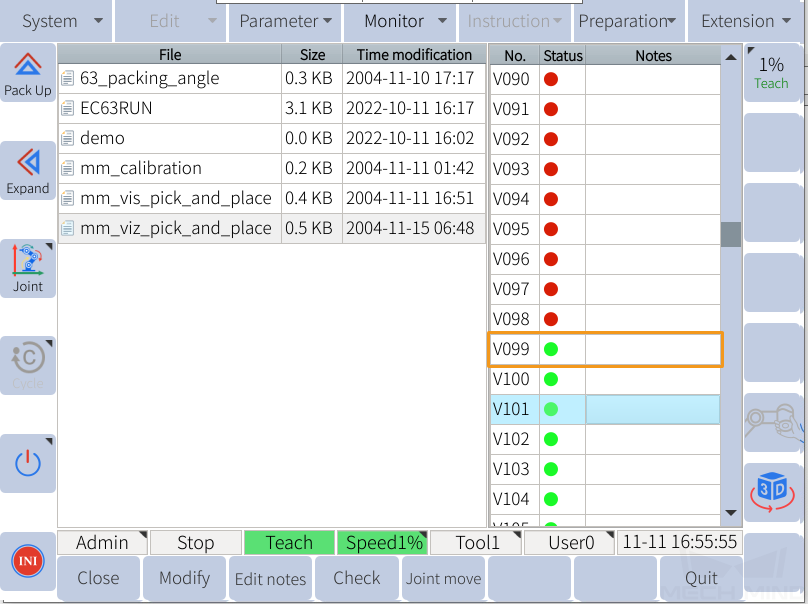
If the dot in the Status column is red, the variable is not opened. Select a closed variable, and press Open in the lower left to open it.
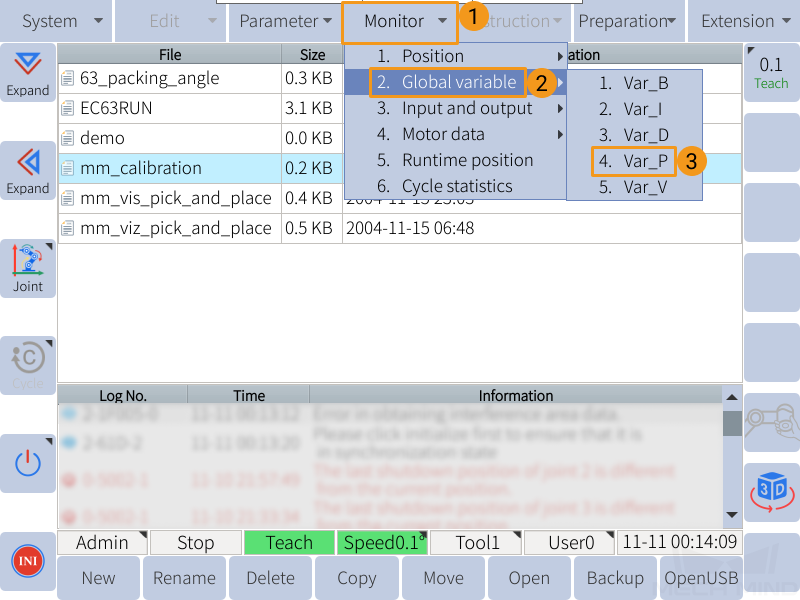
Similarly, press and open variable P099. Press Quit to return to the home page.

Teach the Calibration Start Point
On the home page, select the mm_calibration program, and press Open.

Move the robot to the start point for the calibration.
On the teach pendant, press , and select the variable to store the calibration start point (P004 is used in the following figure).
Store the calibration point:
If the variable is closed, press Open to store the calibration start point.
If the variable is opened, press Close first and then Open to store the calibration start point.

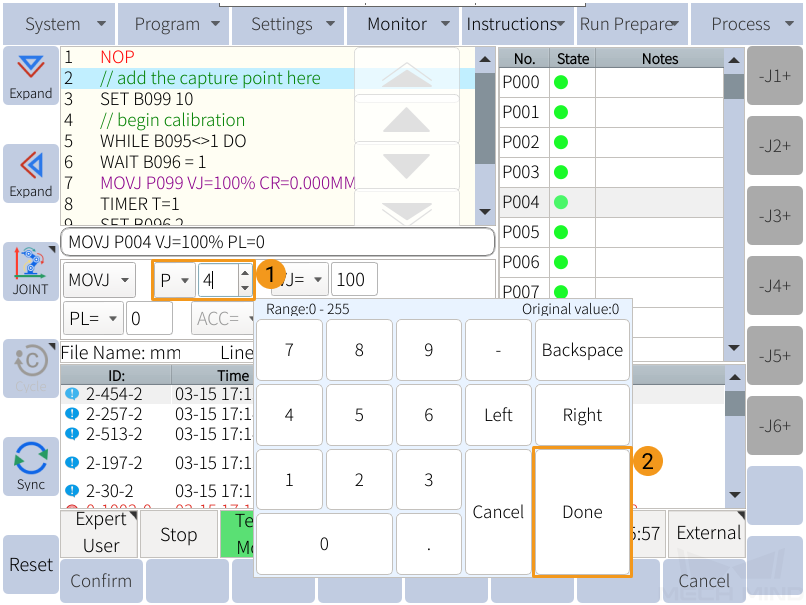
Select the second line in the mm_calibration program, and press .
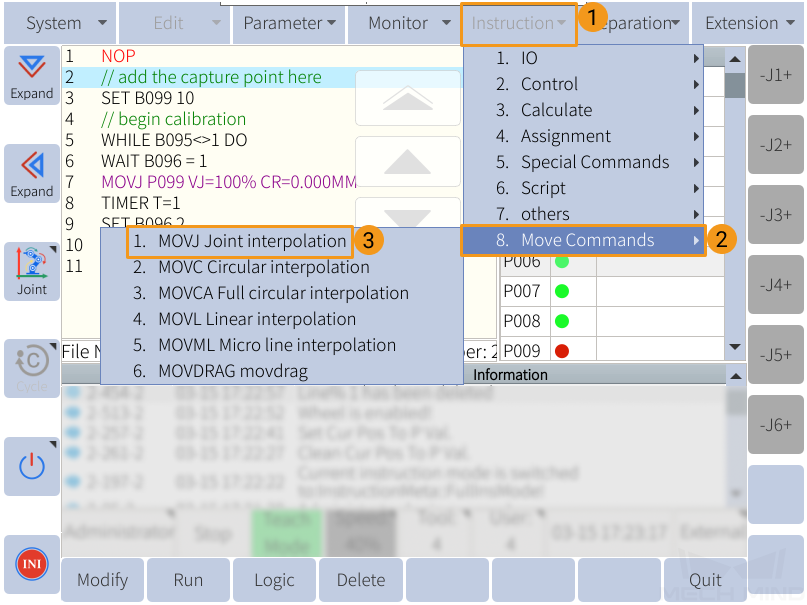
Select the P variable that stores the calibration start point, and press Done.
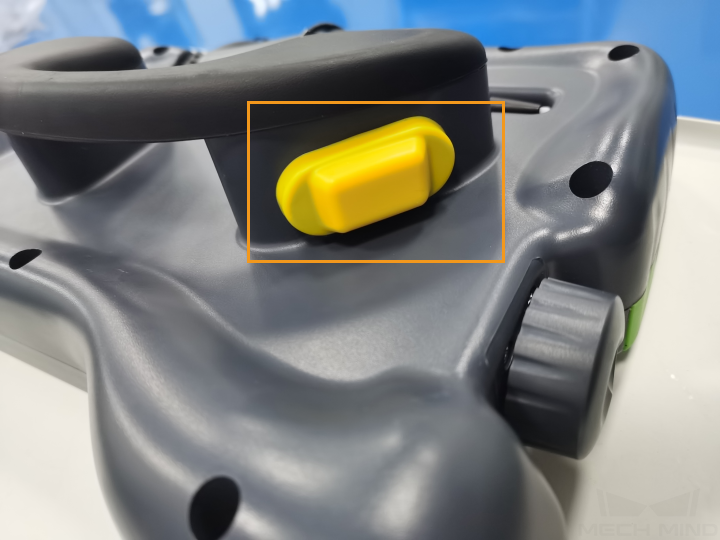
Press the yellow SERVO ON switch at the back of the teach pendant, and press OK in the lower left to confirm inserting the move instruction.
If the MOVJ instruction is successfully inserted, you can see the following command in line 3 of the program.

Note
Select the type of move instructions (MOVJ or MOVL) according to the actual situation. If using MOVL instruction, store the calibration start point in a V variable in the form of TCP.
Run the Calibration Program
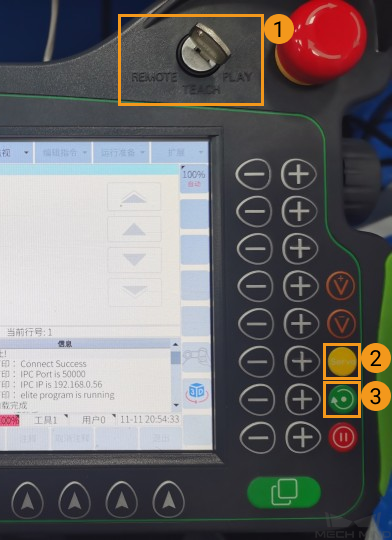
Move the cursor to the first line of the program, and turn the key to PLAY.
Press the yellow button in the lower right of the teach pendant to start the servo motors, and then press the green button to run the program automatically.
Proceed to the next section if the following message is displayed in the Console tab of Mech-Vision Log panel: Entering the calibration process, please start the calibration in Mech-Vision.
Complete Calibration in Mech-Vision
In Mech-Vision, click Camera Calibration (Standard) on the toolbar, or select from the menu bar.
Follow the instructions in Mech-Vision to complete the configuration.
If the camera is mounted in the eye-to-hand mode, please refer to Complete Automatic Calibration in the Eye to Hand Scenario.
If the camera is mounted in the eye-in-hand mode, please refer to Complete Automatic Calibration in the Eye in Hand Scenario.
Note
If the robot does not reach the next calibration point within 60 seconds, Mech-Vision will report a timeout error and stop the calibration process. In such cases, please select the mm_calibration program on the teach pendant again, and run it from the first line. Then, restart the calibration process in Mech-Vision.