Use Mech-Mind 3D Vision Interface
Note
Before you use the CRX plugin, please ensure that you have an executable Mech-Vision project and Mech-Viz project (if needed). Also, the IPC has been connected to the network where the robot belong.
Please follow the steps below to configure the settings in Mech-Center first.
Configure and Enable Interface Service in Mech-Center
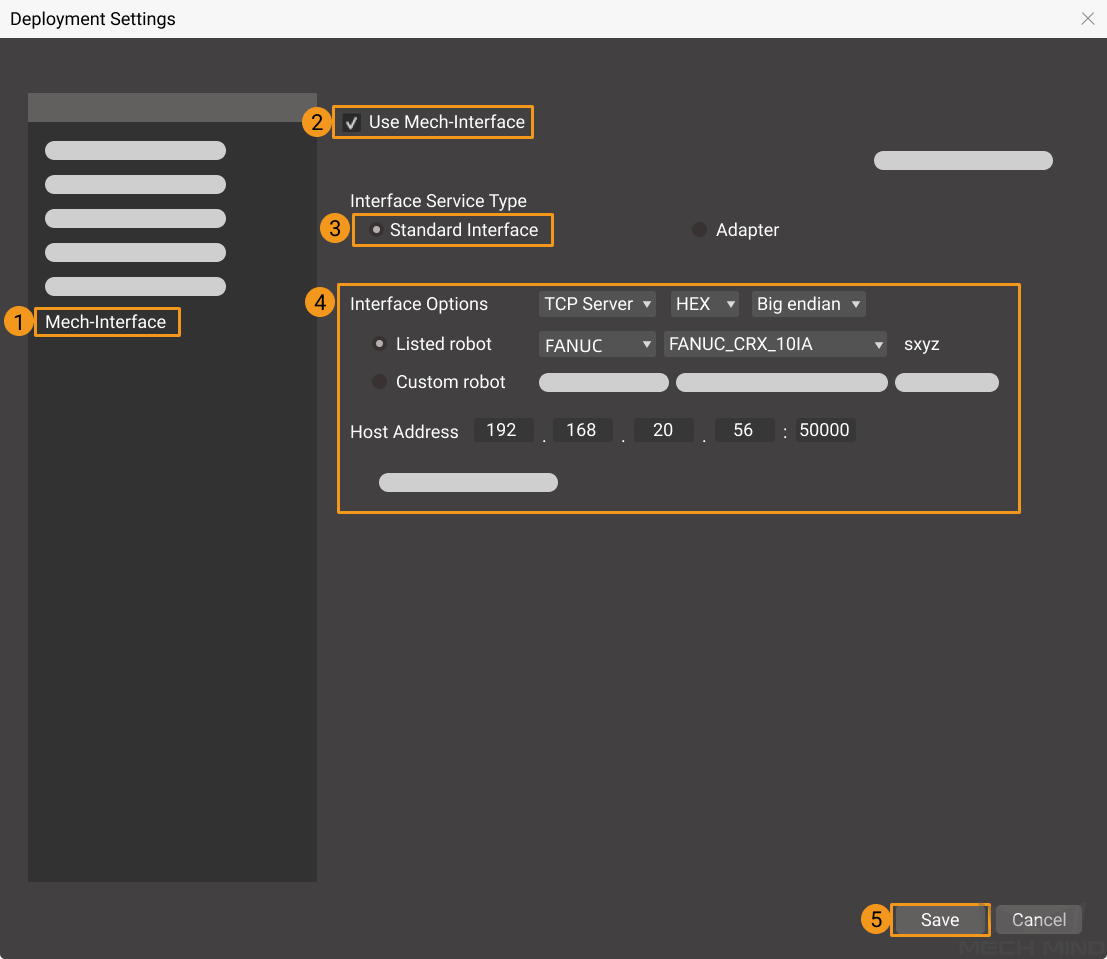
Open Mech-Center, and click Deployment Settings in the toolbar.
Click Mech-Interface in the Deployment Settings window. Select the Use Mech-Interface checkbox, and select Standard Interface as the Interface Service Type.
Select TCP Server, HEX, and Big endian for the Interface options. Select a FANUC CRX series robot in the Listed robot. Then, specify a Host Address and set the port number to 50000 or above. Click Save after settings.
Click Start Interface in the toolbar.
Till now, the TCP interface service should be enabled successfully with the following message displayed in Mech-Center’s Log panel:
Start TCP Server interface.
Establish Communication by the CRX Plugin
Mech-Mind 3D Vision Interface provides TCP/IP based socket communication services to communicate with the vision system installed on the IPC.
You only need to configure the communication settings once if the network environment and IP addresses on both sides remain unchanged.
Attention
You should configure the communication settings again if the plugin is re-installed.
Before establishing the communication with the vision system, please ensure that the following requirements have been met.
The CRX plugin is installed successfully.
The robot controller is connected to the IPC via Ethernet (a router can be used here).
Please follow these steps to configure the communication on the teach pendant.
Set the IP address of the robot.
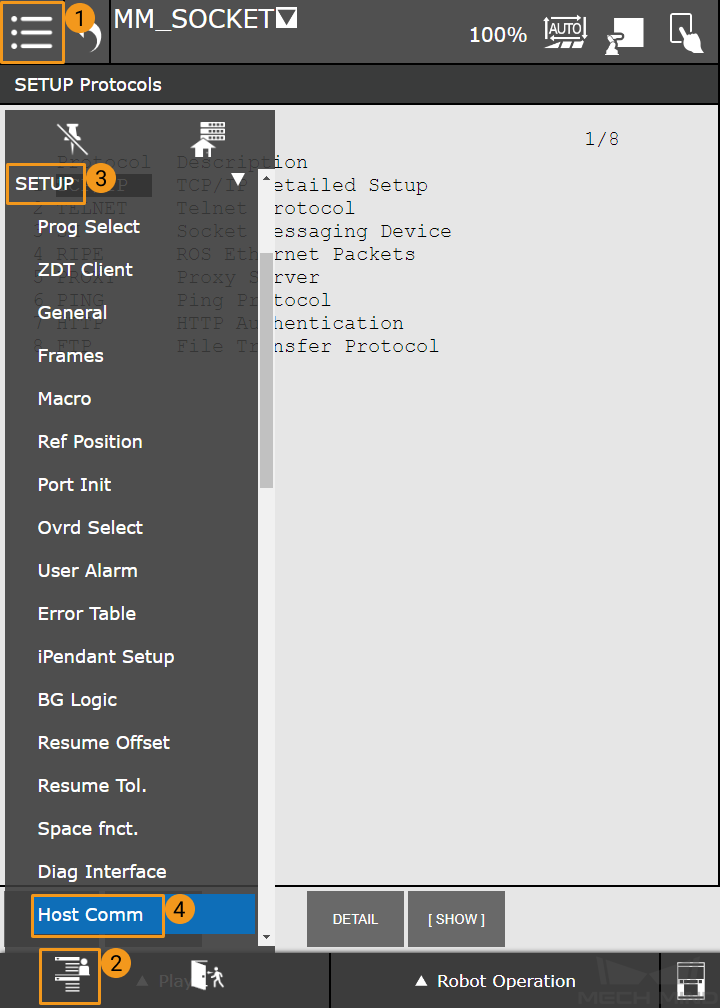
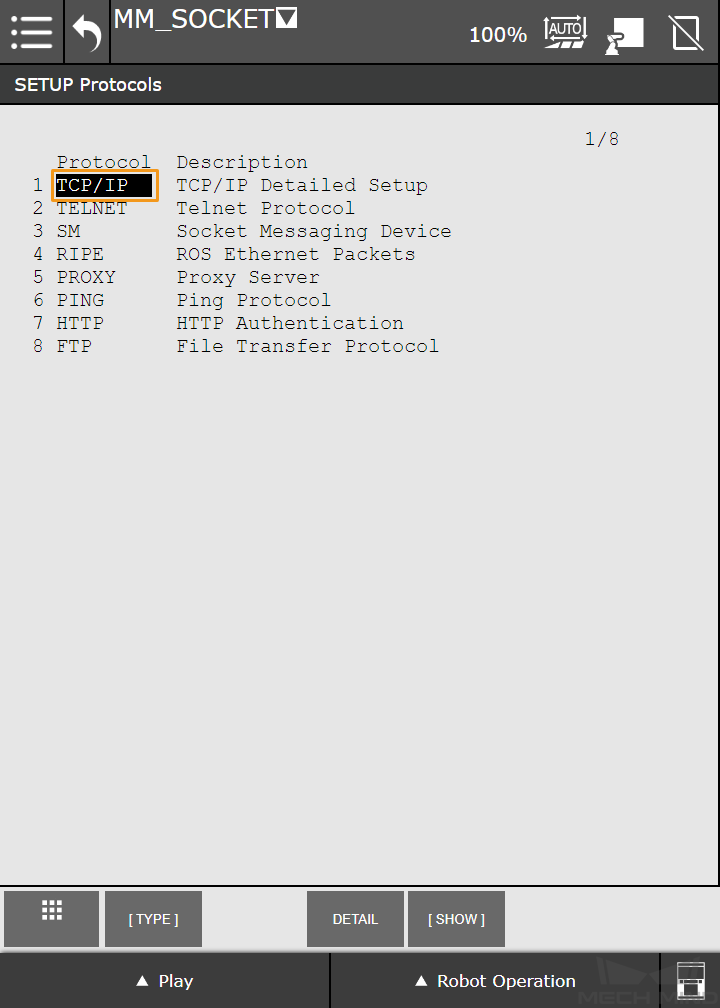
Expand the complete menu, and select SETUP > Host Comm to open the SETUP Protocols window.
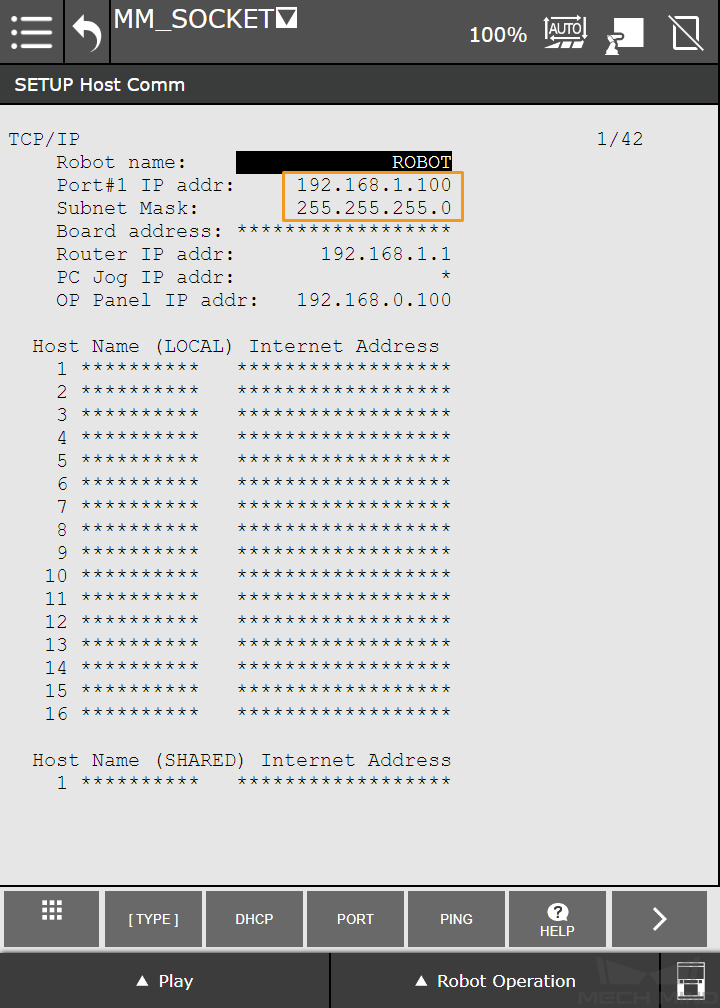
Press TCP/IP, and set the IP address and Subnet Mask.
Attention
Please ensure that the IP address set here is in the same subnet as that of the IPC.
Create a new robot program.
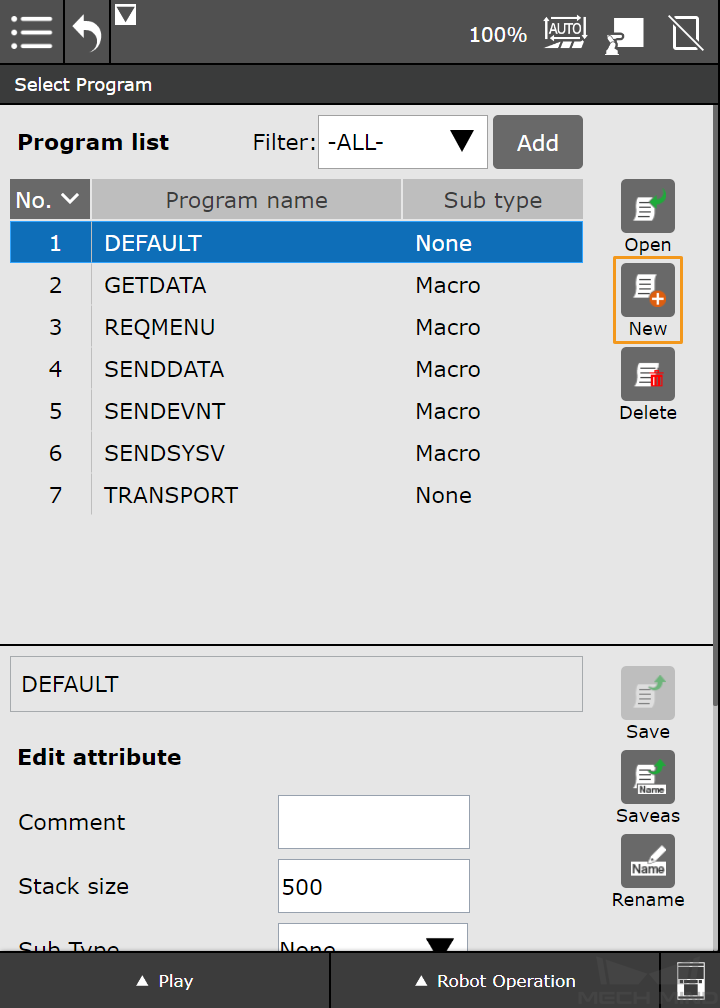
Press the Menu icon and switch to the frequently used menu, and select Teaching > Select Program.

Press the New icon on the right.
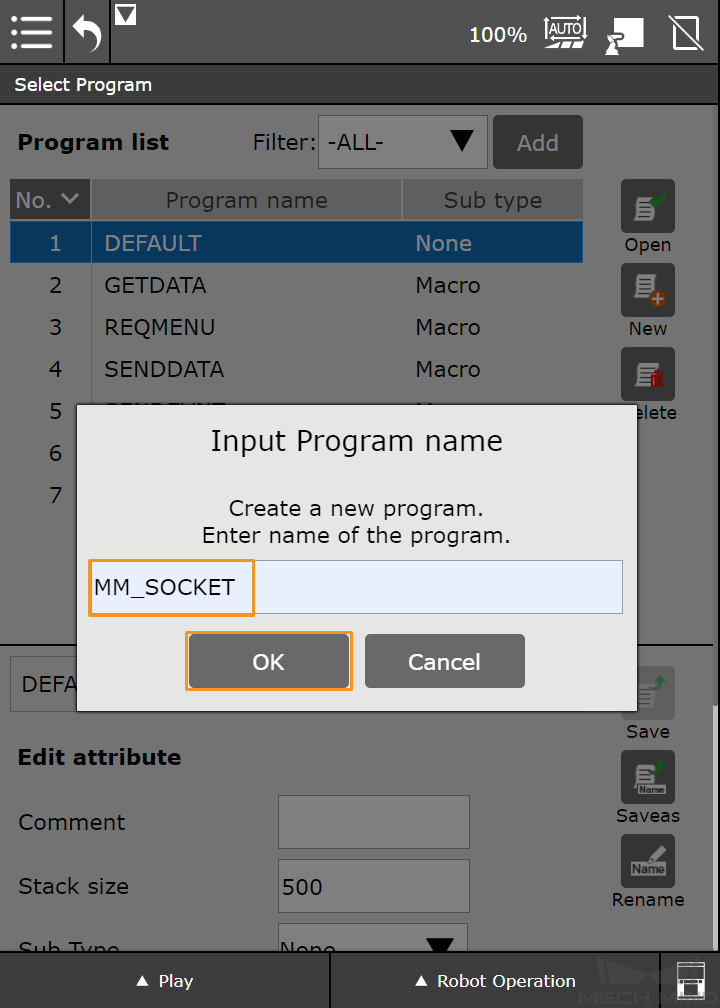
Name the program, such as MM_SOCKET, and then select OK.
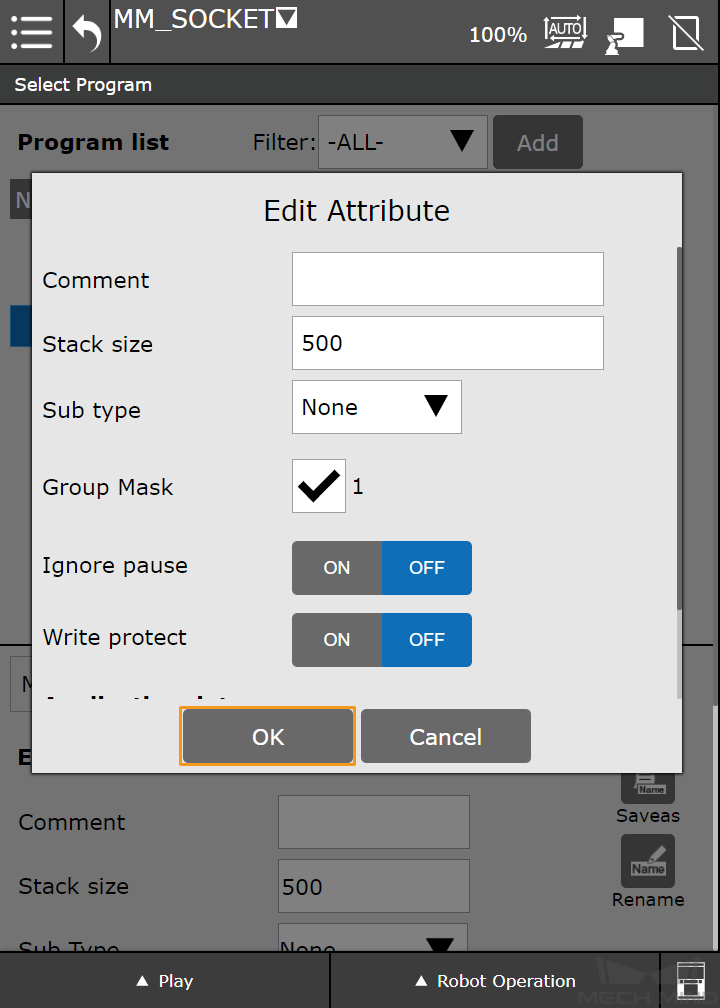
Keep the default settings of the program and then select OK.
Execute the communication initiation command.
Open the newly created program.
Attention
You cannot edit the program or modify the parameters in the Automatic mode. If the icon in the upper right corner is
 , which indicates the Automatic mode, you should press the icon to switch to Manual mode, and the icon will turn to
  .
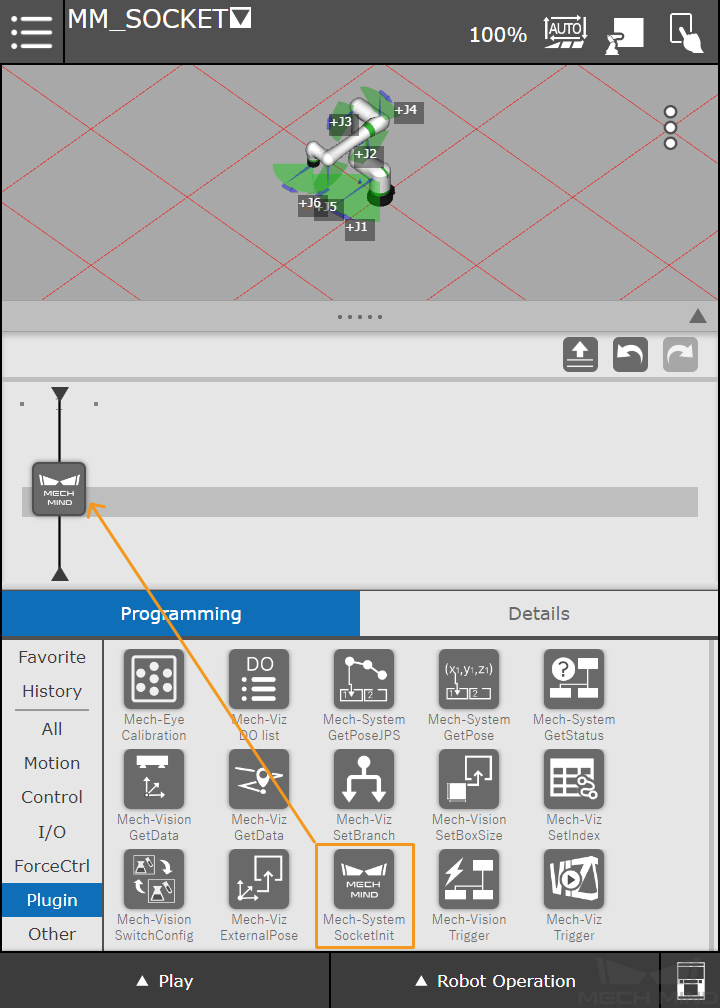
.Select Programming > Plugin, and you can see the plugins in the lower right panel.
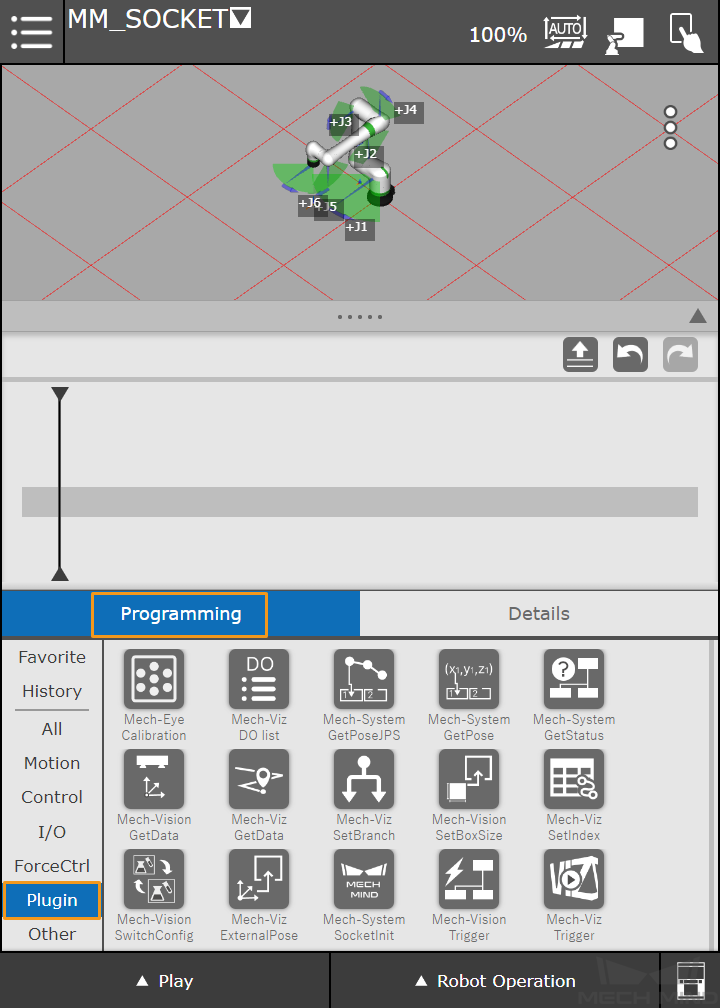
Find the Mech-System SocketInit, and drag it to the program line.
Press the command on the program line to view its details. Set the IP Address of IPC and set the Port of IPC to the port number configured in Mech-Center.

Tip
If you have any question about the parameter to be configured, you can press and hold the question mark on the left to see the detailed description.
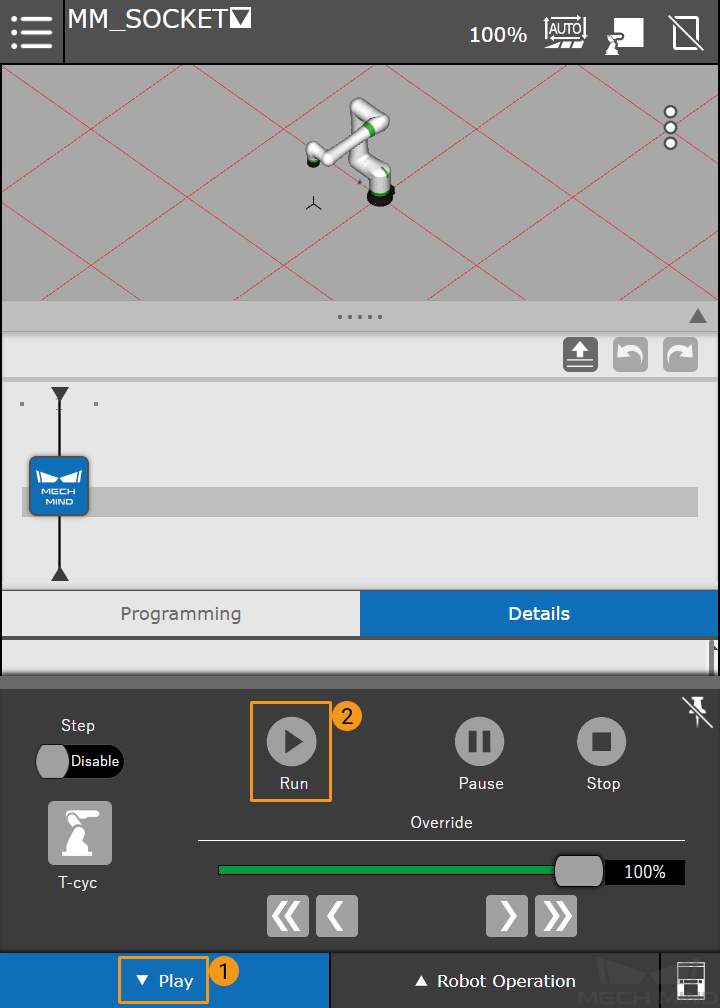
Press the Manual mode icon (
) at the upper right corner of the screen to switch to the Automatic mode ().Press Play in the lower left corner and then press Run.
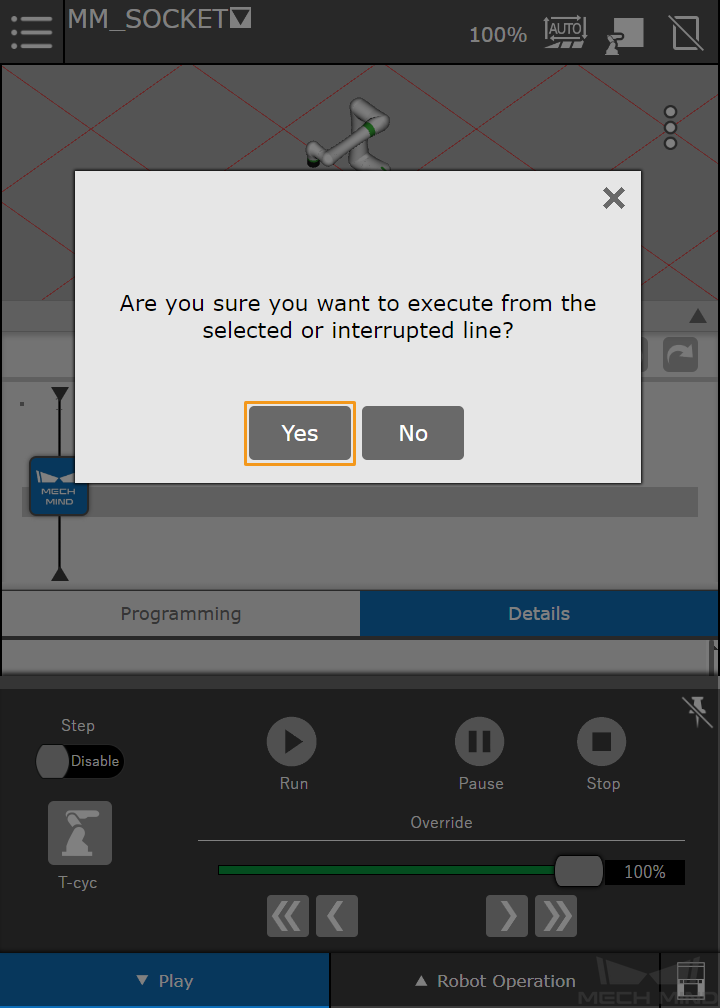
Select Yes in the pop-up dialog box.
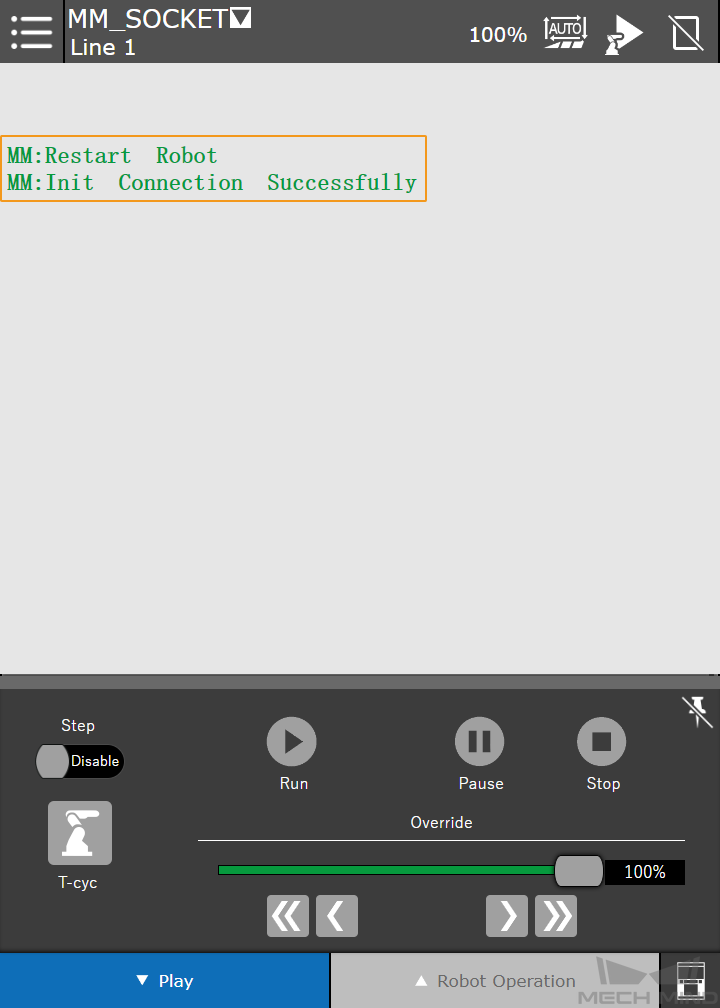
The USER window will be displayed automatically. The communication is established successfully if the message “MM: Restart Robot” displays in the window, and a communication test with Mech-Center is completed successfully if the message “MM: Init Connection Successfully” displays in the window.
Also, the following messages will display in Mech-Center’s Log panel.
The client xxx gets online.
The client xxx gets offline.

Power off the robot controller and then restart it.