Kawasaki Setup Instructions
This section introduces the process of loading the robot full-control program onto a Kawasaki robot.
The process consists of 4 steps:
Please have a flash drive ready at hand.
Note
A USB 2.0 flash drive is recommended. Otherwise, the robot controller may not recognize the flash drive.
Check Controller and Software Compatibility
Controller: no requirement
Controller system software version: no requirement
Additional controller software options: not required
Mech-Center: latest version recommended
Setup the Network Connection
Hardware Connection
Plug the Ethernet cable into:
An Ethernet port on the IPC
The Ethernet port inside the accessory panel on the front of the controller
IP Configuration
To allow communication between the IPC and the robot controller, both must have an IP address in the same subnet. This means that the first three numbers of the IP addresses should be the same. For example, 192.168.100.1 and 192.168.100.2 are in the same subnet.
Check the IP address of the IPC: please use the ipconfig command in Command Prompt or PowerShell to check the IP address.
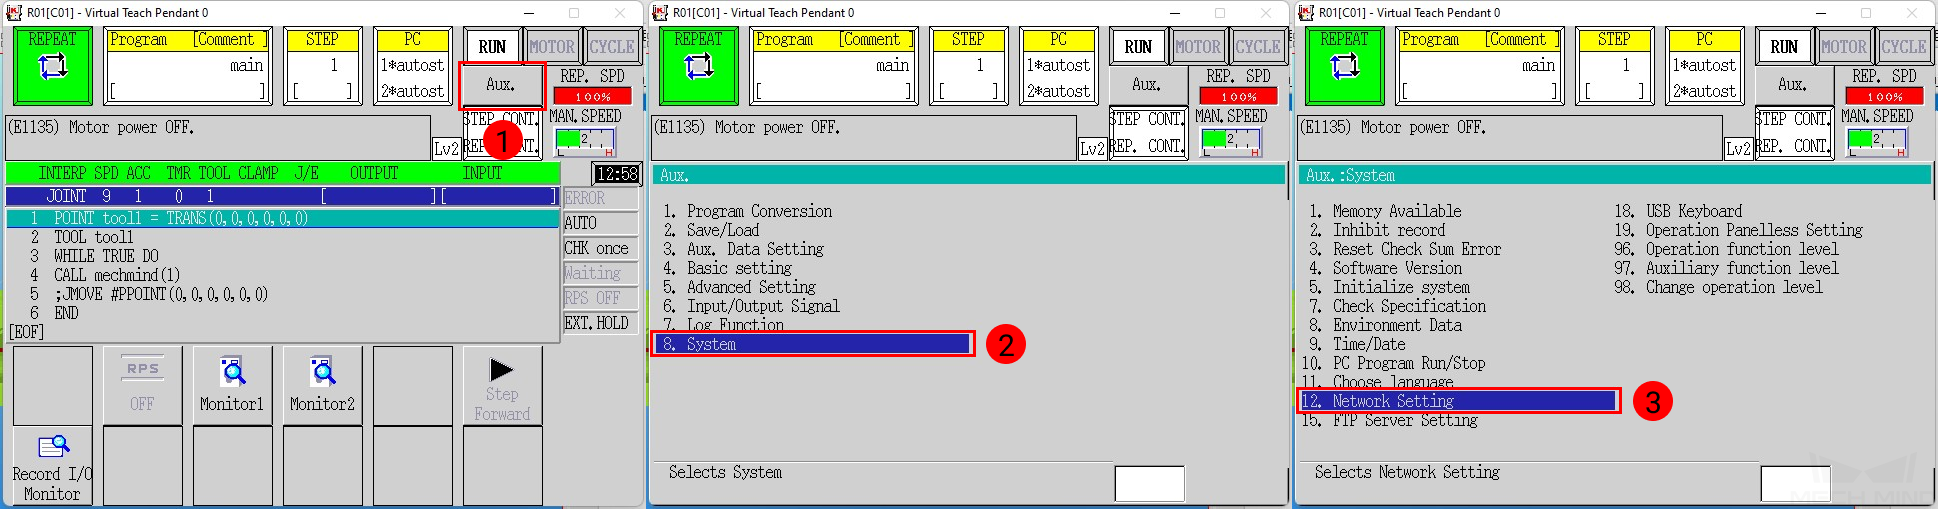
On the teach pendant, press on Aux., and then select .
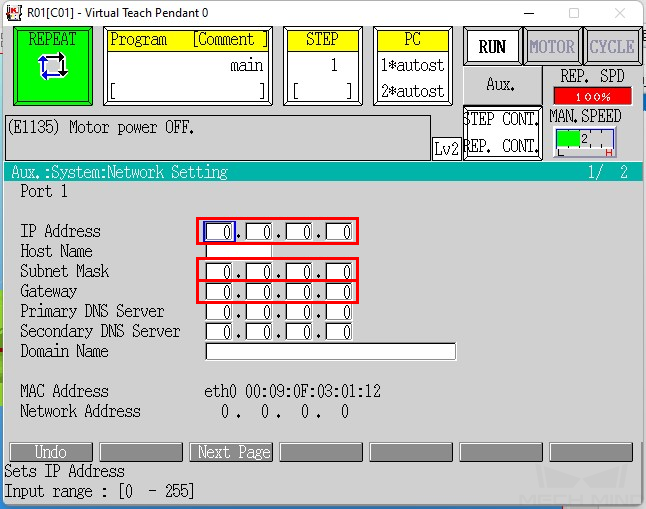
Set IP Address to one in the same subnet as that of the IPC.
Set Subnet Mask to 255.255.255.0.
Note
If the IP address is set to either 192.168.0.1 or 192.168.1.1, please set Subnet Mask to 255.255.0.0 instead.
If you are using a network gateway, the gateway address should also be set. Please consult your IT support for help.
Press the ENTER key to confirm, and then restart the controller.
Load the Program File
Prepare the File
The program file is stored in the installation directory of Mech-Center. The default directory for Mech-Center is C:/Mech-Mind/Mech-Center-xxx.
Navigate to xxx/Mech-Center-xxx/Robot_Server/Robot_FullControl/kawasaki, and copy mm_control.as to your flash drive.
Note
Copy the file to the root directory of the flash drive. Do not put it in another folder or rename it.
Load the File to the Robot
Insert the flash drive to the USB port inside the accessory panel on the controller.
Check the Program and PC areas to see if any programs are running. If so, backup and exit the programs according to the following instructions.

If there is a program in the Program area, please create backup first.
Follow the steps below to back up all files except for system logs to the flash drive.
Press on Aux., and select .
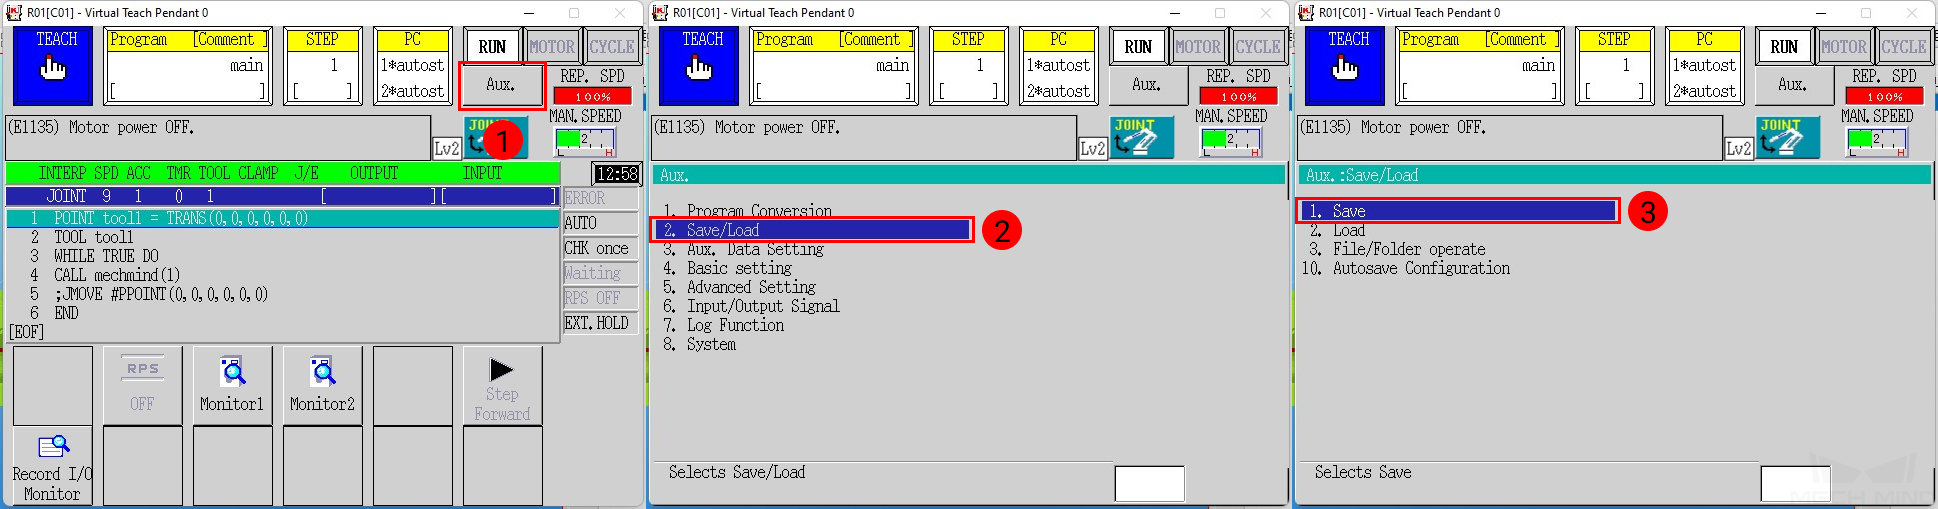
Press on Input File name to input a File Name for the backup file, and then press on SAVE.

Cancel robot control program and kill PC programs.
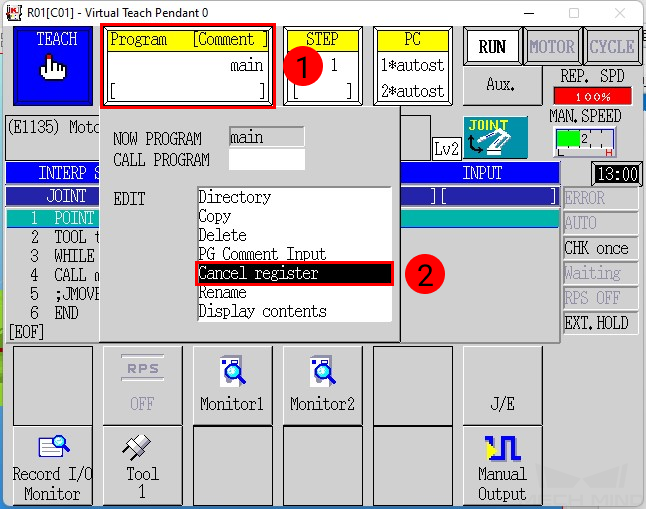
Press on the Program area, and select Cancel register in the drop down menu.
Press on Aux., and select .
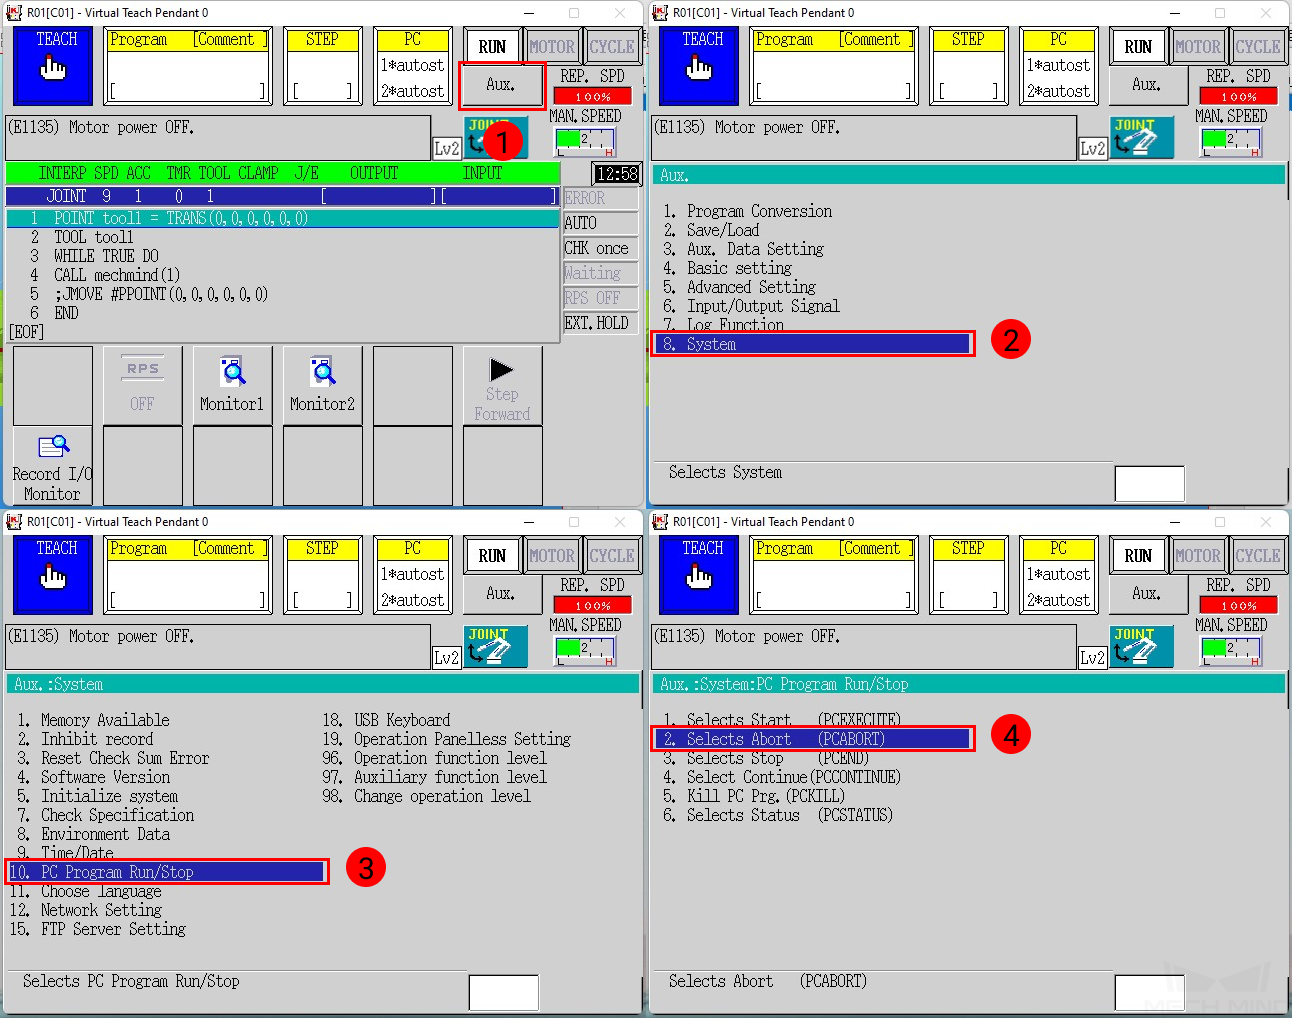
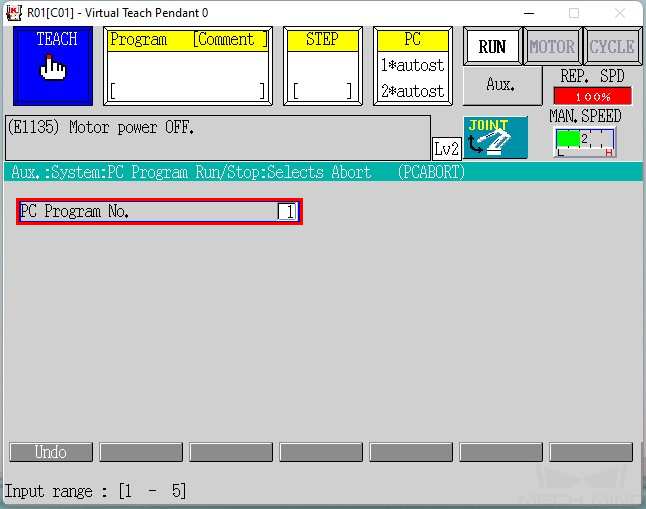
Press the ENTER key to abort PC program 1. Then, press 2 to change the program number, and then press ENTER to abort PC program 2.
Press the R key to return, and select Kill PC Prog..
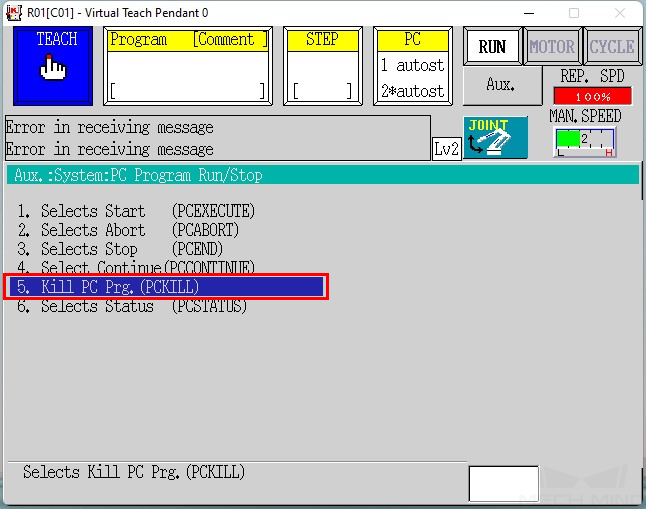
Press the ENTER key to kill PC program 1. Then, press 2 to change the program number, and then press ENTER to kill PC program 2.

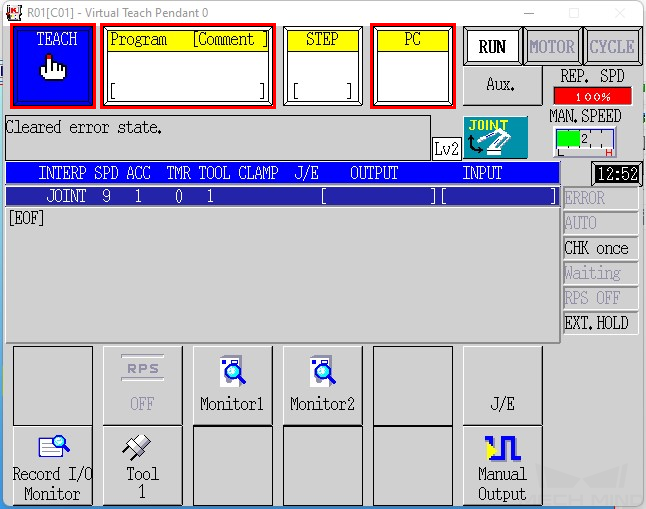
Press the R key to return. Check the PC area to see if any programs are still listed. If so, repeat steps 2 and 4 until there are no programs listed in the PC area.
Make sure that the robot is in teach mode, and make sure that the Program and PC areas have nothing listed.
Note
To switch the robot to teach mode, turn the Teach/Repeat switch on the controller to TEACH, and the teach lock switch on the teach pendant to ON.
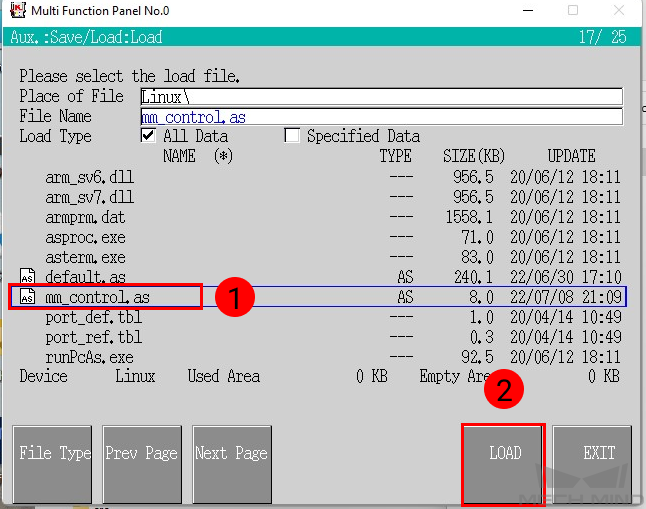
Press on Aux., and select .

Press on mm_control.as in the file list twice to select it, and then press on LOAD.
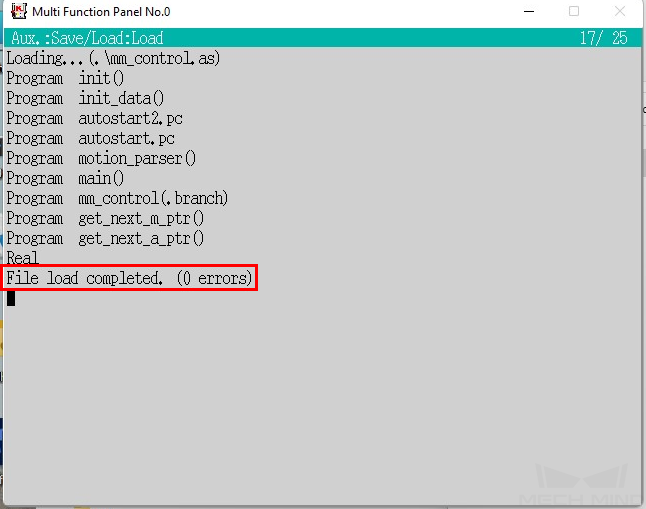
When loading completes, make sure no errors occurred during loading, and press on the R key to exit.
Further Configurations
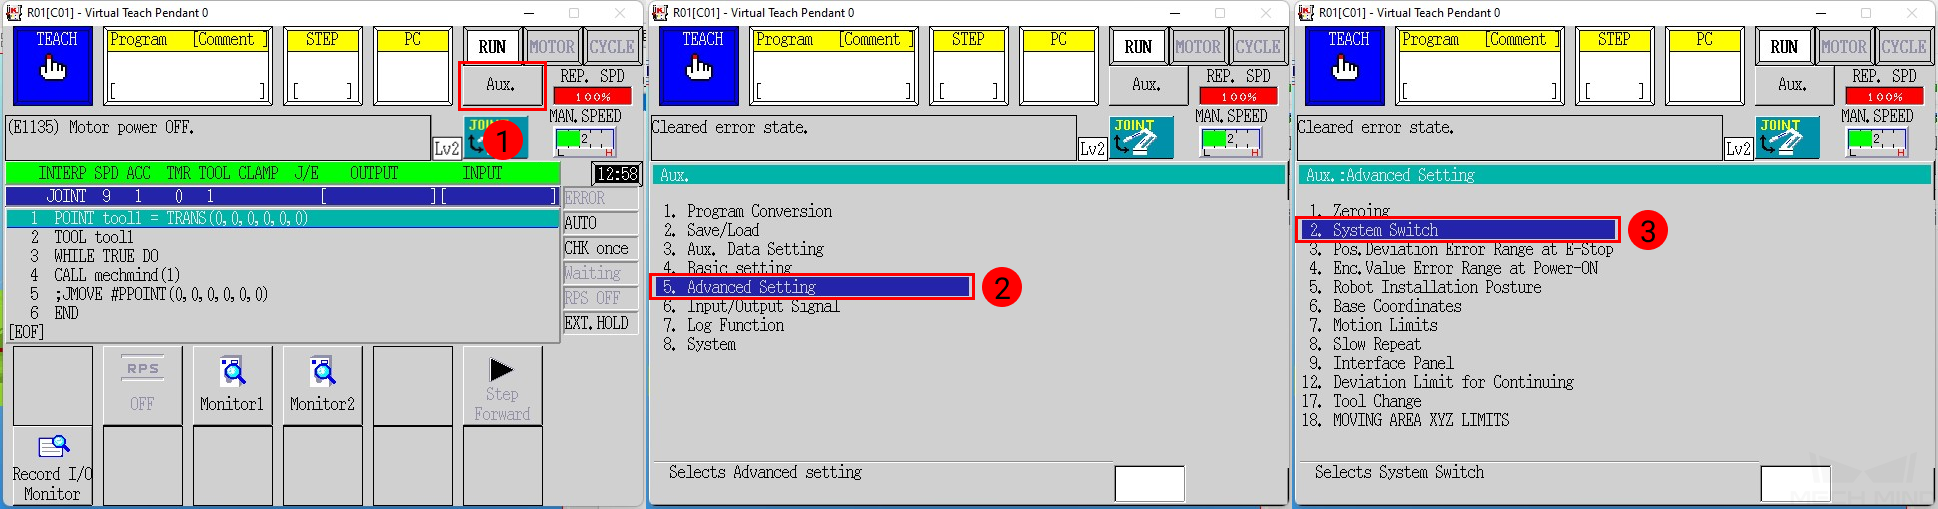
Press on Aux., and select .
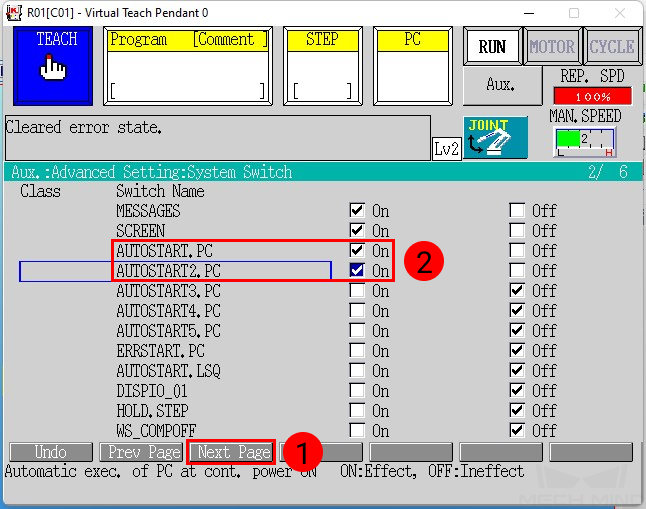
Press on Next Page, find AUTOSTART.PC and AUTOSTART2.PC, check the On boxes of these two programs, and press the ENTER key to save the changes.
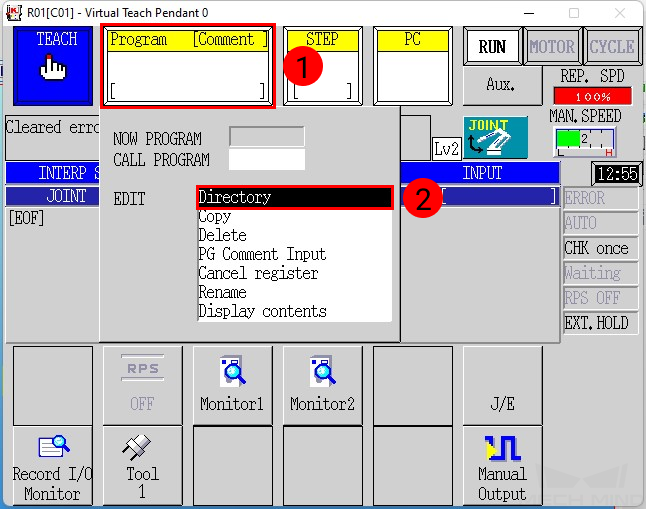
Press on the Program area, select Directory.
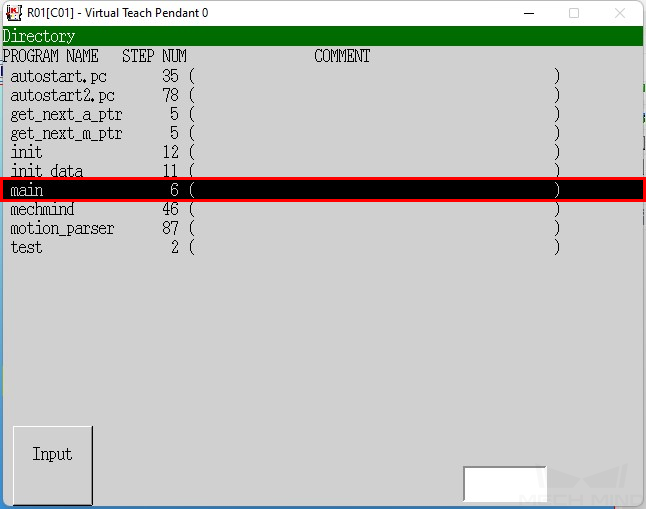
Select main, and press the ENTER key to save the change.
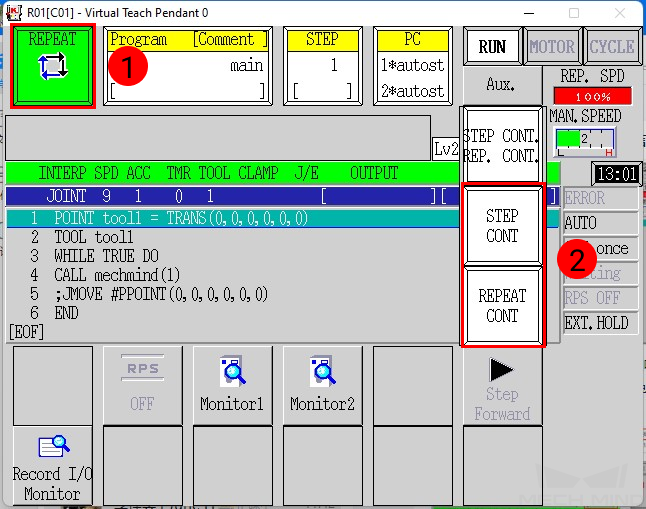
Switch the robot to repeat mode, press on the white button below Aux., and change the drop-down options to STEP CONT and REPEAT CONT.
Note
To switch the robot to repeat mode, turn the Teach/Repeat switch on the controller to REPEAT, and the teach lock switch on the teach pendant to OFF.
Restart the controller. Now the teach pendant should show the following interface, with two PC programs running (indicated by the asterisks after the program numbers) and 1 displayed in the STEP area.
Note
If the STEP isn’t 1, please press on the STEP area and change it to 1.
Test Robot Connection
Please refer to Test Robot Connection for detailed instructions on connecting to the robot in Mech-Center.
Press on MOTOR while holding down the A key to power the motor.
Press on CYCLE while holding down the A key to run the program.
If RUN does not turn green, press the RUN/HOLD key while holding down the A key.
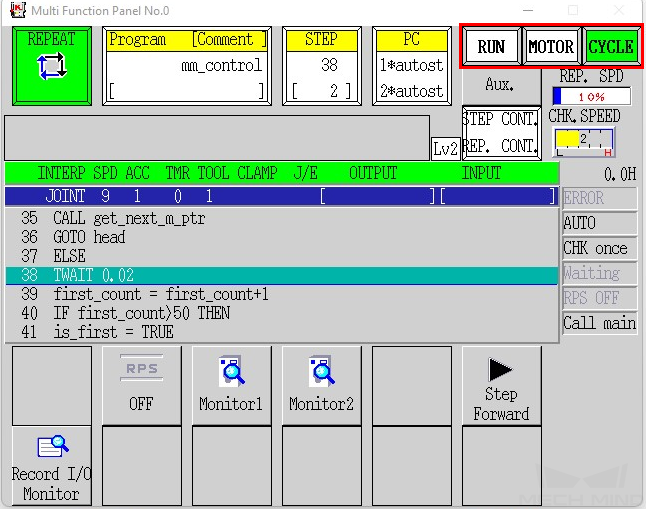
The robot is successfully connected if MOTOR, CYCLE, and RUN are lit green, and no error messages appear in Mech-Center or on the teach pendant.