ABB Setup Instructions
This section introduces the process of loading the robot full-control program onto an ABB robot.
The process consists of 4 steps:
Please have a flash drive ready at hand.
Check Controller and Software Compatibility
Controller: no requirement
Controller system software version: RobotWare 6.02 or above
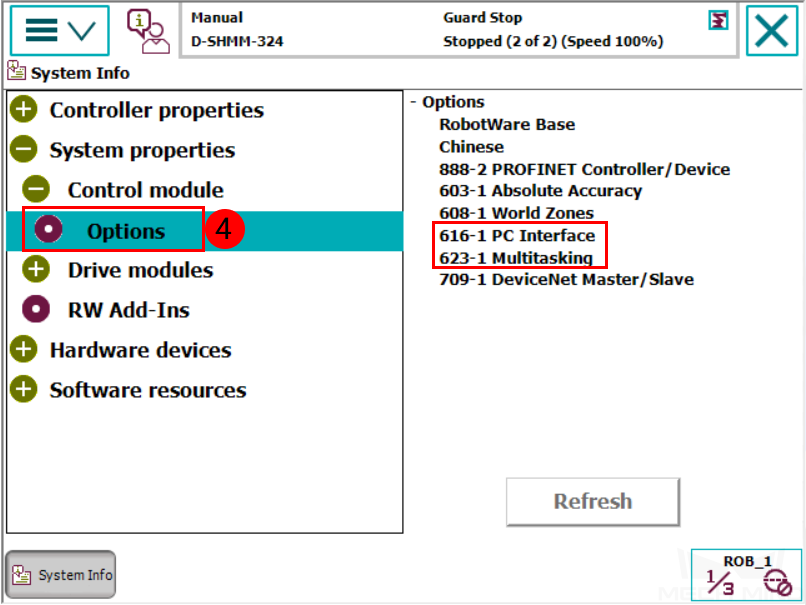
Control module options: 623-1 Multitasking and 616-1 PCInterface
Note
The above control module options must be installed to realize full-control of an ABB robot.
Mech-Center: latest version recommended
Follow the steps below to check the RobotWare version and the installed control module options.
Tap
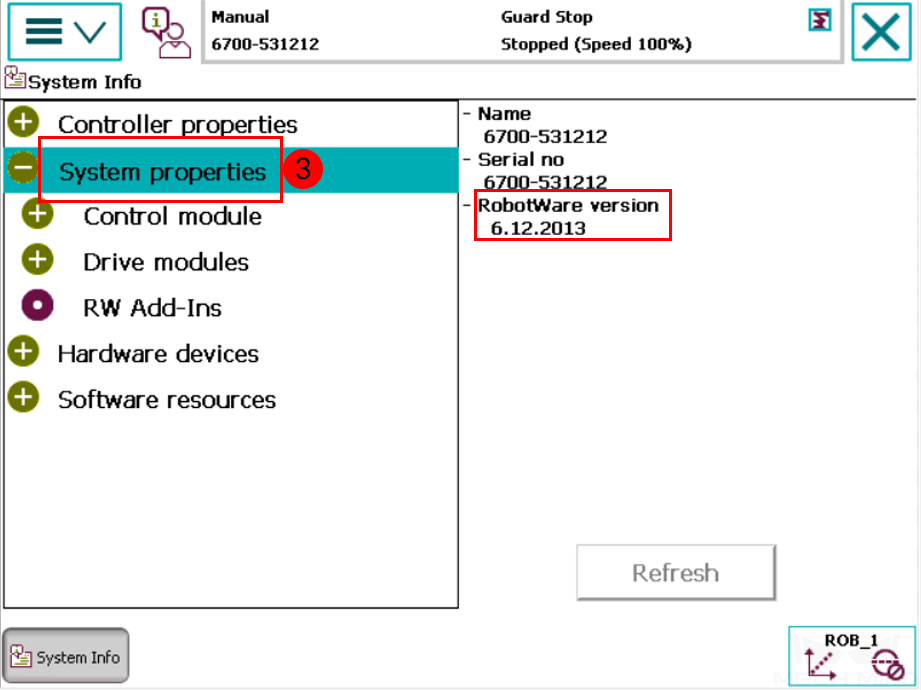
 and then go to to check the RobotWare version.
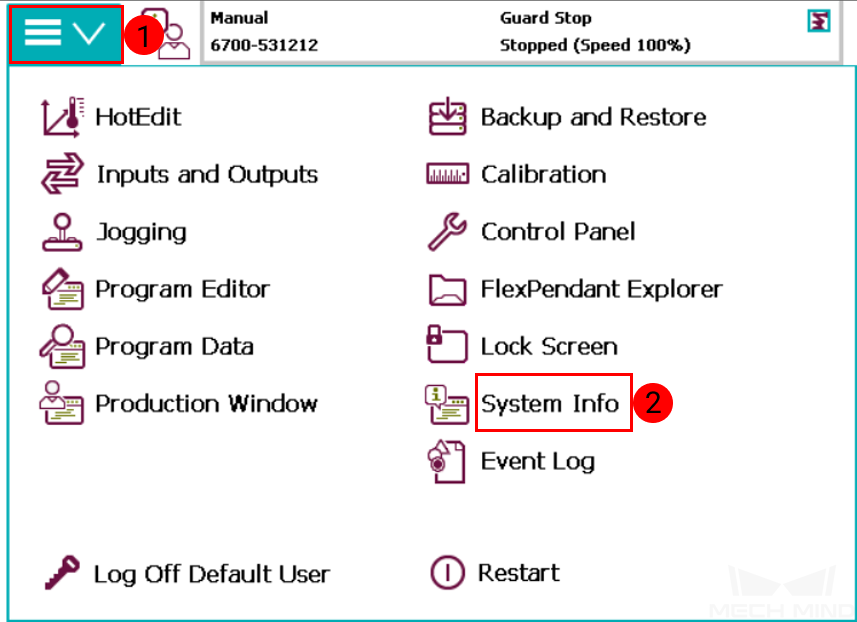
Go to to check whether the necessary options are installed.
Setup the Network Connection
Hardware Connection
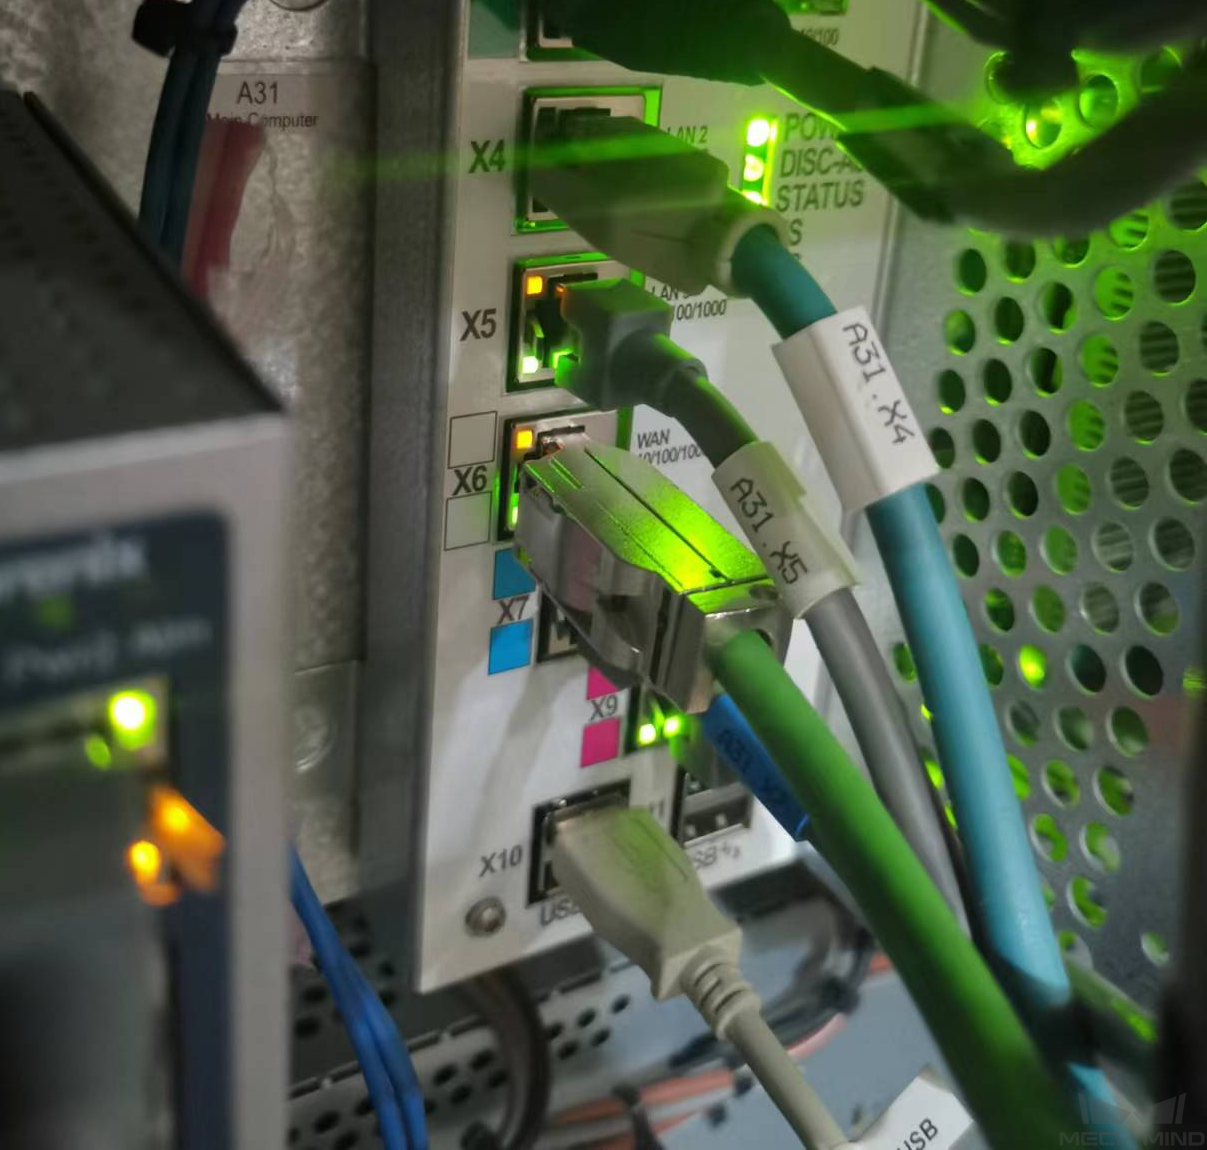
Plug the Ethernet cable of the IPC into the X6 (WAN) port of the robot controller, as shown below.
Hint
If you only need to load the full-control program via RobotStudio, you can use either LAN port or WAN port to connect the robot controller. However, in order to enable visual communication, the Ethernet cable can only be connected to the WAN port.
IP Configuration
You can set the IP on the teach pendant or via RobotStudio.
Set the IP on the teach pendant
Tap
and select Restart.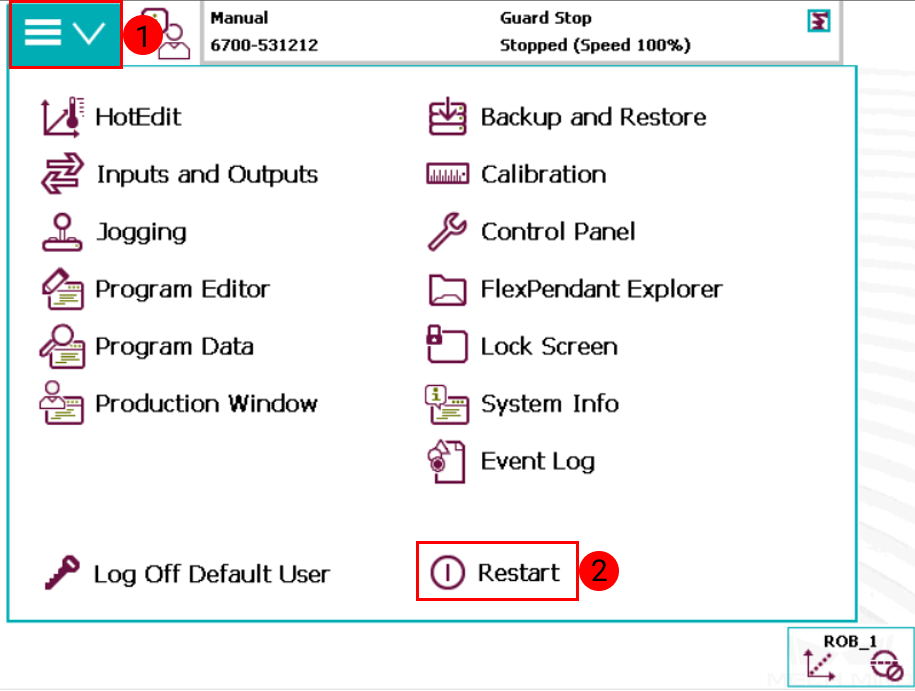
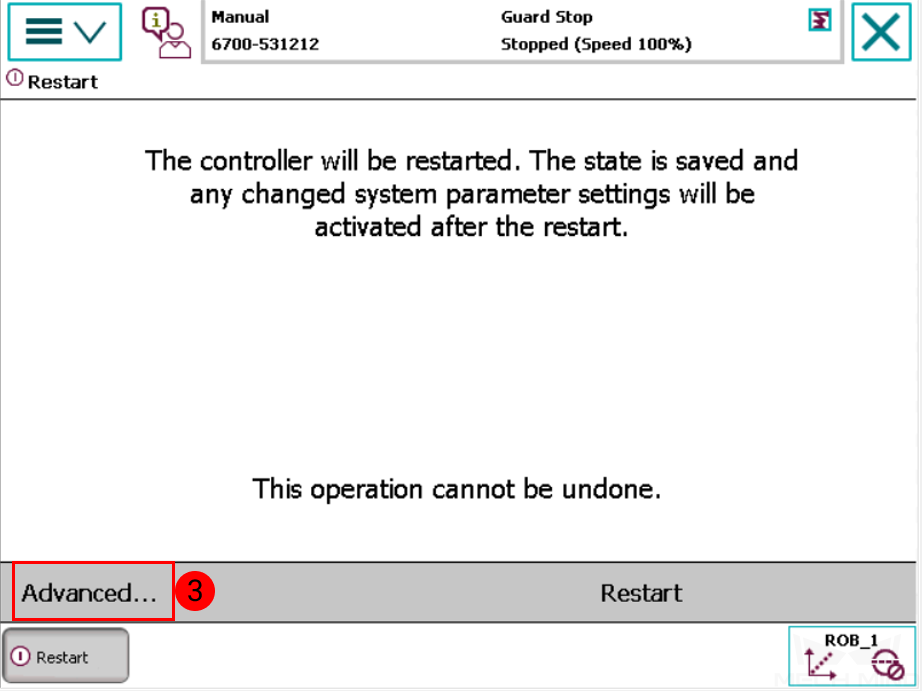
Select Advanced…
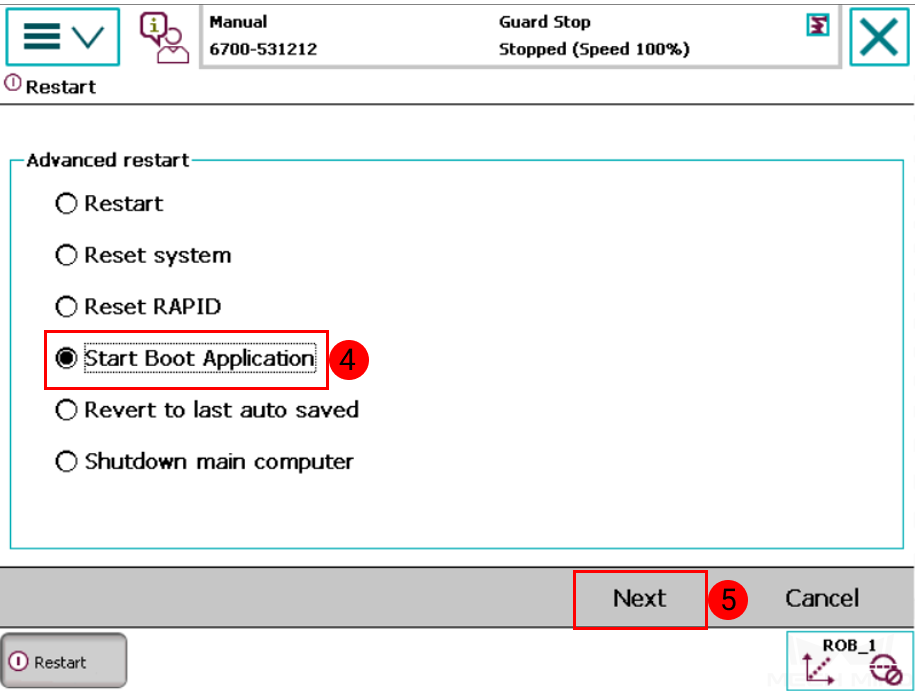
Select Start Boot Application and tap Next.
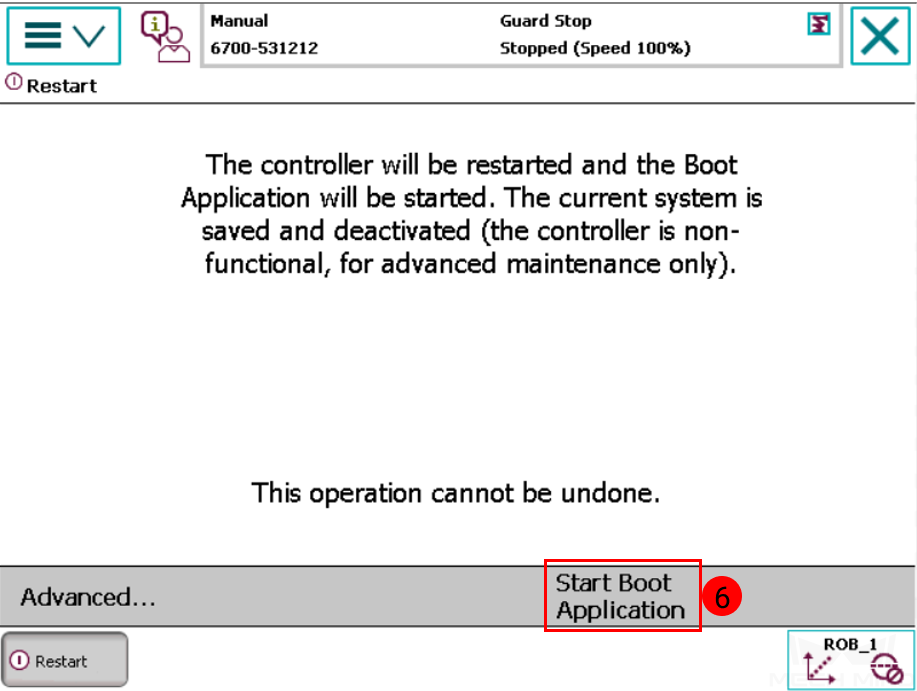
Select Start Boot Application to confirm.
After restarting, you will see the interface as shown below. Tap Settings.

Select Use the following IP settings and configure the IP Address, Subnet Mask, and Default gateway. Tap OK after configuration.

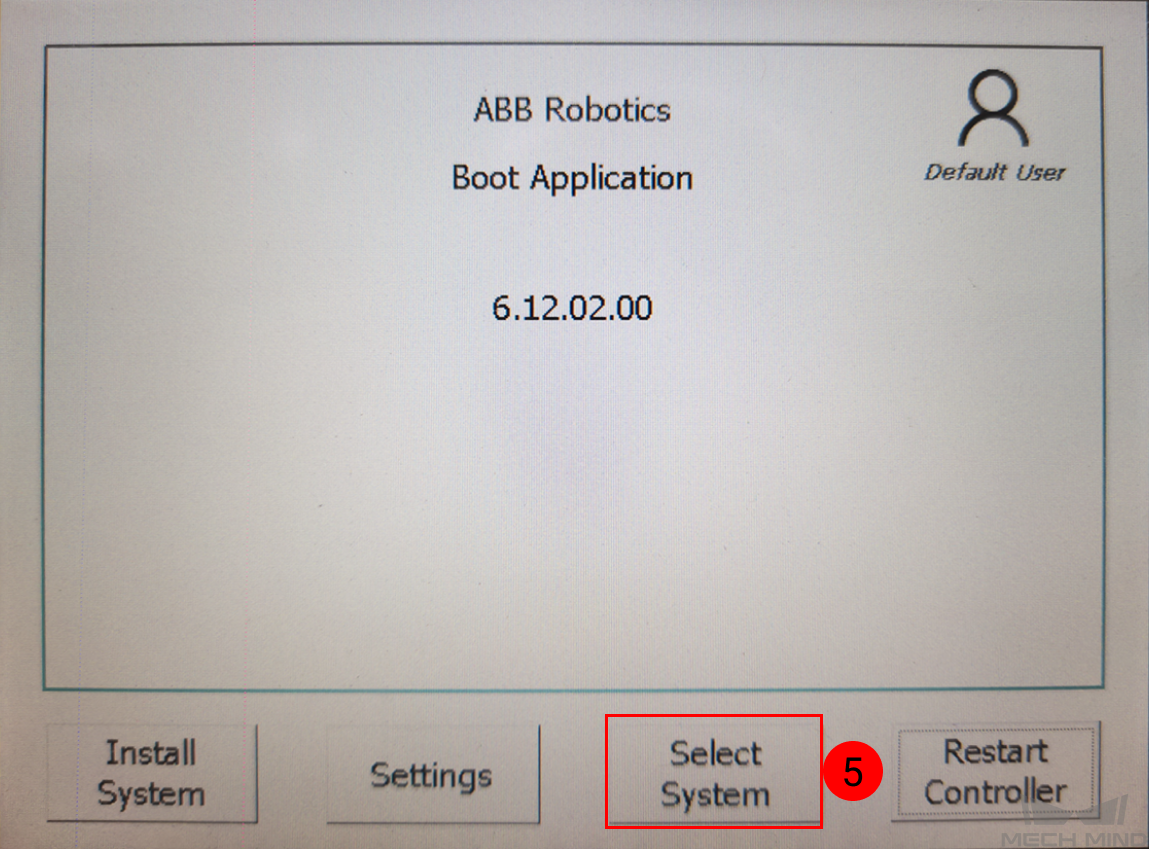
Tap Select System.
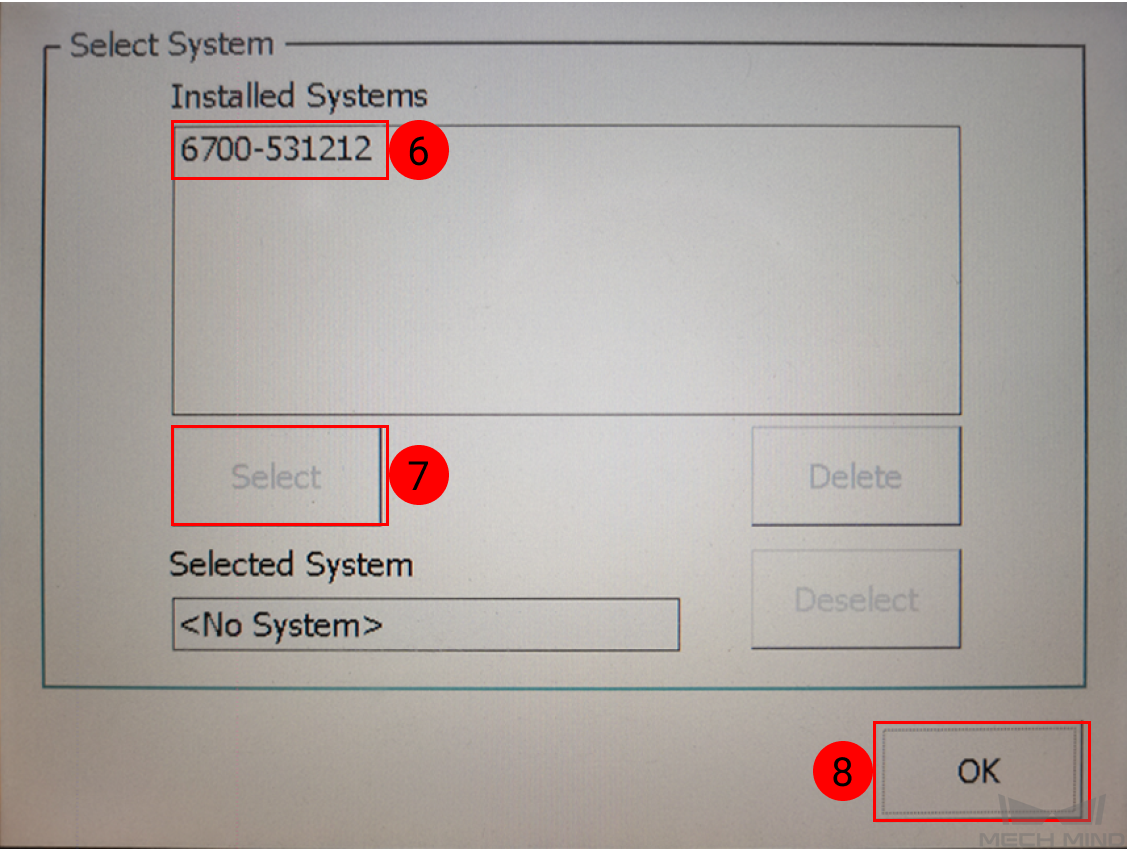
Select the system name in Installed Syetems box and then tap Select. Tap OK after configuration.
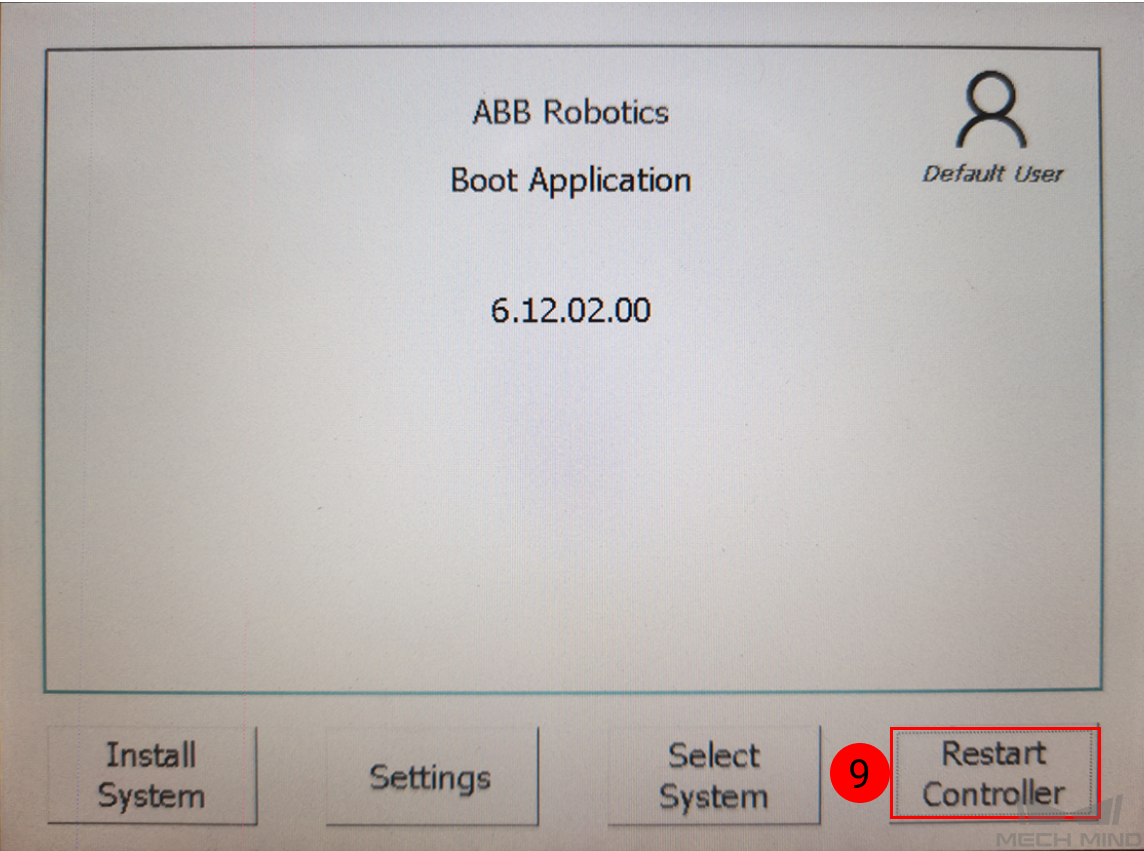
Select Restart Controller.
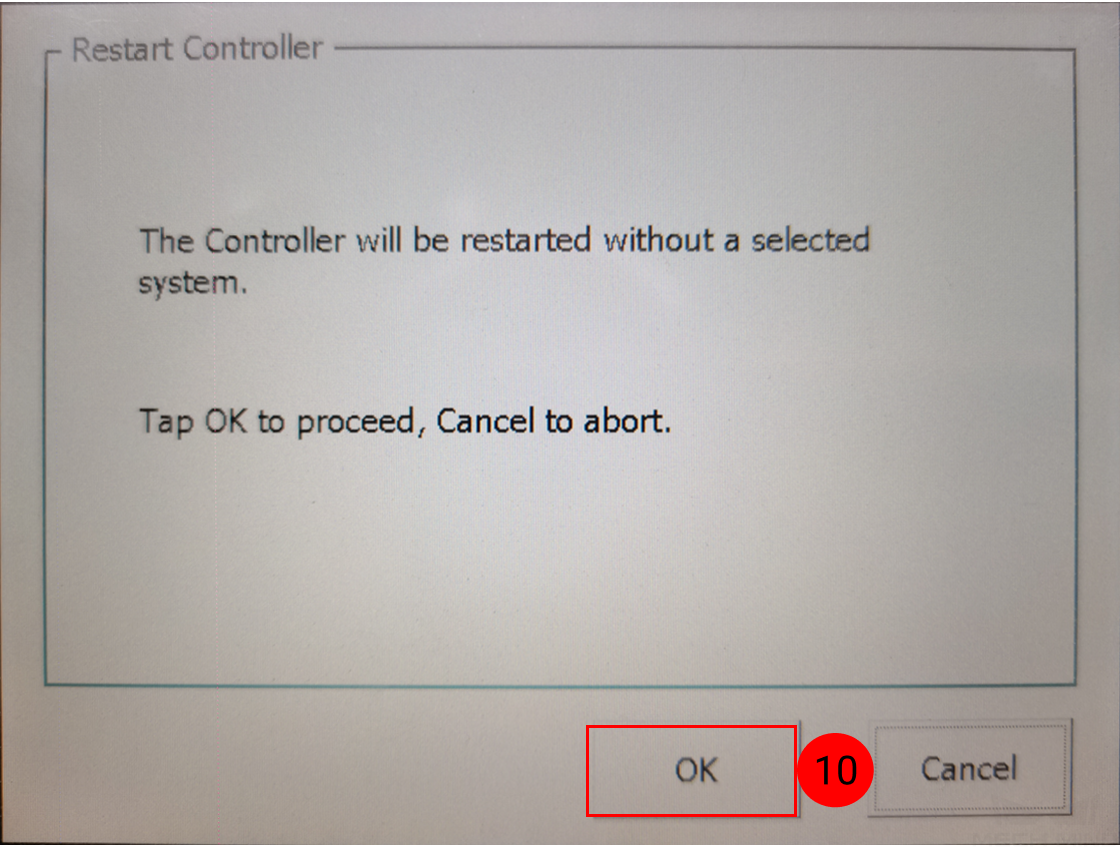
Tap OK to proceed.
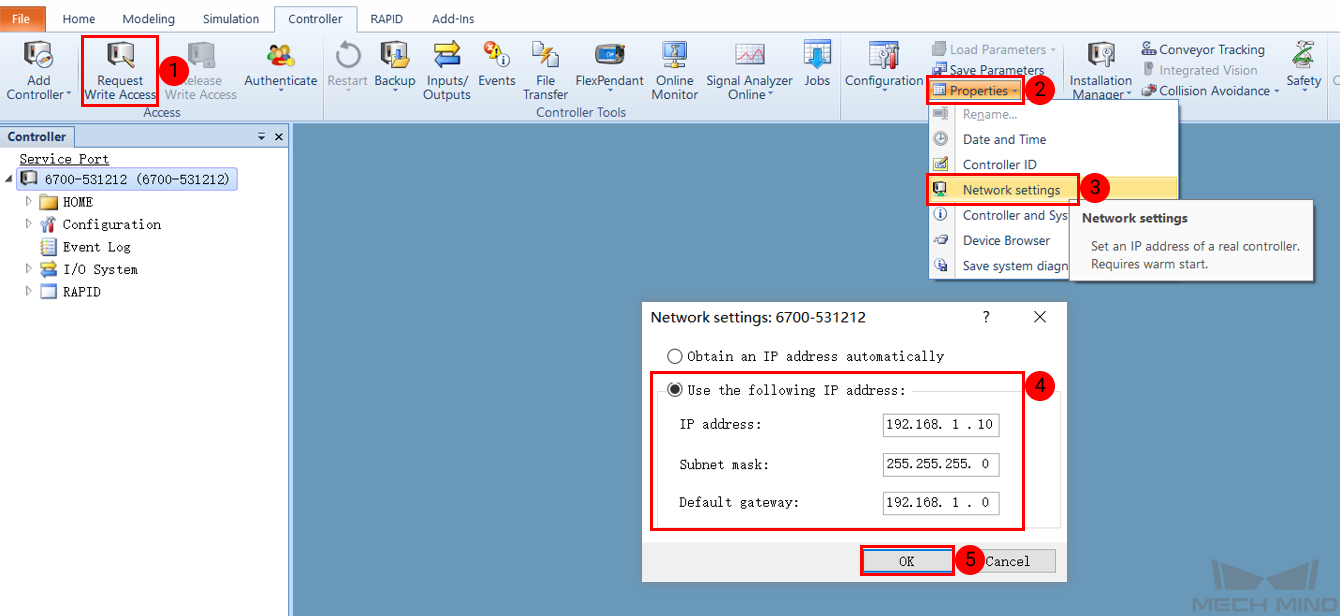
Set the IP via RobotStudio
Follow the steps as shown below to configure the robot IP, and restart the robot after configuration.
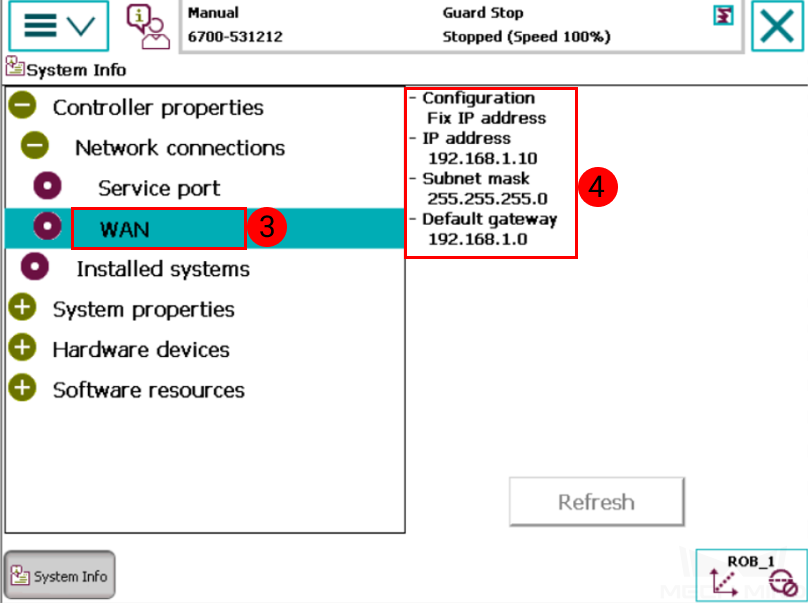
Go to to check if the IP configuration was successful after restarting.

Load the Program Files
Attention
Before operating the robot, please follow the backup instructions below to back up the system.
If the robot currently has other programs running, to avoid interference by these programs, please reset RAPID or system before you load the full-control program files onto the robot. If you need to use the full-control program in conjunction with the current MOD programs and/or DI/DO signal configurations, please contact Mech-Mind Technical Support.
If you need to re-load the full-control program, please reset RAPID first before re-loading. You do not need to re-load the config files.
Backup
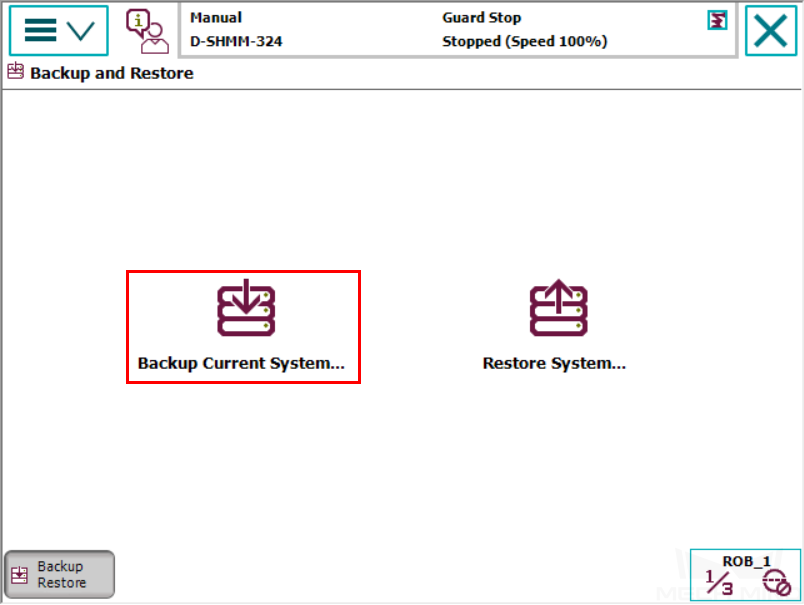
Go to the home page using the menu in the upper-left corner, and then select Backup and Restore.

Select Backup Current System….
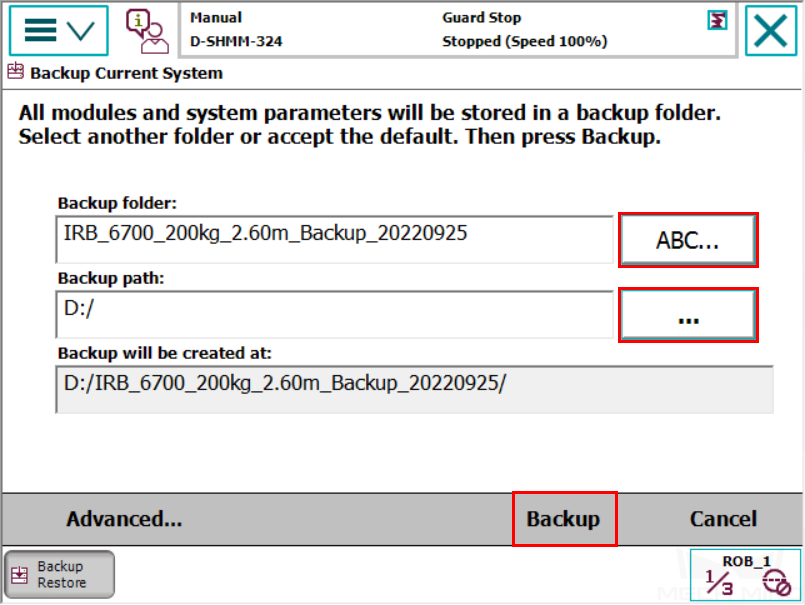
Specify the backup file name by pressing on ABC…, and specify the directory for saving the file by pressing …. Then, press Backup in the lower-right to start the backup process.
Reset
Attention
Please make sure you have backed up the system before resetting.
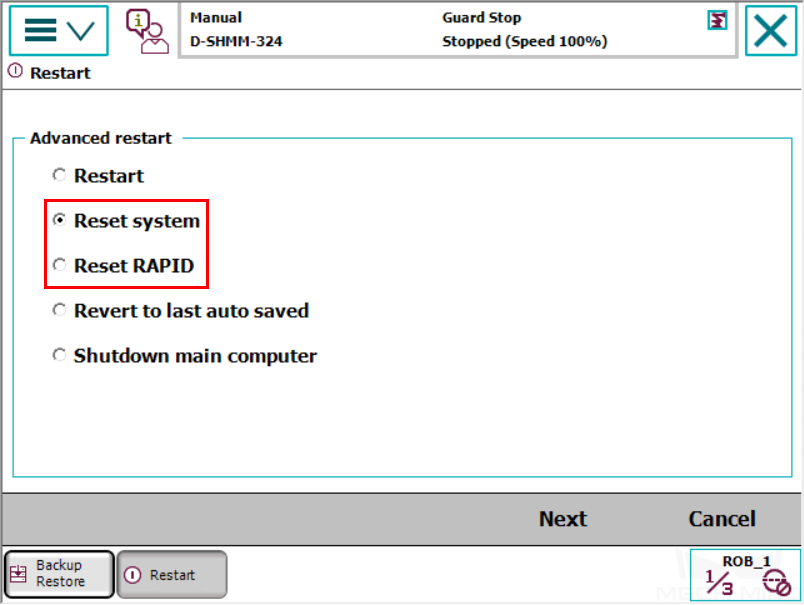
Two reset options are provided: Reset system and Reset RAPID.
Reset system discards all system parameter settings and changes made to RAPID programs.
Reset RAPID only discards changes made to RAPID programs, and system parameter settings are kept.
Go to the home page using the menu in the upper-left corner, and then select Restart.
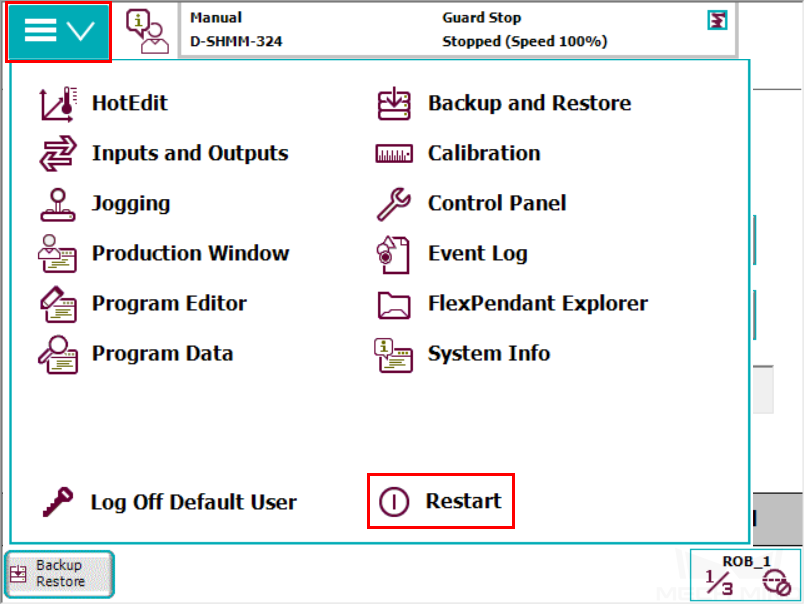
Select Advanced… in the lower-left.
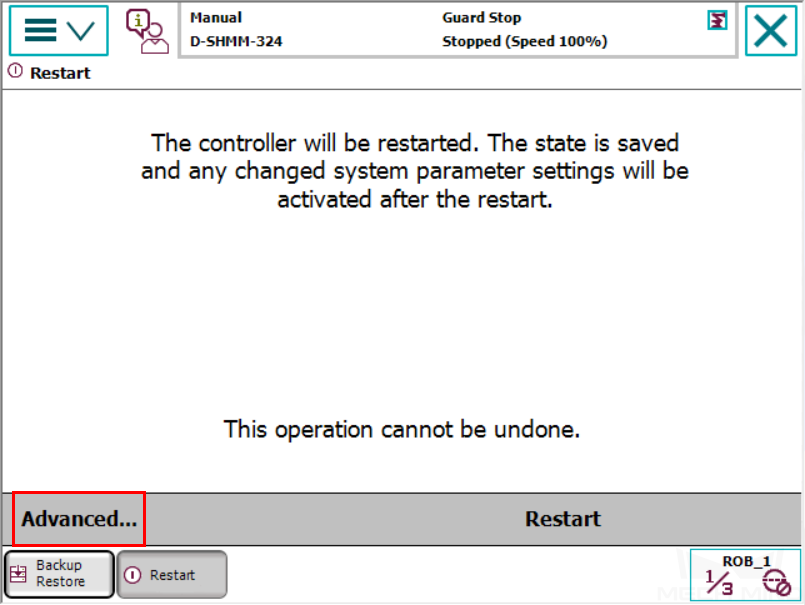
Select either Reset system or Reset RAPID according to your needs, and then press Next in the lower-right.
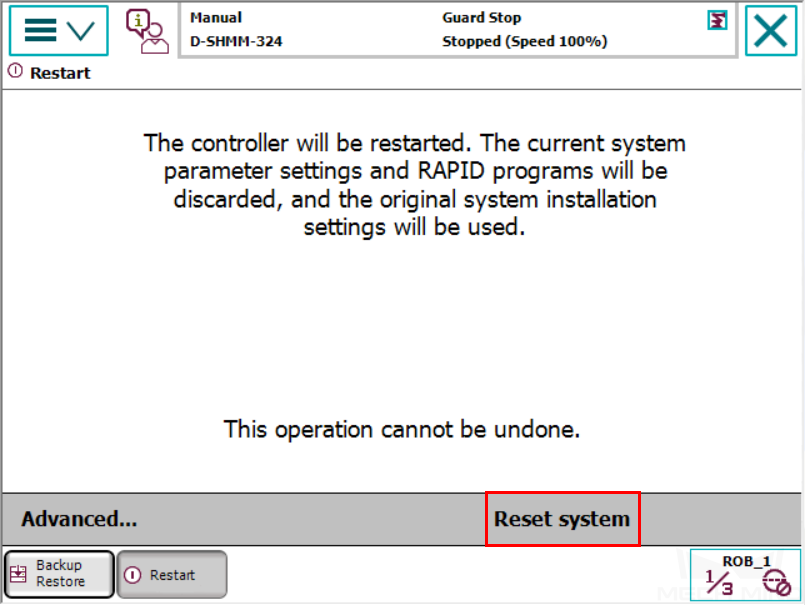
Press Reset system or Reset RAPID in the lower-right, depending on your selection in the previous step, to start the reset process.
Prepare the Files
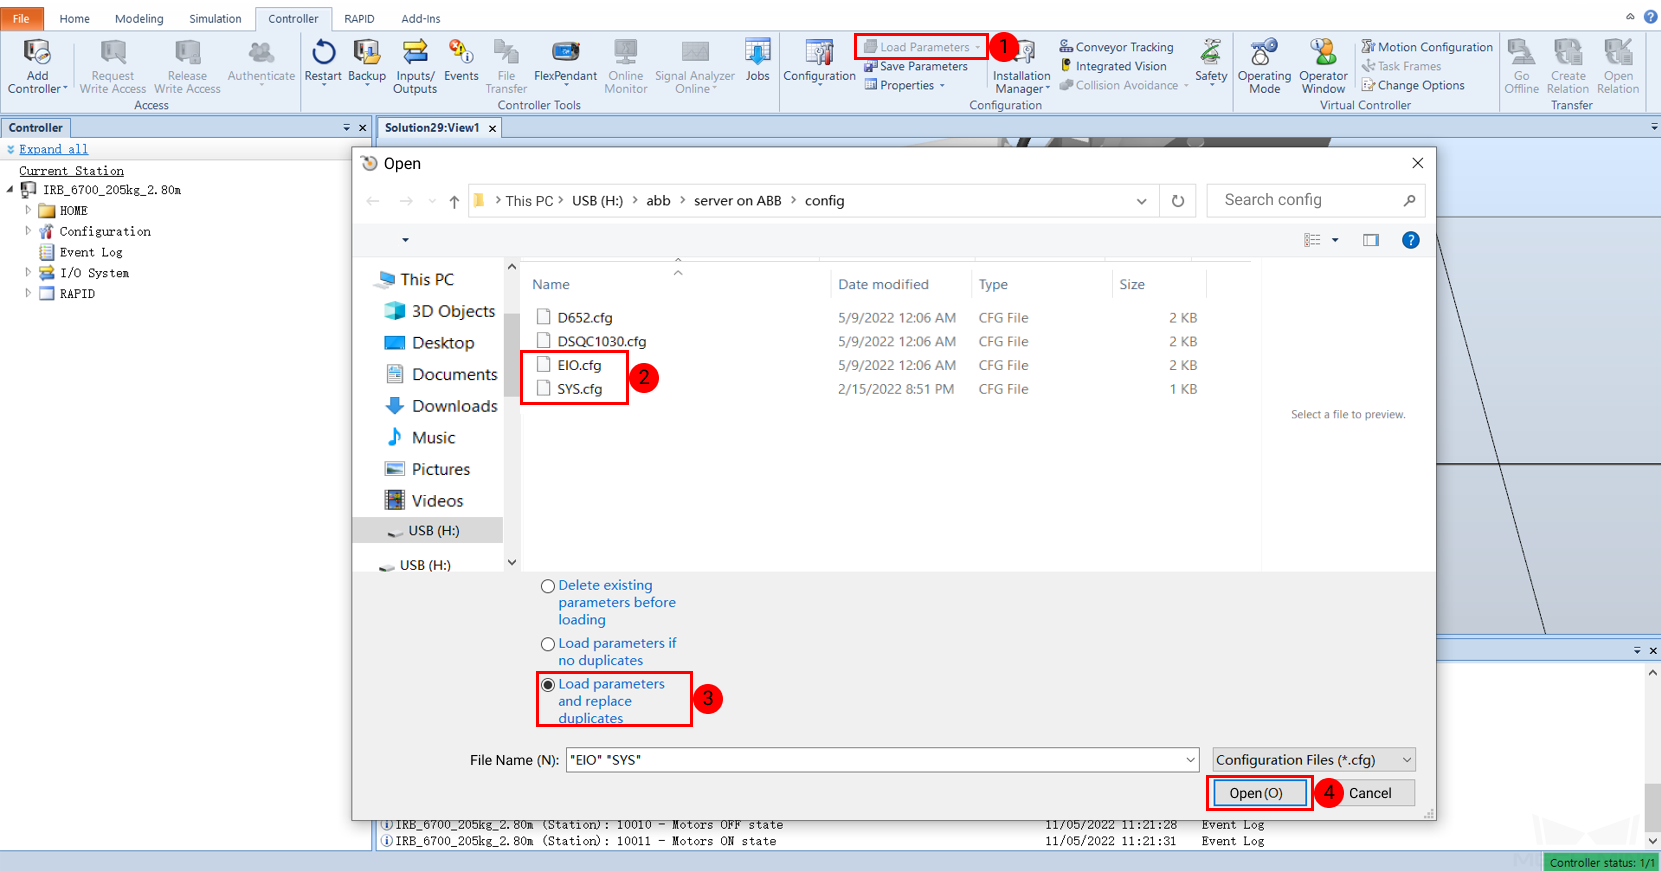
Copy the program files into an USB flash drive. Please locate the folder where Mech-Center is installed and the files are stored in XXXX/Mech-Center-xxx/Robot_Server/Robot_FullControl/abb/server on ABB/config.
The config file should be compatible with the I/O Unit in use. Please choose the right config file according to the table below:
I/O Unit |
config file |
DSQC 652 |
D652.cfg, SYS.cfg |
DSQC 1030 |
DSQC1030.cfg, SYS.cfg |
Other I/O Units or the program is only used for auto-calibration |
EIO.cfg, SYS.cfg |
Load the Files to the Robot
Open RobotStudio on the IPC and connect to the controller.
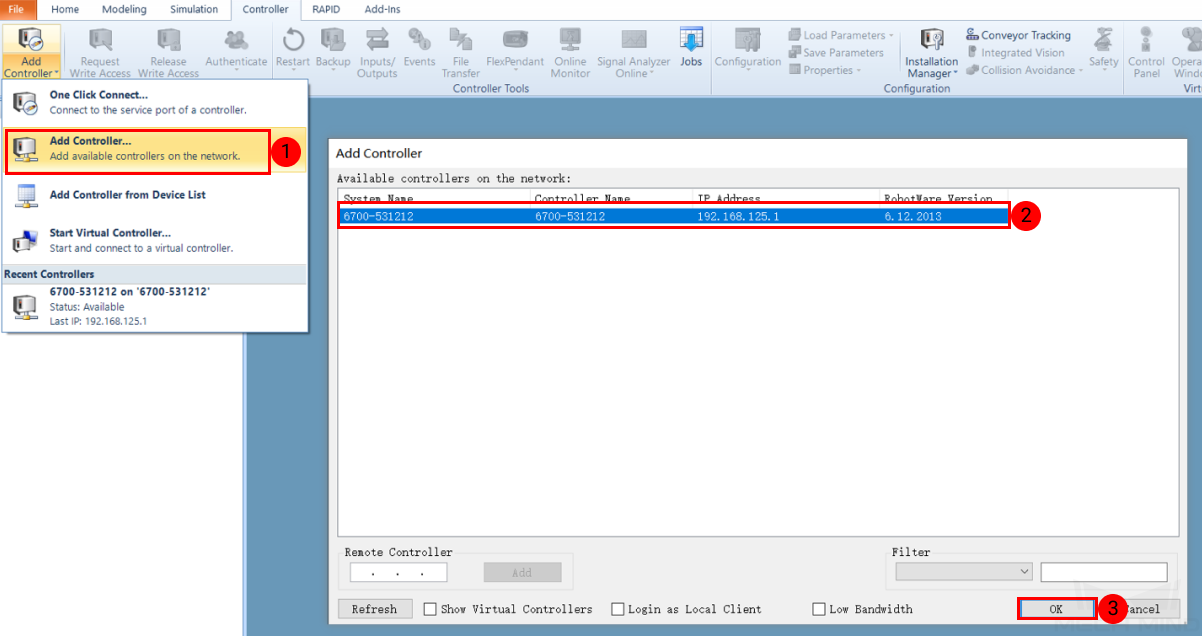
If the robot controller is connected via the LAN port, click on One Click Connect….
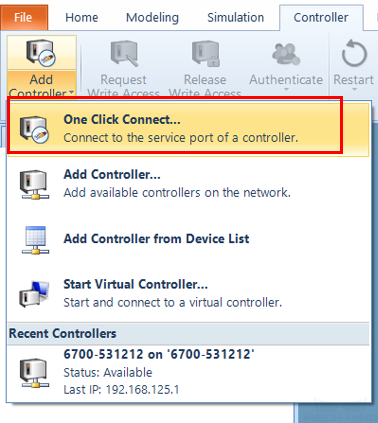
If the robot controller is connected via the WAN port or a switch, click on Add Controller and then select the controller and click on OK.
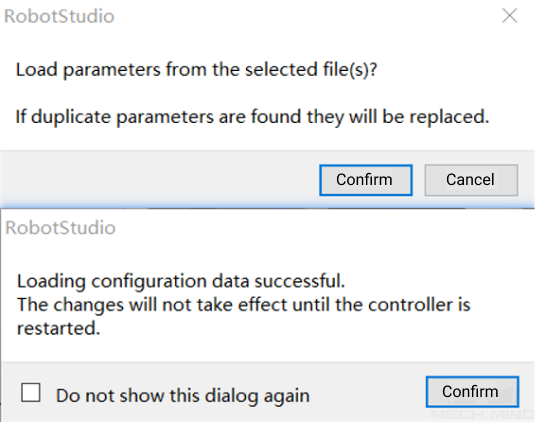
Import the config files as shown below. Click on Confirm in the pop-up windows.
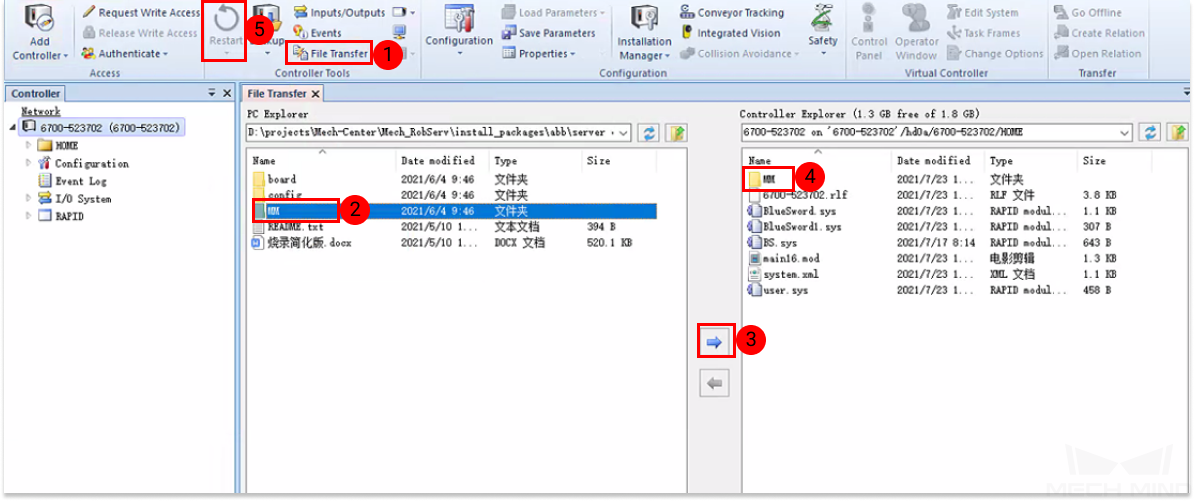
Copy the whole MM folder and paste it to the HOME directory of the robot system, as shown below. Restart the controller to complete loading the program files.
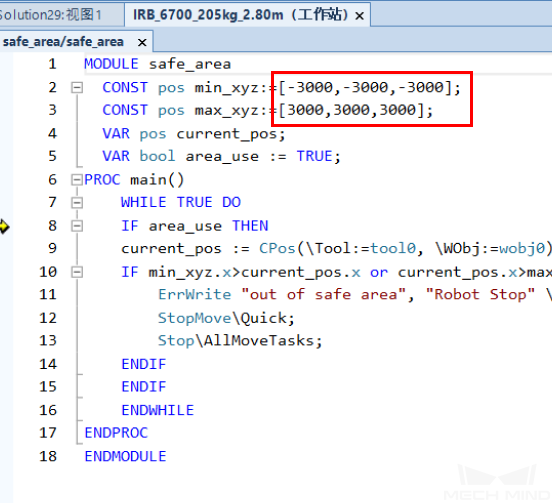
Modify the safe zone threshold (in mm) in the safe_area.mod program according to the actual on-site work space of the robot.
Run the program
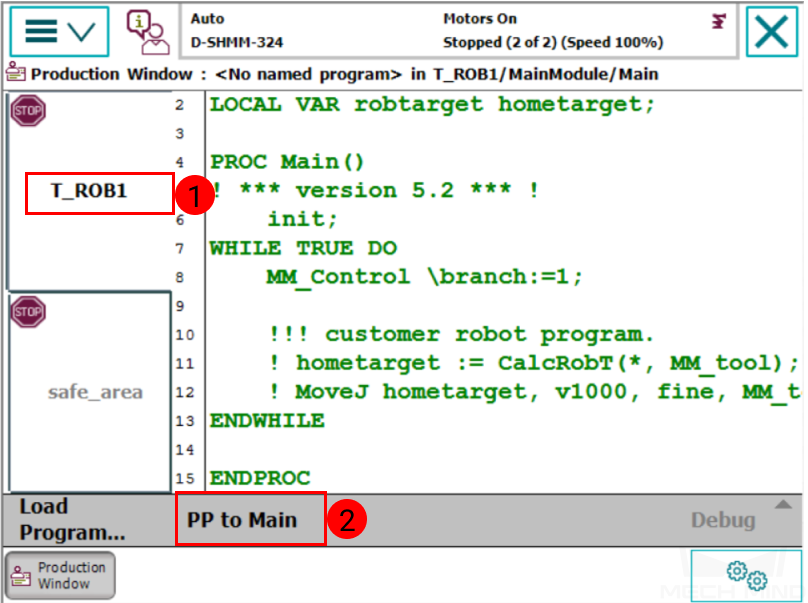
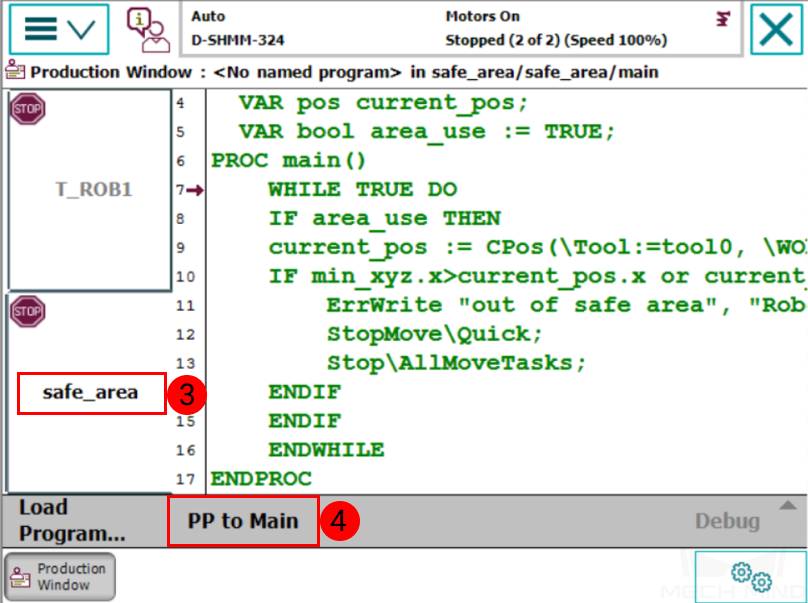
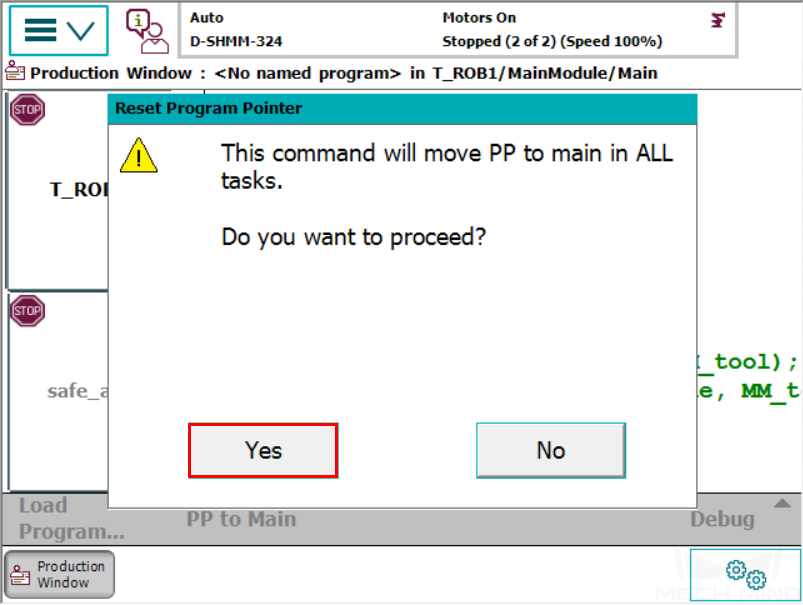
Move the PP of tasks T_ROB1 and safe_area to Main respectively.
After selecting PP to Main, if a window as shown below pops up, please tap Yes to confirm.
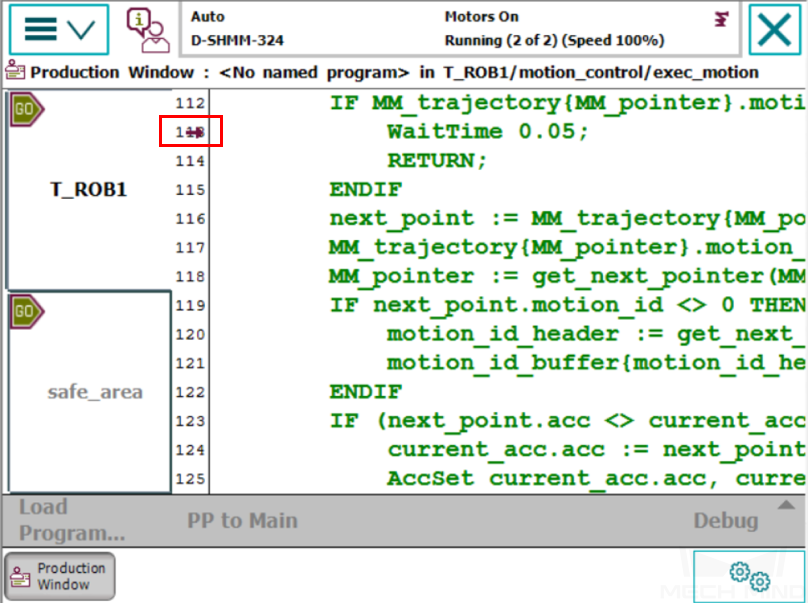
Run the program manually or automatically. The program pointer is shown below.
Test Robot Connection
Please refer to Test Robot Connection for detailed instructions.