1. C++ (Windows)
This section demonstrates how to configure the C++ samples with CMake and then build and run the samples with Visual Studio in Windows.
1.1. Sample List
Samples are divided into five categories, Basic, Advanced, Util, Laser and UHP.
Basic: camera connection and basic capturing functions.
Advanced: advanced capturing functions.
Util: obtain information from a camera and set camera parameters.
Laser: for Laser/LSR series cameras only.
UHP: for UHP series cameras only.
Basic
ConnectToCamera: Connect to a Mech-Eye Industrial 3D Camera.
ConnectAndCaptureImage: Connect to a camera and obtain 2D image, depth map and 3D image.
CaptureColorMap (OpenCV): Obtain 2D image in OpenCV format from a camera.
CaptureDepthMap (OpenCV): Obtain depth map in OpenCV format from a camera.
CapturePointCloud (PCL): Obtain untextured and textured point clouds (PCL format) generated from images captured with a single exposure time.
CaptureHDRPointCloud (PCL): Obtain untextured and textured point clouds (PCL format) generated from images captured with multiple exposure times.
CapturePointCloudROI (PCL): Obtain untextured and textured point clouds (PCL format) of the objects in the ROI from a camera.
Advanced
CaptureCloudFromDepth (PCL): Construct point clouds from depth map and 2D image captured from a camera.
CaptureTimedAndPeriodically (OpenCV & PCL): Obtain 2D image, depth map and 3D images sequentially from multiple cameras.
CaptureSimultaneouslyMultiCamera (OpenCV & PCL): Obtain 2D image, depth map and 3D images simultaneously from multiple cameras.
CaptureSequentiallyMultiCamera (OpenCV & PCL): Obtain 2D image, depth map and 3D images periodically for the specified duration from a camera.
Util
GetCameraIntri: Get and print a camera’s intrinsic parameters.
PrintDeviceInfo: Get and print a camera’s information such as model, serial number and firmware version.
SetDepthRange: Set the range of depth values to be retained by a camera.
SetParameters: Set specified parameters to a camera.
SetUserSets: provide functions related to parameter groups, such as switching to a different parameter group, adding and deleting parameter groups, etc.
Laser
SetLaserFramePartitionCount: Divide the projector FOV into partitions and project structured light in one partition at a time. The output of the entire FOV is composed from images of all partitions.
SetLaserFrameRange: Set the projection range of the structured light. The entire projector FOV is from 0 to 100.
SetLaserFringeCodingMode: Set the coding mode of the structured light pattern.
SetLaserPowerLevel: Set the output power of the laser projector in percentage of max power. This affects the intensity of the laser light.
UHP
SetUHPCaptureMode: Set the capture mode (capture images with camera 1, with camera 2, or with both 2D cameras and compose the outputs).
SetUHPFringeCodingMode: Set the coding mode of the structured light pattern.
1.2. Requirements
Required software:
Mech-Eye SDK
Visual Studio (version 2015 and above recommended)
CMake (version 3.2 or above recommended)
Optional software: please install the software required by the samples you would like to use.
OpenCV (version 3.4.5 recommended)
PCL (version 1.12.1 recommended)
CaptureColorMap
√
CaptureDepthMap
√
CapturePointCloud
√
CaptureHDRPointCloud
√
CapturePointCloudROI
√
CaptureCloudFromDepth
√
CaptureTimedAndPeriodically
√
√
CaptureSimultaneouslyMultiCamera
√
√
CaptureSequentiallyMultiCamera
√
√
Note
Instructions on installing the above software are provided below.
1.3. Instructions
Below are the step-by-step instructions from installing the required software to running a sample program.
1.3.1. Install Software
Install Mech-Eye SDK
Please refer to Install Mech-Eye SDK for instructions on downloading and installation.
Install Visual Studio
Download Visual Studio 2019 installer and double-click on the file to start the installation.
When the following window is displayed, scroll down to Desktop & Mobile, and check Desktop development with C++ and Universal Windows Platform development.
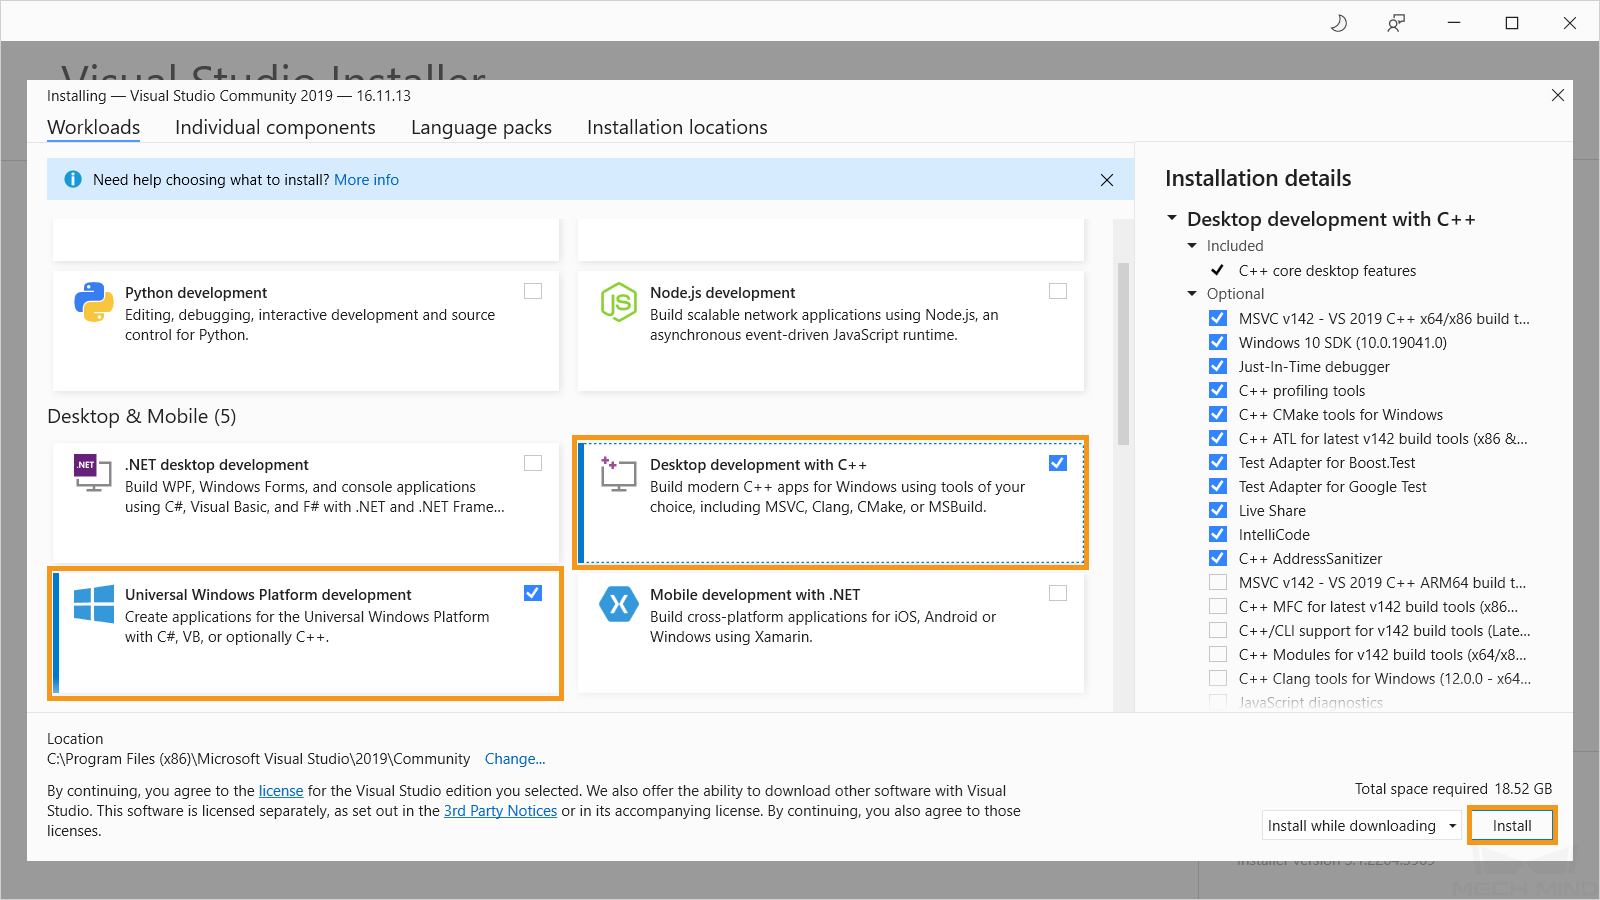
Click on Install in the lower right to proceed. If the installer prompts you to restart your computer, please do so.
Install CMake
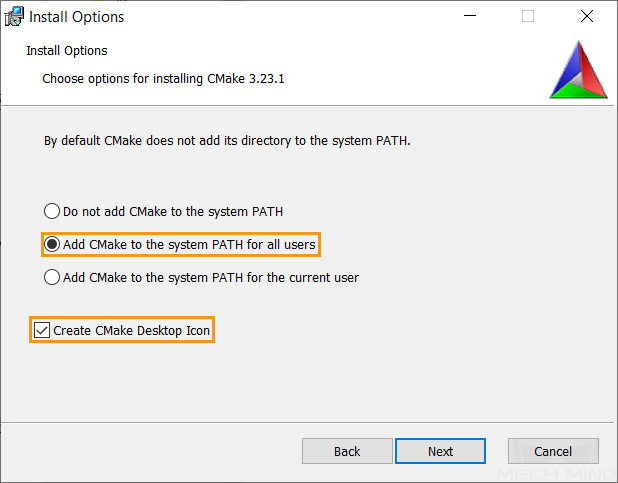
Download the CMake installer (the MSI file) and double-click on the file to start the installation.
Select Add CMake to the system PATH for all users and check Create CMake Desktop Icon, and then click on Next.
Install OpenCV
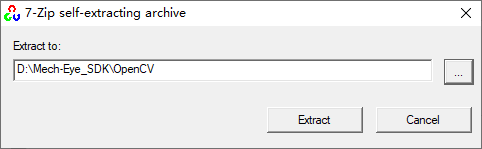
Download the OpenCV installer and double-click on the file to start the installation. Click on Extract to proceed.
Install PCL
Download PCL-1.12.1-AllInOne-msvc2019-win64.exe and pcl-1.12.1-pdb-msvc2019-win64.zip from the GitHub repository.
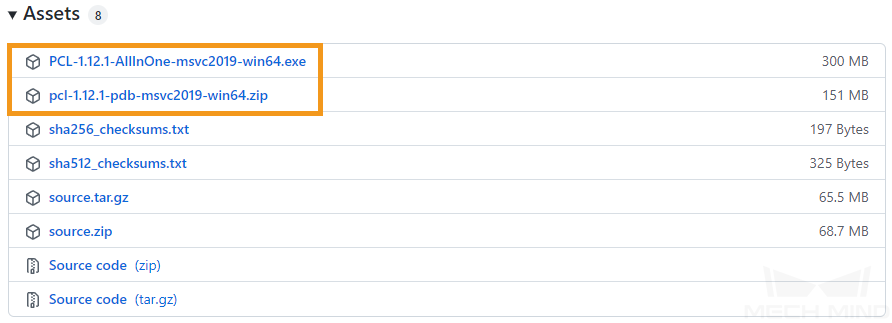
Extract pcl-1.12.1-pdb-msvc2019-win64.zip.
Double-click on PCL-1.12.1-AllInOne-msvc2019-win64.exe to start the installation.
On the Install Options page, select Add PCL to the system PATH for all users, and then click on Next.
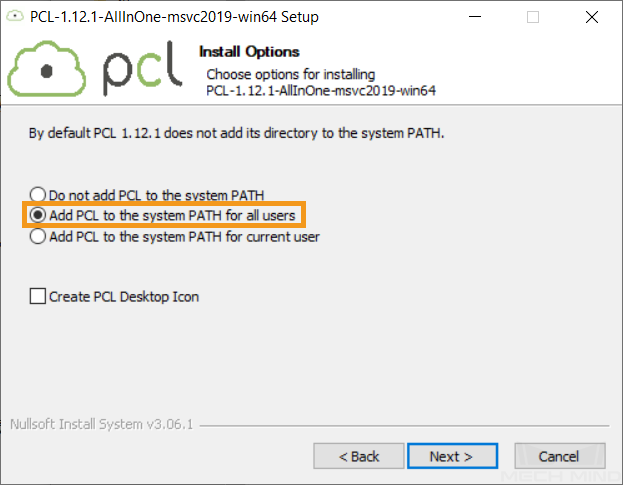
On the Choose Components page, make sure that 3rd Party Libraries is checked (it should be checked by default), and then click on Install to proceed.
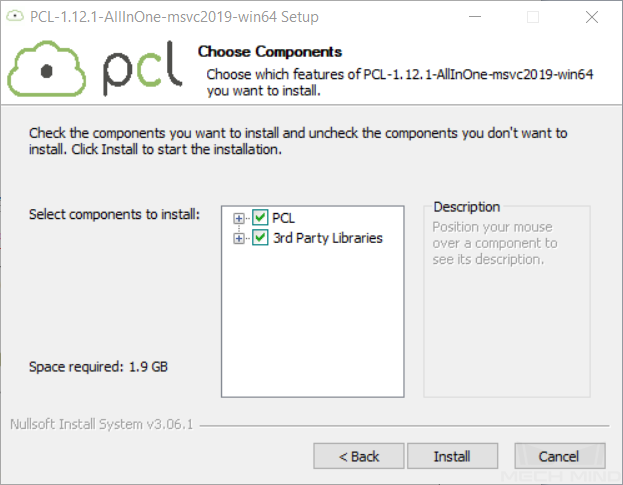
Note
If the following error message pops up:
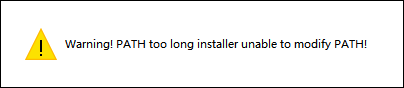
Please add the following directories to Path manually. For instructions, please see Section 1.3.2.
xxx/PCL 1.12.1/bin
xxx/PCL 1.12.1/3rdParty/VTK/bin
1.3.2. Set Environment Variables
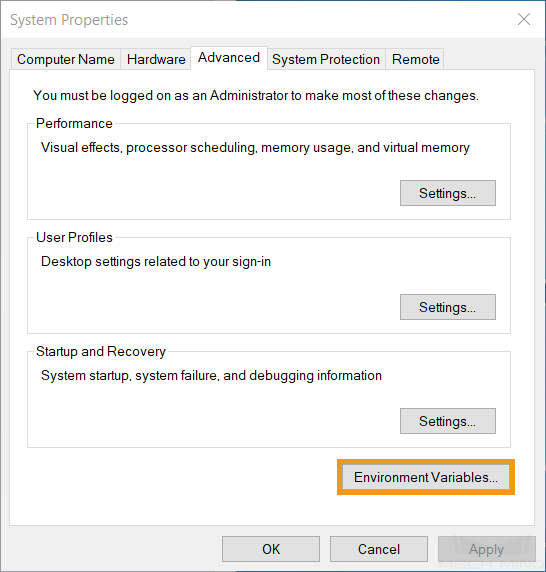
Right-click on This PC on the desktop, select Properties, and click on Advanced system settings in the pop-up window. In the popped up System Properties window, click on Environment Variables.
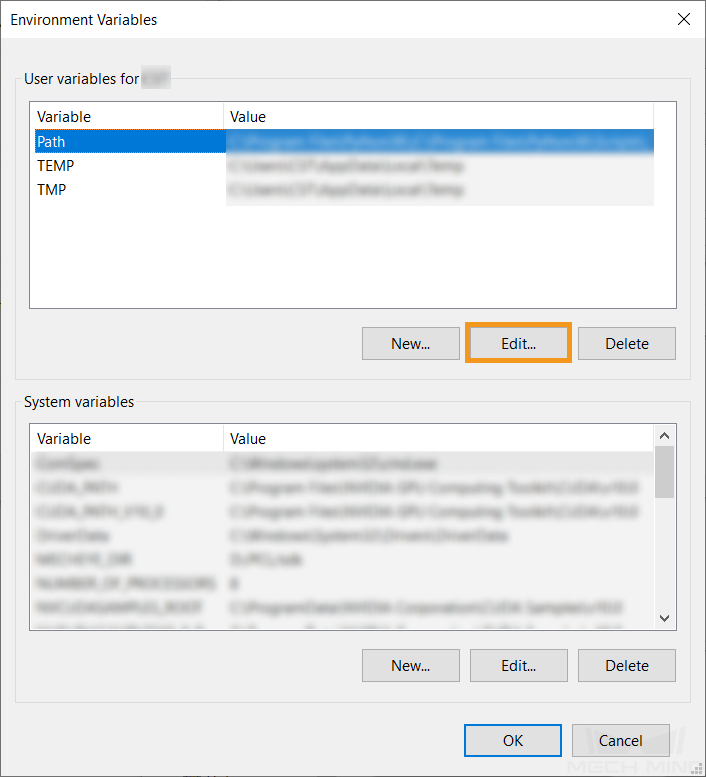
Select Path in the user variables, and click on Edit… to enter the Edit environment variable page.
Click on New to add a new directory, and press the Enter key to confirm adding. Repeat until you finish adding all the directories below, and click on OK to exit the window.

The following directories need to be added to Path:
C:/Program Files/OpenNI/Tools
xxx/opencv/build/x64/vc15/bin
1.3.3. Configure Solution in CMake
Run CMake (cmake-gui).
Note
It is recommended to run CMake as Administrator.
Set the paths as follows:
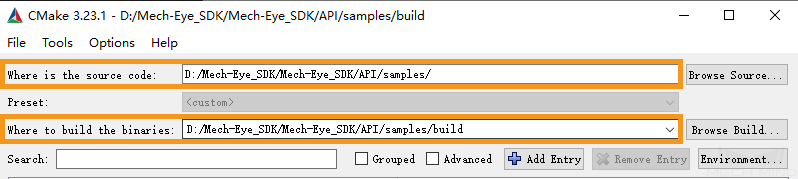
Where is the source code
xxx/Mech-Eye SDK/API/samples
Where to build the binaries
xxx/Mech-Eye SDK/API/samples/build
Click on Configure in the bottom, and set the following two fields according to the actual situation, and then click on Finish.
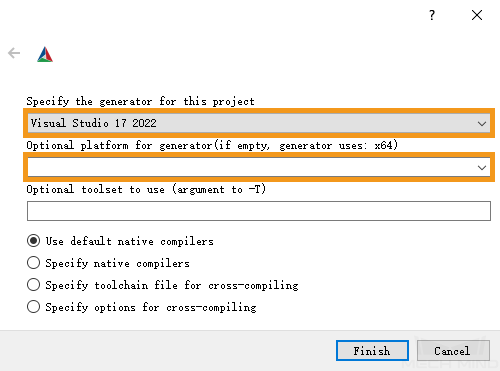
In the case where the following error message pops up:
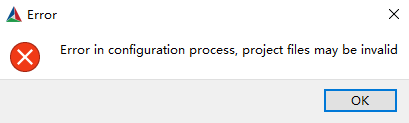
Please type OpenCV_DIR in the Search field, double-click on the directory and change it to xxx/opencv/build/x64/vc14/lib. Then, click on Configure again.

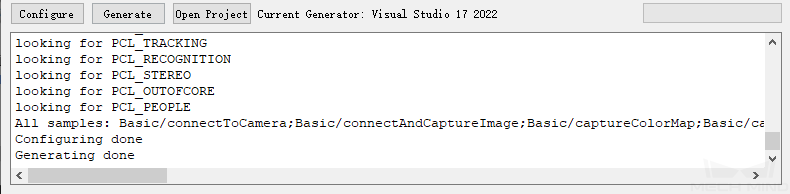
When the log displays Configuring done, click on Generate. When the log displays Generating done, click on Open Project, and select Visual Studio in the pop-up window.
1.3.4. Build Solution in Visual Studio
In the toolbar, click on Debug and select Release.

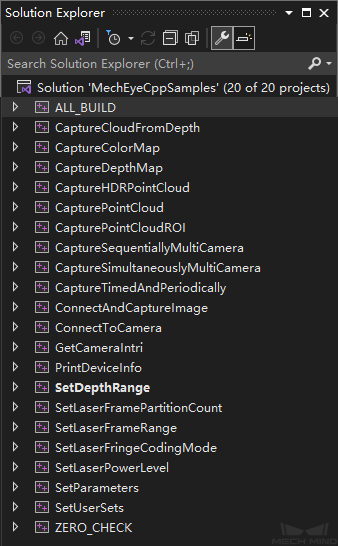
You can see all the available samples in Solution Explorer.
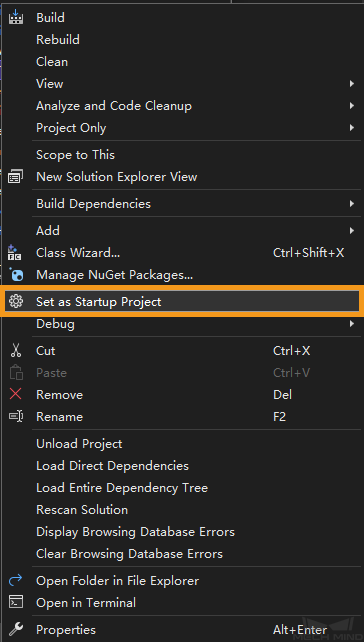
Right-click on a sample, and select Set as Startup Project.
Click on
 in the toolbar to build the solution.
1.3.5. Run Sample Program
Take CaptureColorMap.exe as an example.
Navigate to xxx/Mech-Eye SDK/API/samples/build/Release, and run CaptureColorMap.exe.
Input the index of the camera you want to connect according to the instructions.
When the program exits, you can find a colorMap.png (color image) under xxx/Mech-Eye SDK/API/samples/build.