User Interface of Mech-Eye Viewer
This section introduces the user interface of Mech-Eye Viewer.
Camera List
When you open Mech-Eye Viewer, the Camera List is displayed, as shown below.
In this interface, you can view all the available cameras and their information, set camera IP address and connect to a camera.
If you encountered any problems connecting to the camera, click the ? button in the lower right to view troubleshooting guidance.
Note
Once a camera is connected, you can’t return to this interface unless you disconnect from the camera. Therefore, if you need to change the camera IP address, please do so before connecting to the camera.
Camera Viewer
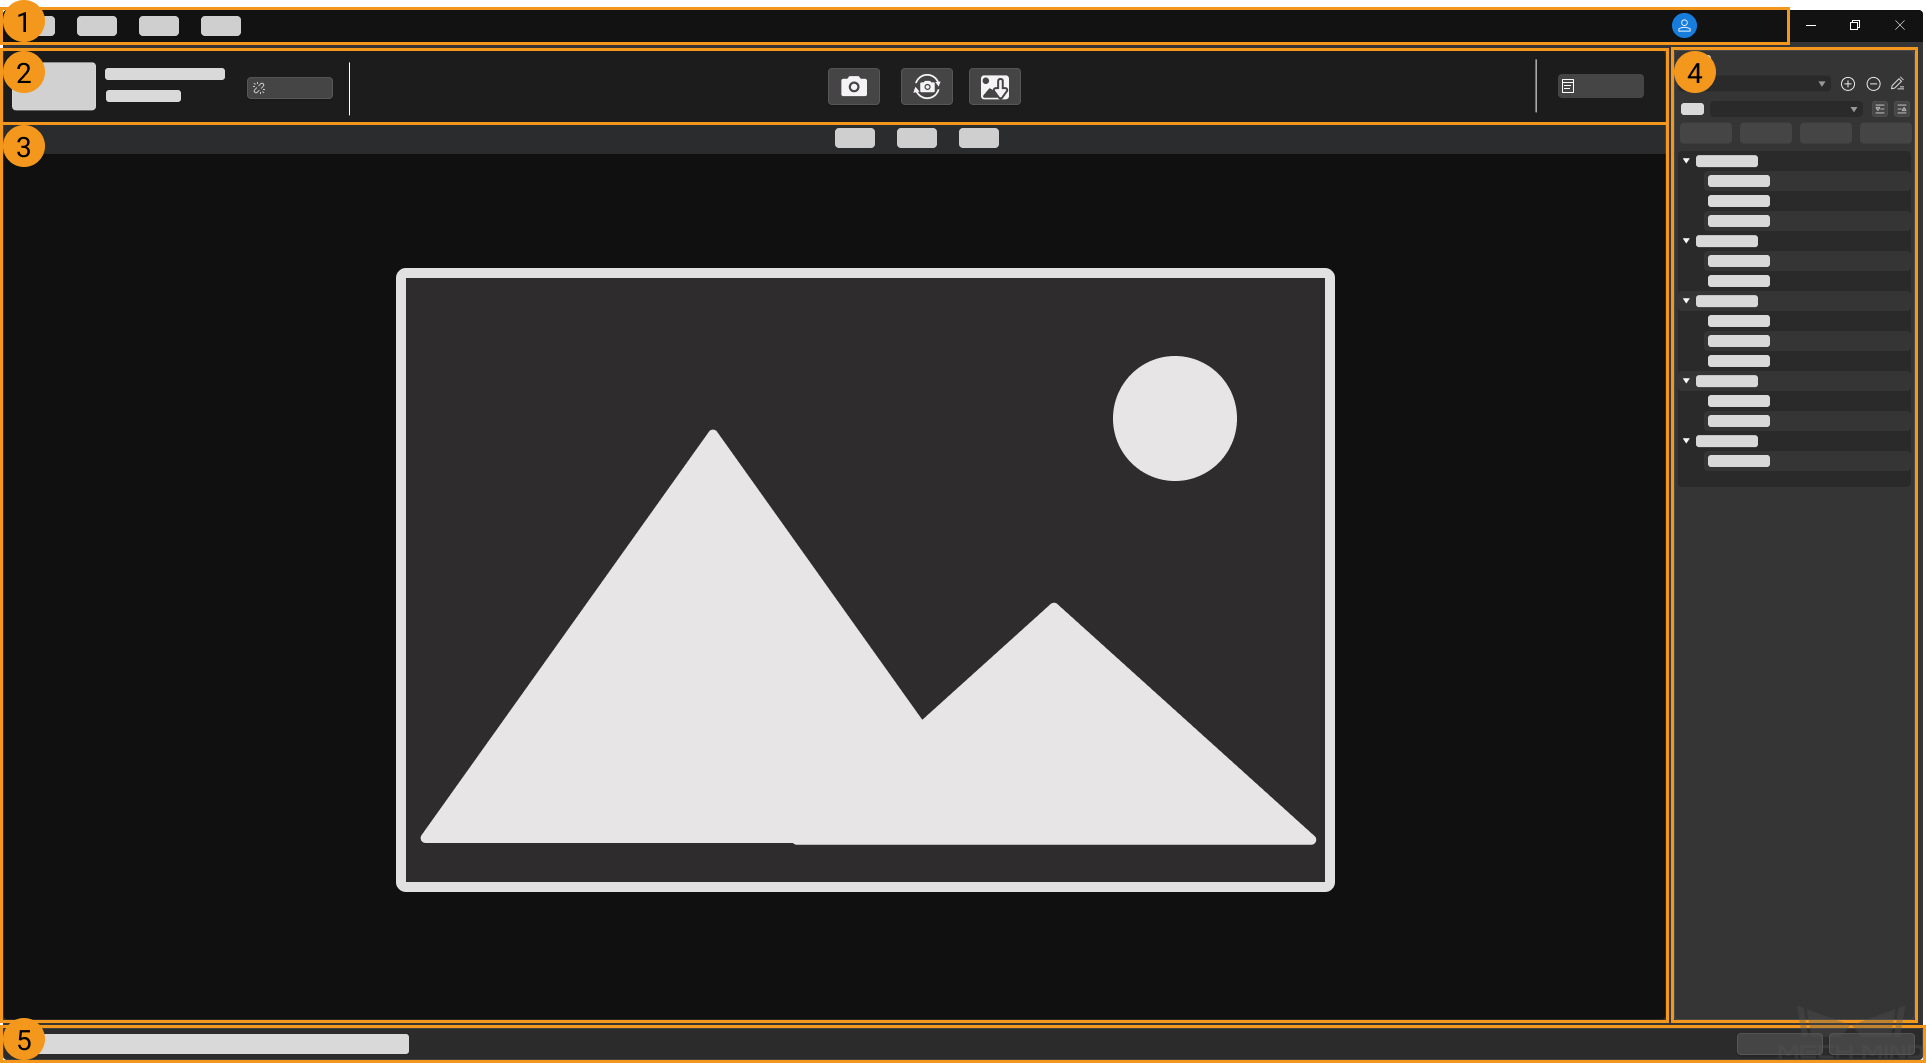
After the camera is successfully connected, the following interface is displayed.
This interface consists of the following parts:
Menu bar: save raw data, start virtual camera, open built-in tools, check software information, etc.
Camera toolbar: disconnect the camera, obtain and save images, and view the camera log.
Data display area: display obtained 2D image, depth map, and point cloud.
Parameter panel: view and adjust parameters, and save parameter groups for different purposes.
Status bar: display statuses and error messages. Use Previous and Next to switch between entries.
Data Display Area
This area displays the last obtained data. You can switch among 2D image, depth map and point cloud.
For detailed information on the function of this area, please refer to Adjust Data Display.
Parameter Panel
You can view all the available parameters, adjust the visibility level, use parameter groups and view parameter descriptions here.
For detailed information, please refer to Parameters.
Note
It is recommended to maximize the interface of Mech-Eye Viewer for better display of components in the parameter panel.
The next topic provides instructions on using Mech-Eye Viewer.

